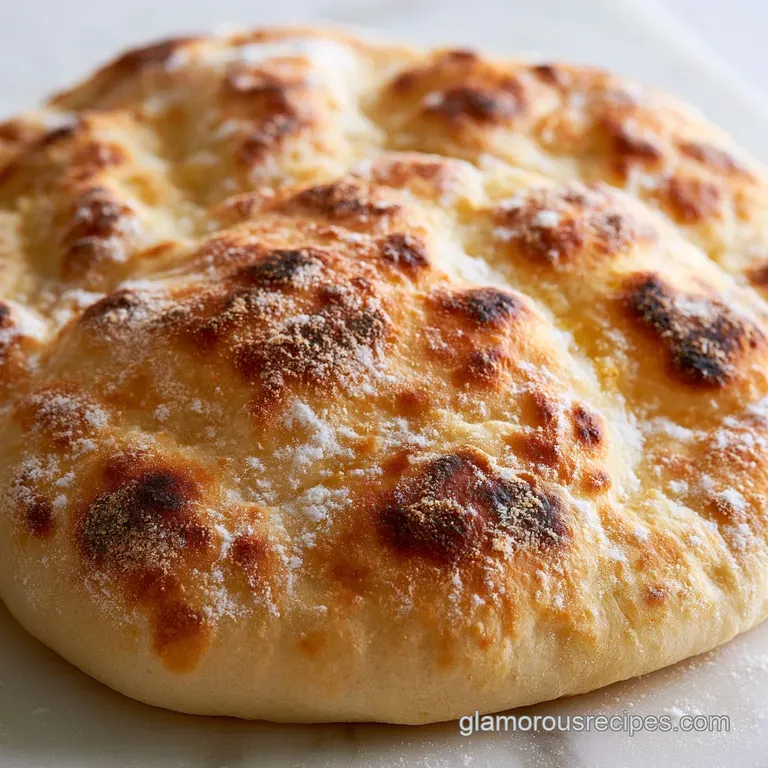
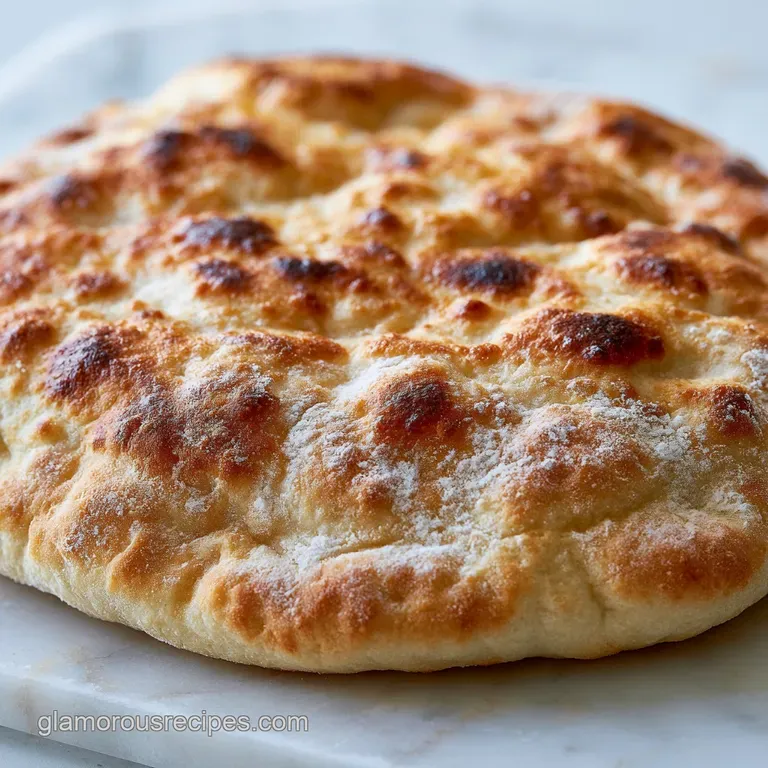
Homemade Pita Bread: Fluffy and Pillowy
- Time: 20 min active + 1 hour 36 mins rising/resting = Total 2 hours 16 mins
- Flavor/Texture Hook: Pillowy interior with smoky, charred exterior spots
- Perfect for: Fresh falafel wraps, hummus dipping, or quick weekday sandwiches
The Ultimate Homemade Pita Bread Recipe
Ever wonder why some pitas balloon into perfect pockets while others stay as flat as a tortilla? I used to think it was some mystical secret held by bakeries in Beirut, but it actually comes down to a wild contrast between a soft, hydrated dough and a screaming hot pan.
The moment that dough hits the heat, the water inside turns to steam, and if the dough is elastic enough, it pushes the layers apart in a sudden, dramatic puff.
I remember the first time I tried this. My first three pitas were basically sad crackers because my pan wasn't hot enough. I almost gave up, but then I cranked the heat until a drop of water literally danced and vanished the second it hit the iron.
The next pita didn't just rise, it inflated like a balloon right before my eyes. It was the most satisfying thing I've ever seen in a kitchen.
This homemade pita bread recipe is all about that thrill. We're going for a contrast of textures, pairing a velvety, soft center with a slightly crisp, charred skin. Whether you're filling these with something rich and savory or just dipping them into a zesty bowl of olive oil, the freshness is something you just can't get from a plastic bag at the store.
The Secret to the Puff
To get that iconic pocket, we need to manage how the dough reacts to heat. It's not magic, just a bit of home cook logic.
- Steam Expansion: High heat turns moisture into steam instantly, which forces the two layers of dough to separate.
- Gluten Strength: Using bread flour provides the structure needed to hold that steam bubble without popping.
- Surface Seal: The quick sear on the bottom creates a seal, trapping the air inside the pocket.
- Dough Relaxation: Resting the rolled circles prevents them from shrinking, ensuring a thin, even wall that puffs easily.
According to the experts at King Arthur Baking, the higher protein content in bread flour creates a stronger gluten network, which is exactly why these pitas don't just flatten out.
Fresh vs store bought
| Feature | Freshly Made | store-bought | Impact |
|---|---|---|---|
| Texture | Pillowy and soft | Often rubbery or dry | Fresh is much more satisfying |
| Aroma | Toasted and yeasty | Bland or chemical | Fresh smells like a bakery |
| Pockets | Wide and deep | Inconsistent/Flat | Easier to stuff fresh pitas |
Quick Recipe Specs
Right then, let's look at the numbers. This is a straightforward process, but you can't rush the rise. If you try to skip the resting time, you'll be fighting the dough the whole time.
Flavor Map:
- Dough: Mild, yeasty, and comforting.
- Crust: Smoky, bitter charred, and aromatic.
- Interior: Neutral, airy, and velvety.
- Pairing: Bright, tangy, and zesty.
The Shopping List Breakdown
I've kept this list short because we don't need fancy stuff here. Just a few pantry staples.
- 3 cups (375g) bread flour Why this? High protein for better puff
- 1 cup (240ml) warm water Why this? Activates the yeast quickly
- 2 tsp (7g) instant yeast Why this? Fast acting and reliable
- 1 tsp (6g) salt Why this? Controls yeast and adds flavor
- 1 tbsp (15ml) olive oil Why this? Keeps the crumb soft
- 1 tsp (5g) honey Why this? Feeds yeast and browns crust
Component Analysis
| Ingredient | Science Role | Pro Secret |
|---|---|---|
| Bread Flour | Structural Base | Sift it to avoid lumps in the dough |
| Honey | Yeast Fuel | Adds a hint of sweetness to the char |
| Warm Water | Activation | Keep it around 110°F (43°C) to avoid killing yeast |
| Olive Oil | Tenderizer | Rub a bit on your hands for easier kneading |
Since this is an easy pita bread recipe, you can easily swap a few things if your pantry is looking bare.
| Original Ingredient | Substitute | Why It Works |
|---|---|---|
| Bread Flour (375g) | All Purpose Flour (375g) | Works fine. Note: Less chew and slightly smaller puffs |
| Honey (5g) | Granulated Sugar (5g) | Same function. Note: Less complex flavor than honey |
| Olive Oil (15ml) | Melted Butter (15ml) | Similar fat content. Note: Adds a richer, nuttier taste |
Essential Baking Gear
You don't need a professional oven for this. A simple stovetop setup does the trick.
- Cast Iron Skillet: This is non negotiable. You need the heat retention that only heavy iron provides.
- Rolling Pin: To get that consistent 6mm thickness.
- Mixing Bowl: A large one so you have room to stir without flour flying everywhere.
- Damp Cloth: To keep the dough from forming a skin while it rises.
Chef's Note: If you don't have a cast iron pan, a heavy bottomed stainless steel skillet works, but you'll need to keep the heat very consistent.
The step by step Guide
Let's crack on. Follow these steps exactly, especially the heat check, or you'll end up with flatbread instead of pockets.
- Combine the warm water, honey, and instant yeast in a bowl and let it bloom for 5 minutes. Note: You should see a foamy layer on top
- Stir in the olive oil, salt, and bread flour.
- Knead the dough by hand or with a mixer until smooth and tacky, ensuring it bounces back slowly when poked.
- Place the dough in a lightly oiled bowl, cover with a damp cloth, and let rise in a warm spot for 60 to 90 minutes until doubled in size.
- Punch down the dough and divide it into 8 equal portions, rolling each into a smooth ball.
- Allow the dough balls to rest for 10 minutes to relax the gluten. Note: This prevents the dough from snapping back
- Use a rolling pin to flatten each ball into a circle approximately 1/4 inch (6mm) thick.
- Heat a cast iron skillet over medium high heat until a drop of water evaporates instantly.
- Lay the dough in the pan; flip after 30-60 seconds once bubbles form on the surface.
- Wait for the pita to inflate and remove once golden brown charred spots appear.
Fixing Your Flat Pitas
It's frustrating when you expect a balloon and get a pancake. Usually, it's a temperature or thickness issue.
Troubleshooting Common Issues
| Issue | Solution |
|---|---|
| Why Your Pita Didn't Puff | If your pita stays flat, the heat was likely too low. The steam didn't build up fast enough to push the dough apart. Make sure the pan is screaming hot before the dough touches it. |
| Why the Dough Shrinks | This happens when the gluten is too tight. If you roll the dough and it immediately shrinks back, you didn't let the balls rest for those critical 10 minutes. |
| Why it's Too Chewy | Over kneading or using too much flour can make the bread tough. The dough should feel tacky, not dry and stiff. |
Quick Fix Checklist:
- ✓ Pan is hot enough to evaporate water instantly.
- ✓ Dough was rolled to a consistent 6mm thickness.
- ✓ Dough balls rested for at least 10 minutes.
- ✓ No excess flour on the surface of the rolled disc.
Bold Flavor Swaps
Once you've mastered this fluffy pita bread recipe, you can start experimenting. I love adding a bit of global flair to the dough.
For a more adventurous take, try stirring in 1 teaspoon of smoked paprika or dried oregano into the flour. It gives the bread a gorgeous color and a zesty aroma that smells like a Mediterranean street market.
If you want something different, you can try a homemade pita bread with greek yogurt by replacing half the water with plain yogurt, though this makes the dough a bit denser.
If you're looking for a quick pita bread recipe for a party, you can make these in a larger batch and slice them into wedges. They are incredible when served with a Shawarma Sauce recipe for a bold, garlicky kick.
Adjusting the Batch Size
If you're cooking for a crowd or just yourself, here is how to handle the scaling.
Scaling Down (1/2 batch): Use a smaller skillet to keep the heat concentrated. Reduce the first rise time by about 10 minutes since smaller masses of dough sometimes warm up faster.
Scaling Up (2x batch): Do not double the salt or honey exactly, use about 1.5x to avoid over seasoning. Work in batches in the pan, as overcrowding the kitchen with rolled out dough will cause them to dry out before they hit the heat.
Keeping Them Fresh
Homemade bread doesn't have the preservatives of the store-bought kind, so you have to be smart about how you store it.
Storage Guidelines: Keep them in a sealed plastic bag or an airtight container at room temperature for 2 days. In the fridge, they'll last about 5 days, but they might get a bit stiff.
Freezing Tips: You can freeze these for up to 3 months. Place a piece of parchment paper between each pita so they don't freeze into one giant block. To reheat, just pop them in a toaster or a warm skillet for 30 seconds.
Zero Waste Hack: If you have leftover scraps of dough, don't toss them. Roll them thin, sprinkle with sea salt and sesame seeds, and bake them at 200°C (400°F) for 5 minutes. You'll have crispy, homemade pita crackers.
The Best Flavor Pairings
A great pita is only half the story. The real magic happens with the fillings. Because this lebanese pita bread recipe creates a deep pocket, you can really load it up.
I highly recommend filling these with grilled chicken, pickled turnips, and a generous dollop of my Tzatziki Sauce recipe for a bright, cooling contrast. The tanginess of the cucumber and garlic cuts right through the smoky char of the bread.
For a vegetarian option, stuff them with roasted chickpeas, avocado, and a drizzle of tahini. If you're feeling lazy, just warm the pita, slice it open, and use it as a scoop for hummus and olive oil.
Trust me, the smell of a fresh, warm pita paired with zesty dips is enough to bring everyone in the house to the kitchen.
Recipe FAQs
What is the difference between pita and Greek style pita bread?
Pita typically forms a pocket, while Greek style is usually thicker and softer. Middle Eastern pita is rolled thinner to allow steam to separate the layers, whereas Greek pita often focuses on a fluffier, more cake like texture.
What is the secret to perfect pita?
High, consistent heat. The skillet must be hot enough to create an immediate burst of steam that pushes the dough apart. If you enjoyed mastering the dough elasticity here, the same gluten development principles apply to our homemade pizza dough.
What is the best flour to use for pita bread?
Bread flour. The higher protein content creates a stronger gluten network, which is essential for trapping the steam that creates the pocket.
Are pitta breads good for diabetics?
Generally, no. Because they are made with refined white flour, they have a high glycemic index and can cause rapid spikes in blood sugar.
How to get pita bread to puff up?
Heat your cast iron skillet over medium high until a drop of water evaporates instantly. Lay the dough in the pan and flip it after 30-60 seconds once surface bubbles form to trigger the inflation.
Why does my pita dough shrink when I roll it?
The gluten is too tight. This occurs if you skip the 10-minute resting period after dividing the dough into balls, which is necessary to relax the proteins.
How to store homemade pita bread?
Wrap them in a clean kitchen towel and place them in an airtight bag. This traps the residual moisture and prevents the bread from becoming brittle or dry.
Homemade Pita Bread Recipe

