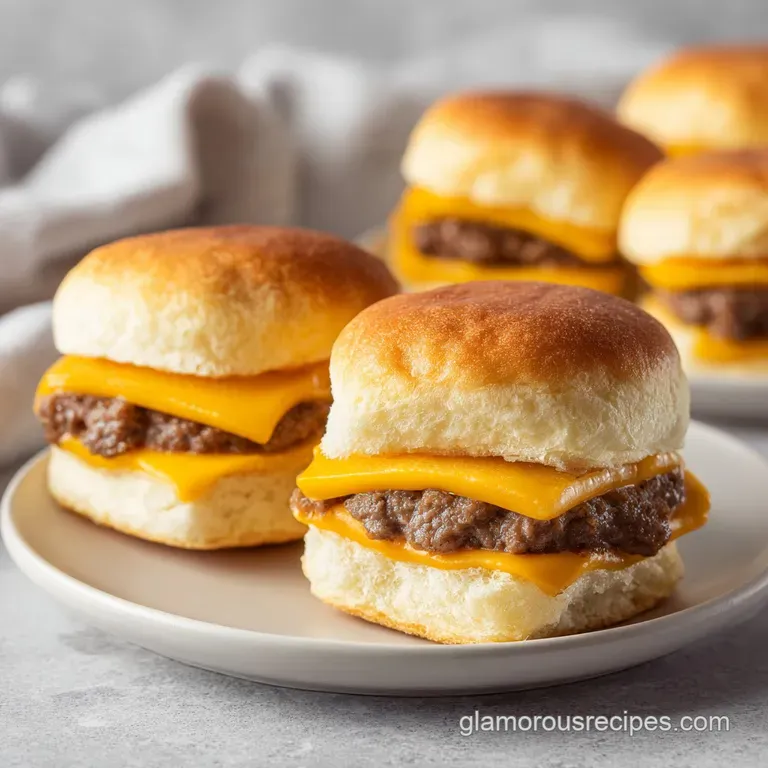
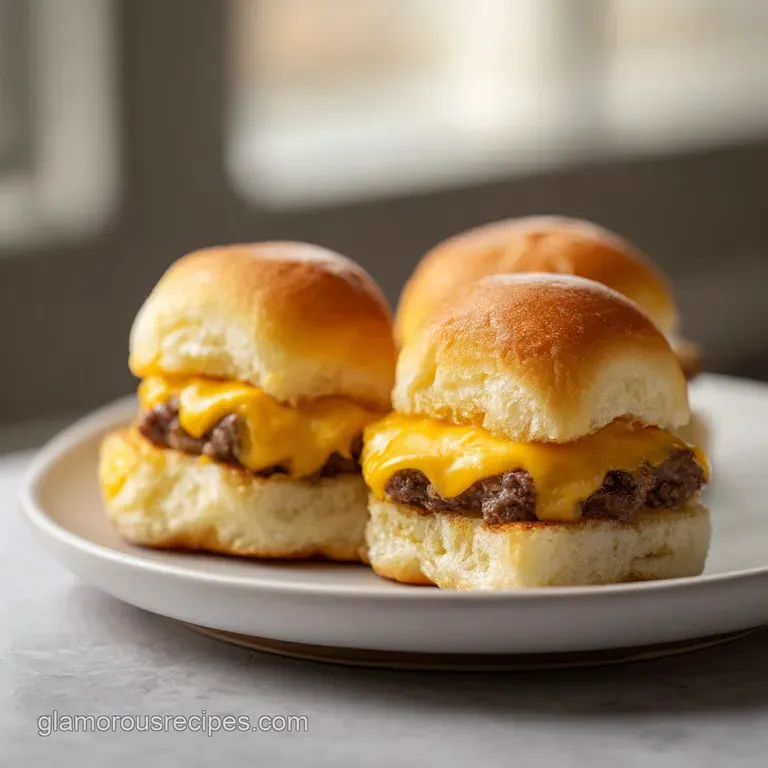
Cheeseburger Sliders Oven Baked: Juicy and Savory
- Time: 10 min active + 30 min cook = Total 40 mins
- Flavor/Texture Hook: Sweet, buttery buns contrasting with salty, savory beef
- Perfect for: Game day crowds, easy family dinners, or a cozy comfort snack
- Cheeseburger Sliders Oven Baked
- The Secret to Easy Sliders
- Component Analysis
- Everything You Need
- Essential Tools for Success
- Simple Step-by-Step Method
- Fixing Common Slider Issues
- Troubleshooting Common Issues
- Creative Flavor Twists
- Adjusting the Batch Size
- Common Kitchen Myths
- Storage and Waste Tips
- Best Ways to Serve
- Recipe FAQs
- 📝 Recipe Card
The smell of garlic butter hitting a hot oven is enough to make anyone run into the kitchen. I remember the first time I tried to make mini sliders for a party, and I spent two hours searing individual tiny patties. By the time I sat down, I was exhausted, and the burgers were cold.
It was a total mess, and I almost gave up on the idea entirely.
Then I discovered the slab method. It's a total shift in how you think about burgers. Instead of fighting with a spatula, you just press the meat into a pan and let the oven do the heavy lifting.
These cheeseburger sliders oven baked are all about that cozy, shared experience, where you pull them apart from one big, golden brown tray.
The real star here is the Hawaiian roll. I've tried using standard slider buns or even homemade sourdough focaccia, but nothing beats that specific sweetness. It creates this incredible contrast with the sharp cheddar and the tangy pickles. Trust me, don't even bother with plain buns; the sweetness is what makes this feel like a treat rather than just a meal.
Cheeseburger Sliders Oven Baked
Right then, let's talk about why this method actually works. When you cook the beef as a single rectangle, you're essentially creating a giant meatloaf that retains its moisture better than tiny patties would. It's a soul nourishing way to feed a group without spending your whole night over a stove.
The contrast is the key here. You have the rich, savory beef, the sharp bite of the cheddar, the zingy pickle, and then that buttery, sweet bun. It's a flavor map that hits every single taste bud.
Flavor Map:
- Savory: Lean ground beef and Worcestershire sauce
- Sweet: Hawaiian rolls and melted butter
- Tangy: Dill pickles and sharp cheddar
- Aromatic: Minced garlic and fresh parsley
The Secret to Easy Sliders
Most people think they need to sear meat to get flavor, but when we're talking about cheeseburger sliders oven baked, the slab method is a different beast.
- The Slab Effect
- Cooking the meat as one piece prevents the edges from drying out, keeping the beef velvety.
- Steam Control
- The buns act as a lid, trapping a bit of moisture to keep the cheese gooey.
- Butter Barrier
- The garlic butter glaze creates a toasted seal on the top buns, preventing them from getting soggy.
- Consistent Heat
- Using a 13x9 pan ensures the heat hits the beef evenly, so you don't get raw spots in the middle.
Since we're choosing between a fast way and a slow way, here's how the slab method stacks up against the traditional way.
| Feature | Slab Method (Shortcut) | Individual Patties (Fresh) | Impact |
|---|---|---|---|
| Prep Time | 10 minutes | 30 minutes | Much faster setup |
| Cleanup | One pan, one bowl | Greasy stovetop, multiple plates | Minimal scrubbing |
| Texture | Tender, juicy interior | Crispy charred edges | Slab is more tender |
| Effort | Low - "set and forget" | High - constant flipping | Better for hosting |
Between the two, the shortcut actually wins for these because the rolls are so small that you don't really miss the sear. If you're craving something with a more traditional crust, you might prefer a homemade pizza dough base for other appetizers, but for burgers, the slab is king.
Component Analysis
Understanding what each ingredient does helps you tweak the recipe without ruining the result.
| Ingredient | Science Role | Pro Secret |
|---|---|---|
| 90% Lean Beef | Structure & Protein | Don't overmix, or the meat gets tough |
| Worcestershire | Umami Booster | Adds a deep, salty richness that mimics aging |
| Hawaiian Rolls | Sweet Contrast | Keep them connected to steam the beef |
| Sharp Cheddar | Fat & Salt | Use a sharp variety to cut through the sweet bun |
Everything You Need
Grab these ingredients. Stick to the 90% lean beef if you can, otherwise, you'll be dealing with a lake of grease in your pan.
- 1 lb (450g) 90% lean ground beef Why this? Less grease prevents soggy bottom buns
- 1 tbsp (15ml) Worcestershire sauce Why this? Deepens the beefy flavor
- ½ tsp (3g) garlic powder Why this? Even distribution of savory notes
- ½ tsp (3g) smoked paprika Why this? Adds a hint of grill smoke flavor
- ½ tsp (3g) salt Why this? Essential for flavor extraction
- ¼ tsp (1g) black pepper Why this? Subtle heat
- 1 package (12 count) Hawaiian sweet rolls Why this? The sweetness is the signature
- 6 slices (170g) sharp cheddar cheese Why this? High meltability and bold taste
- 12 thin slices of dill pickles Why this? Essential acid to balance the fat
- 2 tbsp (28g) unsalted butter, melted Why this? Richness and golden color
- 1 clove (5g) garlic, minced Why this? Fresh aroma on the crust
- 1 tbsp (2g) fresh parsley, finely chopped Why this? Bright, herbaceous finish
If you're missing something, don't panic. Here are some swaps that actually work.
| Original Ingredient | Substitute | Why It Works |
|---|---|---|
| 90% Lean Beef | 80/20 Ground Beef | More flavor, but Note: must drain grease more thoroughly |
| Hawaiian Rolls | Brioche Sliders | Richer taste. Note: Less sweet, so add a pinch of sugar to glaze |
| Sharp Cheddar | Pepper Jack | Adds spice. Note: Slightly different flavor profile |
| Worcestershire | Soy Sauce | Similar umami. Note: Saltier, so reduce added salt slightly |
Essential Tools for Success
You don't need a fancy kitchen for this. A few basics will do the trick.
- 13x9-inch baking pan: The standard size for a 12 pack of rolls.
- Aluminum foil: This is a must for easy cleanup.
- Large mixing bowl: To combine your beef and spices.
- Pastry brush: For getting that garlic butter every where.
- Serrated knife: This is the only way to slice the rolls without squishing them.
Simple step-by-step Method
Let's crack on. Follow these steps and you'll have a tray of gold in 40 minutes.
Phase 1: Baking the Beef Slab
- Preheat your oven to 400°F (200°C) and line your 13x9-inch pan with foil. Note: Foil prevents the meat from sticking to the corners.
- In a large bowl, mix the ground beef, Worcestershire sauce, garlic powder, smoked paprika, salt, and black pepper. Mix until just combined. Note: Don't overwork the meat or it becomes dense.
- Press the beef mixture evenly into the bottom of the pan to form a flat rectangle.
- Bake for 15-20 minutes until the beef is browned and fully cooked through.
- Tilt the pan and use a paper towel to dab away any excess grease. Note: This is the most important step to avoid soggy buns.
Phase 2: Assembling the Sliders
- Slice the block of Hawaiian rolls in half horizontally to create a top and bottom slab.
- Place the bottom half of the rolls directly on top of the cooked beef slab.
- Lay the cheddar cheese slices evenly across the meat, then top with the dill pickle slices and the top half of the rolls.
Phase 3: Finishing and Glazing
- Whisk together the melted butter, minced garlic, and chopped parsley. Brush this generously over the top of the buns.
- Return the pan to the oven for 5-8 minutes until the buns are golden brown and the cheese is melted.
- Use a serrated knife to slice the assembly into 12 individual cheeseburger sliders oven baked.
Chef's Tip: For an extra punch of flavor, try adding a teaspoon of espresso powder to the beef mixture. It sounds wild, but it deepens the savory notes and makes the beef taste like it's been on a charcoal grill for hours.
Fixing Common Slider Issues
Even with a simple recipe, things can go sideways. Most of the time, it's a moisture or heat issue.
Troubleshooting Common Issues
| Issue | Solution |
|---|---|
| Why Your Buns Are Soggy | Sogginess usually comes from two places: excess grease from the beef or putting the buns on too early. If you don't dab the meat, the rolls act like sponges. According to [Serious Eats](https://www.se |
| Why the Cheese Isn't Melting | If your cheese is still in solid sheets, your oven might be running cool, or you're using a cheese with too much stabilizer. Always use a high fat, sharp cheddar for the best melt. |
| Why the Tops Are Burnt | The sugar in Hawaiian rolls caramelizes quickly. If the tops are browning too fast but the cheese isn't melted, just tent a piece of foil over the top for the last 5 minutes. |
Common Mistakes Checklist:
- ✓ Did you line the pan with foil? (Saves 20 mins of scrubbing)
- ✓ Did you dab the grease? (Prevents the "soggy bun" syndrome)
- ✓ Did you use a serrated knife? (Prevents crushing the bread)
- ✓ Did you avoid overmixing the beef? (Ensures a tender bite)
- ✓ Did you preheat the oven fully? (Ensures a quick, gold crust)
Creative Flavor Twists
Once you've mastered the basic cheeseburger sliders oven baked, you can start playing with the ingredients.
Decision Shortcut:
- If you want more heat → Use Pepper Jack cheese and add sliced jalapeños.
- If you want a BBQ vibe → Swap Worcestershire for BBQ sauce and add red onion.
- If you want it "fancy" → Use Gruyère cheese and caramelized onions.
For those who want a healthier spin, you can swap the 90% lean beef for ground turkey. Just be careful, as turkey is leaner and can dry out faster. Reduce the initial beef bake time by 2-3 minutes to keep it juicy.
You can also swap the butter glaze for an olive oil and garlic mix to reduce the saturated fat.
Adjusting the Batch Size
Scaling this recipe is pretty straightforward, but you have to watch your pan size and oven temp.
Scaling Down (6 Sliders): Use a smaller loaf pan or a 9x5 pan. Reduce the beef bake time by about 20% since the mass of meat is smaller. If you're using a half egg in any variation, beat it in a cup first and pour half into the bowl.
Scaling Up (24 Sliders): Use two 13x9 pans. Don't just double the salt and spices; increase them to 1.5x first, then taste. Work in batches if your oven doesn't have great airflow.
If you're baking two pans at once, lower the temperature by 25°F (to about 375°F/190°C) and extend the cook time by 5 minutes to ensure everything cooks evenly.
Common Kitchen Myths
There are a few things people tell you about sliders that just aren't true.
The Searing Myth: Some say you must sear the beef in a skillet first to "seal in the juices." This is a myth. Moisture loss happens regardless. The slab method in the oven provides enough heat to brown the meat while keeping the center tender.
The Lean Beef Myth: You might hear that only 80/20 beef tastes good. While fat adds flavor, 90% lean beef is actually better for oven baked sliders because it doesn't leave the buns swimming in oil.
Storage and Waste Tips
Don't let any of these go to waste. These sliders hold up surprisingly well if stored correctly.
Storage Guidelines: Store leftover sliders in an airtight container in the fridge for up to 3 days. To keep them from getting mushy, place a piece of parchment paper between layers.
Reheating: Avoid the microwave if you can. Use an oven or toaster oven at 350°F (175°C) for 5-10 minutes. This brings back the crispness of the bun and melts the cheese again without making the bread rubbery.
Freezing: You can freeze these for up to 2 months. Wrap them individually in foil and then place them in a freezer bag. Thaw in the fridge overnight before reheating in the oven.
Zero Waste: If you have leftover garlic butter glaze, don't toss it! Brush it on some leftover bread for a quick garlic toast, or use it to baste some roasted vegetables. If you have leftover beef, crumble it into a pasta sauce for a quick weeknight meal.
Best Ways to Serve
These cheeseburger sliders oven baked are great on their own, but the right sides make them a full meal.
I love serving these with a side of crisp, salty fries or a tangy coleslaw to cut through the richness of the cheese. If you want a dipping sauce, mix some mayo, ketchup, a splash of pickle juice, and a pinch of paprika. It's a classic "special sauce" that ties everything together.
Because these are so handheld and easy to eat, they're a hit at parties. Just set the tray out with a platter of sliced pickles and some dipping sauce, and let everyone help themselves. It's a simple way to bring people together over something that feels like a classic comfort food.
Recipe FAQs
How long should I cook hamburger sliders in the oven?
Bake the beef for 15 20 minutes and the final assembly for 5 8 minutes. This two-step process ensures the meat is fully cooked before the buns toast.
How long to put sliders in the oven at 350 degrees?
Reheat leftovers at 350°F for 5 10 minutes. For the initial cook, use 400°F to properly brown the meat and melt the cheese.
Can I bake sliders in the oven?
Yes, oven baking is the most efficient method. Pressing the beef into a single slab allows you to cook all 12 sliders simultaneously without flipping individual patties.
What temperature do you put sliders on in the oven?
Preheat your oven to 400°F (200°C). This temperature is necessary to brown the lean ground beef and caramelize the sugar in the Hawaiian rolls.
Why are my slider buns soggy?
Dab the surface of the cooked beef with a paper towel before adding the rolls. Removing excess rendered fat prevents the buns from acting like sponges.
How to ensure the cheese melts completely?
Use a high fat, sharp cheddar cheese. If the cheese stays solid, your oven may be running cool or you are using a cheese with too many stabilizers.
How do I store and reheat leftover sliders?
Store in an airtight container in the fridge for up to 3 days. Use parchment paper between layers to prevent mushiness. If you enjoyed the ease of this party food, see how we prioritize speed in our quick and easy pizza dough.
Cheeseburger Sliders Oven Baked

