Homemade Graham Cracker Crust for Cheesecake

- Total20 Mins
- Calories188 kcal
- CuisineAmerican
- Time: 10 min active + 10 min baking
- Flavor & Texture: Buttery, toasted, and crisp
- Perfect for: Cheesecake and cream pies
Why does a few simple crumbs and melted butter create a base that can hold pounds of creamy filling without collapsing? It comes down to the specific compression of the crumbs and the thermal set of the butter.
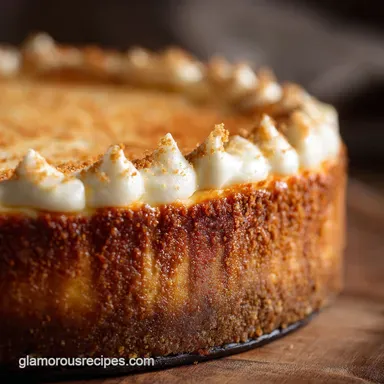
You can expect a mahogany colored base with a clean, sharp edge. This recipe avoids the typical "soggy bottom" by using a precise pre-bake window.
Whether you are filling a springform pan or a tart ring, this Graham Cracker Crust stays sturdy during slicing.
Graham Cracker Crust Precision
- Sugar Bond: The sugar and melted butter create a syrup that glues the crumbs together.
- Fine Grain: A sand-like grind removes gaps, creating a seamless surface.
- Thermal Set: Baking the base locks the fats in place, creating a moisture barrier.
| Method | Time | Texture | Best For |
|---|---|---|---|
| No-Bake | 0 min | Softer, buttery | Ice cream pies |
| Baked | 10 min | Crisp, toasted | New York cheesecake |
The Ingredient Logic
The graham cracker crumbs provide the bulk and a honeyed flavor. Granulated sugar adds a slight crunch and helps the butter bind the crumbs. Melted butter is the primary fat, ensuring the base is rich and holds its shape. A pinch of salt balances the sweetness and enhances the toasted notes.
Gathering Your Essentials
- 1.5 cups (150g) graham cracker crumbs Function: Forms the honey-flavored foundation
- 1/3 cup (65g) granulated sugar Function: Adds sweetness and helps bind the crust
- 6 tbsp (85g) melted unsalted butter Function: Binds the dry ingredients together
- 1/4 tsp (1.5g) salt Function: Balances the sugar for a better flavor
| Original Ingredient | Substitute | Why It Works |
|---|---|---|
| Graham Crumbs | Digestive Biscuits | Similar consistency. Note: Slightly saltier; common in the UK |
| Unsalted Butter | Coconut Oil (melted) | Similar fat profile. Note: Adds a light coconut flavor |
Equipment Needed
- Food processor or rolling pin
- Medium mixing bowl
- 9 inch pie plate or 9x13 inch pan
- Flat bottomed measuring cup (for pressing)
Step-by-step Instructions
- Pulse whole crackers in a food processor until they reach a fine, sand-like consistency, or crush them in a gallon Ziploc bag with a rolling pin until no large pieces remain.

- In a medium bowl, stir together the graham cracker crumbs, sugar, and salt.
- Pour in the melted unsalted butter and stir until the mixture resembles wet sand and there are no dry clumps.

- Pour the mixture into a 9 inch pie plate or 9x13 inch baking pan.
- Use the bottom of a flat measuring cup to press the crumbs firmly into the base and up the sides. Apply significant pressure to eliminate air pockets.

- Preheat the oven to 350°F (180°C).
- Bake the crust for 8 to 10 minutes until it smells nutty and looks lightly toasted.

- Remove from the oven and let cool completely before adding fillings.
Pro Tips & Pitfalls
Fixing a Crumbling Base
If the base falls apart, it usually means the crumbs were too coarse or the press wasn't firm enough. Ensure a fine grind for this Graham Cracker Crust to create more surface area for the butter to bond.
Preventing a Soggy Bottom
Always bake the crust first. This creates a toasted seal that prevents the filling from seeping into the crumbs.
Removing Air Pockets
Don't just push the crumbs down, press them. Use a hard, flat tool and apply weight to the edges where the base meets the side of the pan.
Plating and Pairing

For a simple home look, leave the crust in the pie plate. For a polished presentation, use a springform pan and wipe the edges with a damp cloth before releasing the ring. For a restaurant-style finish, use a tart ring for a perfectly vertical wall.
| Level | Presentation | Finishing Touch |
|---|---|---|
| Simple | Rustic Pie Plate | Dust with cinnamon |
| Polished | Springform Pan | Clean, sharp edges |
| Restaurant | Tart Ring | Precision trim |
Storage and Freshness
Keep the unbaked crumbs in a sealed container in the refrigerator for 3 days. Once baked, the base stays crisp for about 5 days in the fridge. You can freeze the baked base, wrapped tightly in foil, for 2 months. To restore the snap, pop it in a 300°F oven for 5 minutes before filling.
Preserving your Graham Cracker Crust this way ensures it doesn't absorb fridge odors.
Variations and Substitutions
Use brown sugar instead of white for a rich caramel undertone. To add aroma, stir in a dash of cinnamon, much like the flavor profile of cinnamon graham cookies. For a gluten-free version, simply use certified GF crumbs. For an alternative base option, a keto pizza crust features a distinct fat-to-protein balance, though you can use the same pressing method.
Use these adjusted measurements to scale the Graham Cracker Crust: Half batch: 3/4 cup (75g) crumbs, 2 tbsp+2 tsp (32g) sugar, 3 tbsp (42g) butter, 1/8 tsp salt. Use a 6 inch pan. Double batch: 3 cups (300g) crumbs, 2/3 cup (130g) sugar, 12 tbsp (170g) butter, 1/2 tsp salt.
Use two 9 inch pans.
Recipe FAQs
Should you bake a graham cracker crust before filling?
Baking the crust first creates a crisp barrier that prevents the filling from soaking in.
Tip: Allow it to cool entirely before filling to keep the structure stable.
How do I make my own graham cracker crust?
Pulse crackers into fine crumbs, mix with sugar, salt, and melted butter, then press into a pan.
Tip: Use a Ziploc bag and rolling pin if you don't have a food processor.
Why does my graham cracker crust fall apart?
The crumbs were likely not compressed enough during the shaping process.
Tip: Press firmly with a flat measuring cup to remove all air pockets.
Is it true that store-bought crusts are identical to homemade versions?
Actually, no. Homemade crusts offer a superior buttery flavor and better texture control.
Tip: Adjust the sugar amount slightly to control the overall sweetness.
Which recipes pair best with this crust?
This base works perfectly for most creamy pies and cheesecakes.
Tip: For a seasonal treat, try it with a pumpkin pie cheesecake.
Graham Cracker Crust in 20 Minutes
Ingredients:
Instructions:
More to Cook

Cinnamon Graham Cookies
Home bakers seeking Cinnamon Graham Cookies will love this recipe.

4 Ingredient Keto Pizza Crust Fathead Dough
Master this 4 Ingredient Keto Pizza Crust Fathead Dough with Garlic.

Quick and Easy Pizza Dough: Make Perfect Crust Tonight
Make the perfect Quick and Easy Pizza Dough in under 30 minutes!

Cracker Barrel Meatloaf: The Secret Copycat Recipe with Signature Glaze
Cracker Barrel Meatloaf is the ultimate comfort food. Get our incredibly moist, deeply savory…

Pumpkin Pie Cheesecake: Velvety Baked
Enjoy this Pumpkin Pie Cheesecake. This baked pumpkin cheesecake recipe includes a step-by-step…
