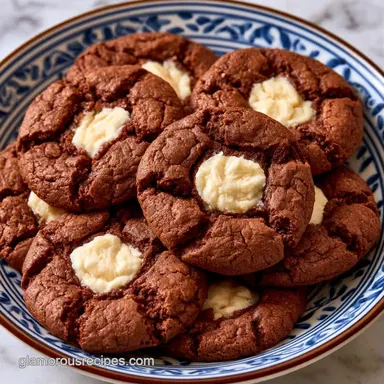
Chocolate Peppermint Thumbprint Cookies: Fudgy Base

- Time: 20 min active + 30 min chilling
- Taste & Feel: Fudgy mahogany base with a cool, minty snap
- Ideal for: Holiday dessert platters or a refined gift box
You don't need a commercial bakery or specialized piping tools to create an upscale look for your holiday sweets. Many believe a complex formula is required to keep cookies from flattening, but the secret is simply the right temperature and a bit of cornstarch.
I remember a previous attempt where I bypassed the chilling stage. I ended up with a single, massive chocolate sheet instead of individual cookies. This failure highlighted that patience is the most essential ingredient in the process.
The result is a batch of Chocolate Peppermint Thumbprint Cookies with a professional, artisanal appearance. We're creating a sophisticated color profile: the deep mahogany of the cocoa, the rich brown of the ganache, and the vivid red and white pop of crushed candy canes.
Quick Details for These Cookies
Now, let's break down the process. Precision is essential here; rushing the chilling phase or overbaking the centers will ruin that signature fudgy core.
The objective is a cookie that keeps its form, with a deep, clean well to hold the filling. We are making 16 cookies that harmonize the bitter notes of cocoa with a sharp peppermint kick.
| Approach | Prep Time | Texture | Best For |
|---|---|---|---|
| Fast (No Chill) | 15 min | Flat/Spreading | Quick cravings |
| Classic (Chilled) | 45 min | Thick/Defined | Holiday gifts |
Why This Dough Works
The structure of these treats relies on a few specific choices. It's not about magic, just simple ratios.
- Cornstarch: This keeps the protein structure "short," meaning the cookies don't toughen up and the thumbprint stays crisp.
- Egg Yolk Only: By leaving out the white, we increase the fat and lower the moisture, which prevents the dough from puffing up too much.
If you enjoy this kind of texture, you might also like my chocolate snowball cookies, which use a similar approach to richness.
The Ingredient List
I've found that using a high-quality cocoa powder makes a huge difference in the final color. Don't go for the cheapest option if you want that deep, dark look.
Dough Base
- 1/2 cup (113g) unsalted butter, softenedWhy this? Provides the necessary structure and creaminess
- 1/2 cup (100g) granulated sugar
- 1 large egg yolk, room temperatureWhy this? Adds richness without adding too much moisture
- 1 1/4 cups (155g) all purpose flour
- 1/3 cup (30g) unsweetened cocoa powder
- 1 tsp (3g) cornstarch
- 1/2 tsp (3g) baking soda
- 1/4 tsp (1.5g) salt
- 1/2 cup (85g) semi sweet chocolate chips
Peppermint Ganache & Garnish
- 1/4 cup (60ml) heavy cream
- 1/4 tsp (1.25ml) peppermint extract
- 2 tbsp (15g) crushed candy canes
| Component | Purpose | Substitute Notes |
|---|---|---|
| Cornstarch | Tenderness | Arrowroot powder works but may slightly change the color |
| Egg Yolk | Binding/Richness | Flax egg (1 tbsp) for vegan, but will be softer |
| Cocoa Powder | Color/Flavor | Dutch processed cocoa for a darker, milder taste |
Essential Kitchen Tools
Minimal gear is required, but a few specific tools can make the process easier. A stand mixer like a KitchenAid is helpful, but a hand mixer works just as well.
- Baking sheet and parchment paper
- Wire cooling rack
- Small microwave safe bowl (for the ganache)
- Rounded teaspoon (for the thumbprint well)
- Sifter or fine mesh strainer
Baking the Cookies
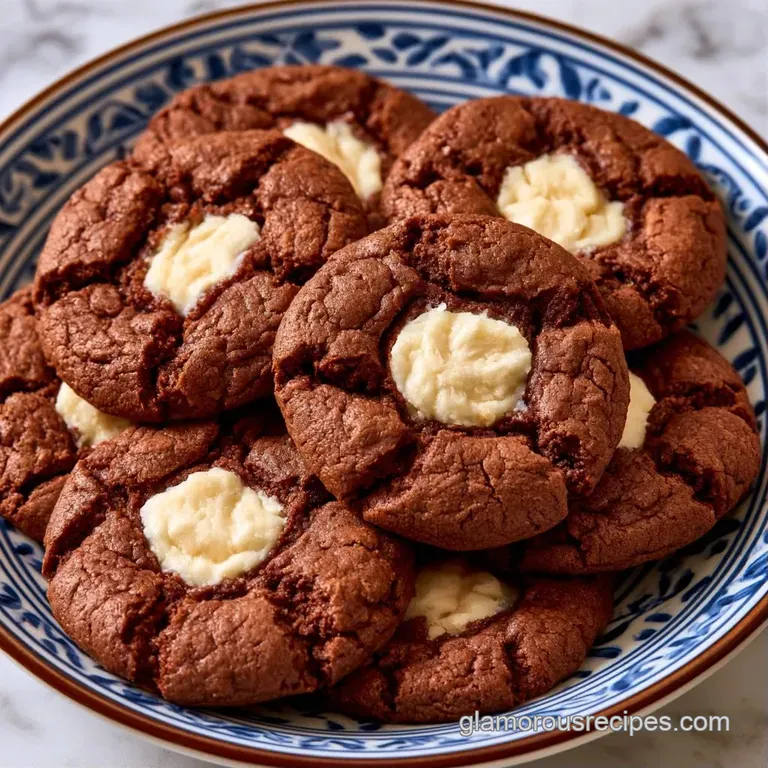
Let's dive in. Accuracy is essential, particularly regarding the state of your butter. Ensure it's softened rather than melted to prevent the cookies from spreading too much.
Mixing the Dough Base
- Whip the softened butter and granulated sugar until the mixture becomes light and airy.
- Mix in the egg yolk until smooth.
- Sift the flour, cocoa powder, cornstarch, baking soda, and salt together. Slowly blend these dry components into the butter on a low setting.
- Stir until a soft, mahogany colored dough is achieved.
Shaping and Chilling for Stability
- Cover the dough and chill in the fridge for 30 minutes. Note: This prevents the butter from melting too quickly during baking
- Set your oven to 350°F (175°C) and prepare a baking sheet by lining it with parchment paper.
- Roll 1 tablespoon of dough into a ball and place it on the pan. Use your thumb or a rounded spoon to press a deep indentation into the center.
- Bake for 10-12 minutes until the edges are firm but the centers stay soft.
- Let the cookies rest on the baking sheet for 5 minutes before moving them to a wire rack.
Filling the Thumbprints
- Place chocolate chips and heavy cream in a bowl. Heat in the microwave in 20-second intervals, stirring each time, until the mixture is glossy and smooth.
- Mix in the peppermint extract.
- Fill each cookie well with roughly 1 teaspoon of the ganache.
- Quickly top with crushed candy canes before the chocolate hardens.
Troubleshooting the Bake
Even with a good plan, things happen. Usually, it's a temperature issue.
Fixing Flat Cookies
If your Chocolate Peppermint Thumbprint Cookies spread too much, it's almost always because the dough was too warm. If the butter is too soft or the fridge time was skipped, the walls of the thumbprint will collapse.
Preventing Ganache Separation
If the ganache looks oily or broken, you've likely overheated the cream. You can usually fix this by stirring in a tiny splash of cold heavy cream and whisking vigorously.
Avoiding Cracking Dough
If the dough cracks while you're rolling it into balls, it might be too cold. Let it sit on the counter for 5 minutes to soften slightly before shaping.
| Problem | Fix |
|---|---|
| Cookies are flat | Chill dough for exactly 30 mins; use softened, not melted, butter |
| Ganache is grainy | Microwave in shorter 10 second bursts and stir more |
| Dough is too crumbly | Add 1 teaspoon of milk to the dough and re mix |
Storage and Waste Tips
Because of the ganache filling, these require a bit more care than a typical sugar cookie.
Storage Guidelines Arrange them in a single layer with parchment paper separating each cookie. Keep them in a sealed container on the counter for 3 days, or refrigerate them for a week if you prefer the chocolate center to remain firm.
Freezing Instructions Baked, unfilled cookies can be frozen for 2 months. Simply thaw them and add the ganache and candy canes just before serving.
Zero Waste Tips Save any remaining candy cane fragments. Chop them finely to stir into your morning oatmeal or to garnish a peppermint hot chocolate. If you have a small amount of ganache left over, swirl it into a cup of warm milk for a quick treat.
Creative Flavor Twists
Though the traditional recipe is wonderful, feel free to experiment with different hues and tastes to customize the mood. If you enjoy this variety, you might also like my chocolate dipped butter cookies for a more straightforward dessert.
- Deep Contrast: Incorporate 70% dark chocolate chips into the ganache for a richer, less sugary result.
- Winter White: Replace the cocoa powder with vanilla extract and opt for white chocolate in the ganache.
- Nutty Crunch: Stir 2 tablespoons of finely crushed hazelnuts into the dough.
| Original Ingredient | Substitute | Why It Works |
|---|---|---|
| Semi sweet Chips | Dark Chocolate (70%) | Reduced sugar and a bolder cocoa profile |
| Candy Canes | Crushed Peppermint Bark | Maintains the flavor while adding chocolate texture |
| Heavy Cream | Coconut Cream | Comparable fat levels. Note: Infuses a subtle coconut hint |
Decision Shortcut:
- Extra minty? → Boost extract to 1/2 tsp
- Chewier center? → Bake for 1 minute less
- Brighter red color? → Apply candy canes only once the ganache has fully set
How to Serve Them
These Chocolate Peppermint Thumbprint Cookies are all about the visual. I recommend plating them on a white ceramic platter to make the mahogany and red colors pop.
Because they are quite rich, pair them with something simple. A glass of cold milk or a strong, black coffee balances the sweetness of the ganache and the intensity of the peppermint. For a party, arrange them in a pyramid shape with a few whole candy canes tucked in between the layers for a festive look.
Trust me, don't overthink the presentation. The contrast between the dark cookie and the bright red candy canes does all the work for you. Just make sure the ganache has set for at least 30 minutes before you move them, otherwise, you'll get smudges on the edges.
Recipe FAQs
When is the best time to add the filling?
Spoon the ganache into the wells after the cookies have baked and cooled slightly. This prevents the chocolate from overcooking and ensures a velvety center.
What's the secret to a tender thumbprint cookie?
The addition of cornstarch creates a softer, more delicate crumb. If you enjoyed mastering this tender texture here, see how the same principle works in our sugar cookie recipe.
Is it true that you must freeze the dough before baking?
No, this is a common misconception. Refrigerating the dough for 30 minutes is plenty to prevent the cookies from spreading.
How to create a deep enough well in the dough?
Press your thumb or a rounded teaspoon firmly into the center of each dough ball. This creates a sturdy reservoir that holds the ganache without it overflowing during assembly.
Should I adjust the oven temperature for a softer bake?
Actually, no. Keeping the oven at 350°F (175°C) for 10-12 minutes ensures the edges set while the centers remain perfectly soft.
Chocolate Peppermint Thumbprint Cookies