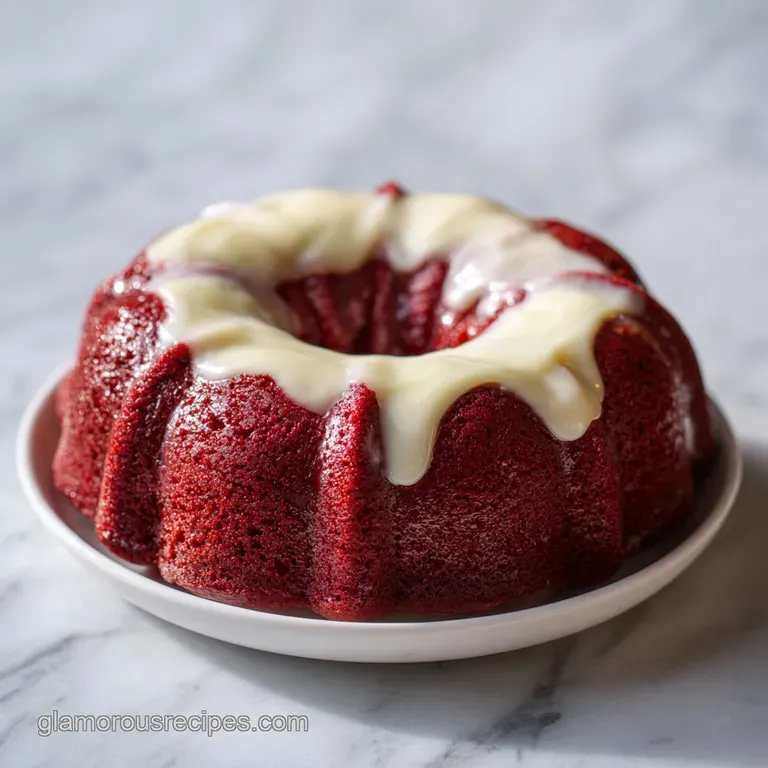
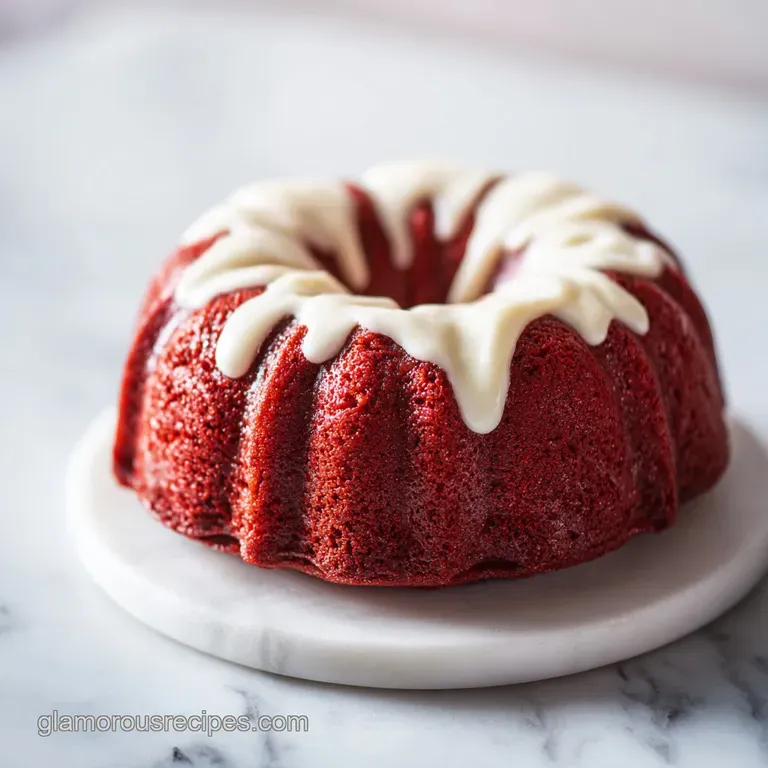
Red Velvet Cream Cheese Bundt Cake
- Time: Active 20 minutes, Passive 50 minutes, Total 70 minutes
- Flavor/Texture Hook: A velvety, moist crumb contrasted by a silky cream cheese core.
- Perfect for: Sunday dinners, holiday gatherings, or showing off at the neighborhood potluck.
- Baking the Most Velvety Red Velvet Cream Cheese Bundt Cake Ever
- Essential Stats for Your Sunday Dinner Showstopper
- The Soul of the Cake: Selecting Your Elements
- The Right Tools for a Flawless Release
- How to Layer and Bake Your Crimson Masterpiece
- Fixing Sinking Fillings and Stuck Bundt Cakes
- Making This Red Velvet Dessert Your Own
- Storage Secrets for a Moist Cake All Week
- Drizzling and Decorating Like a Southern Pro
- Recipe FAQs
- 📝 Recipe Card
Baking the Most Velvety Red Velvet Cream Cheese Bundt Cake Ever
You know that specific, heavy aroma that fills a house on a Sunday afternoon when someone’s been baking? It’s not just sugar; it’s that deep, earthy scent of cocoa mingling with the sharp tang of buttermilk.
Whenever I pull this cake out of the oven, the first thing I notice isn't the color, but the way the steam carries that classic Southern comfort straight to my heart. It reminds me of the kitchen in my childhood home, where the red velvet cake was a sacred tradition, usually reserved for the most special guests or the most important family news.
I’ve had my fair share of dry, crumbly cakes that look beautiful but taste like flavored cardboard. We’ve all been there. But this version is different. The crumb is tight yet incredibly moist, almost like a cross between a traditional cake and a dense pound cake.
When you cut into it, the crimson red against the stark white cream cheese filling is just a showstopper. There’s something so satisfying about that first "thwack" of the knife hitting the cooling rack, knowing that inside is a velvety surprise waiting to be revealed.
The secret hero of this whole operation is the buttermilk. In the South, we don't treat buttermilk as an optional ingredient; it's the soul of the dish. It provides that essential acidity that reacts with the cocoa and the leavening agents to give you a crumb that feels like silk on your tongue.
Without it, you're just making a red colored chocolate cake. With it, you're making a masterpiece. Let's get into how we build these layers of flavor so your next Sunday dinner feels a little more like home.
Essential Stats for Your Sunday Dinner Showstopper
Before we start cracking eggs and sifting sugar, let's look at the blueprint for this bake. Success in the kitchen, especially with a bundt pan, comes down to knowing exactly what to expect at every stage. If you're nervous about the cake sticking or the filling leaking, these stats will keep you on the right path.
- 1. Internal Temperature
- 210°F (99°C). If you have a probe thermometer, this is the safest way to ensure the center is set without overbaking the edges.
- 2. Cooling Window
- Exactly 10 minutes. If you wait 5 minutes, the cake is too fragile and will shatter. If you wait 20 minutes, the sugar cools and acts like glue, locking the cake into the pan forever.
- 3. Batter Consistency
- It should be heavy and glossy, similar to the thickness of Greek yogurt, so it can support the weight of the cream cheese filling.
| Thickness | Internal Temp | Rest Time | Visual Cue |
|---|---|---|---|
| 3 inches (at deepest) | 210°F | 10 mins | Edges pull away slightly from pan |
| 2 inches (at thinnest) | 205°F | 10 mins | Surface looks matte, not shiny |
| Filling Core | 185°F | 10 mins | Skewer comes out with a few moist crumbs |
When choosing your cooking method, the oven is the gold standard for a bundt. While some folks try to use a slow cooker for moisture, you lose that beautiful, slightly caramelized crust that defines a good red velvet cream cheese bundt cake.
The oven provides a consistent, dry heat that allows the cake to rise evenly around the central chimney of the pan.
| Method | Time | Texture | Best For |
|---|---|---|---|
| Conventional Oven | 50 minutes | Silky crumb with a firm outer crust | Classic presentation and even rise |
| Stovetop (Water Bath) | 75 minutes | Very dense, almost steamed pudding texture | Those without a reliable oven |
The Soul of the Cake: Selecting Your Elements
The magic of this red velvet cream cheese bundt cake isn't just in the steps, it's in how the ingredients interact. We aren't just mixing things together; we are building a structure that can hold a heavy cream cheese center while staying light enough to be called "velvet."
- The Acid Base Balance: The sour cream and buttermilk aren't just there for moisture. They provide the acidity that keeps the gluten strands tender. High acidity prevents the cake from becoming "bready."
- Starch Gelatinization: By adding the instant chocolate pudding mix, we are introducing pre gelatinized starch. This starch grabs onto the liquids in the batter and holds them tight, ensuring the cake stays moist for days instead of hours.
- The Fat Barrier: Using vegetable oil instead of butter might seem like a shortcut, but oil stays liquid at room temperature. This means your cake feels moister on the tongue than a butter based cake, which can feel firm or dry when cooled.
- Cocoa Bloom: The Dutch process cocoa powder adds a dark, earthy depth that cuts through the sweetness of the glaze.
| Ingredient | Science Role | Pro Secret |
|---|---|---|
| Buttermilk | Protein Tenderizer | Use full fat for the most velvety crumb |
| Sour Cream | Fat & Moisture Carrier | Room temperature prevents the batter from curdling |
| Pudding Mix | Moisture Lock | Don't use "Cook & Serve" it must be Instant |
| Cream Cheese | Structural Density | Whip it long enough to remove all lumps before adding the egg |
Many people wonder why we bother adding extra cocoa powder to a pre mixed cake base. It's because most boxed mixes prioritize color over chocolate flavor. Adding that tablespoon of Dutch process cocoa bridges the gap, giving it that "from scratch" depth that reminds me of the homemade chocolate cake my aunt used to bake. It's that tiny layer of extra flavor that makes guests ask for the recipe.
The Right Tools for a Flawless Release
If you've ever had a bundt cake come out in three different pieces, you know that the equipment is just as important as the flour. For this red velvet cream cheese bundt cake, the pan is your most critical partner. I highly recommend a heavy duty cast aluminum pan.
These pans distribute heat more evenly than thin, dark non stick pans, which tend to scorch the "shoulders" of the cake before the middle is done.
You'll also want a stand mixer if you have one. While you can do this by hand, beating the batter for the full 2 minutes as required in the steps is what develops the "glossy" finish. This aeration is what helps the cake rise over the cream cheese "trench" we're going to build.
If the batter is under mixed, it won't have the strength to hold the filling, and you'll end up with a sunken center.
Finally,, don't forget a simple offset spatula. It’s the best tool for smoothing the final layer of batter over the cream cheese core without disturbing the hidden treasure inside. It’s also much easier to use for the glaze later on, ensuring those beautiful drips look intentional rather than messy.
How to Layer and Bake Your Crimson Masterpiece
Let's talk about the assembly. This isn't just a "dump and bake" situation. To get that perfect ring of cream cheese in the middle, you have to be intentional with your layering. I once made the mistake of just pouring the filling on top, and it sank straight to the bottom (which becomes the top when you flip it), making the cake stick and look like a mess.
For the Red Velvet Base
- 1 box (15.25 oz) Premium Red Velvet Cake Mix Why this? Provides a consistent base for the extra add ins.
- 1 package (3.4 oz) Instant Chocolate Pudding Mix Why this? Essential for that signature "Nothing Bundt Cakes" texture.
- 1 cup full fat sour cream, room temperature
- 0.75 cup vegetable oil
- 4 large eggs, room temperature
- 0.5 cup buttermilk
- 2 tsp vanilla extract
- 1 tbsp unsweetened Dutch process cocoa powder
For the Cream Cheese Filling
- 8 oz full fat cream cheese, softened Why this? low-fat versions are too watery and will leak.
- 0.25 cup granulated sugar
- 1 large egg, room temperature
- 1 tsp vanilla extract
- 2 tbsp all purpose flour Why this? Acts as a binder so the filling doesn't run.
For the Tangy Cream Cheese Glaze
- 4 oz cream cheese, softened
- 1.5 cups powdered sugar, sifted
- 3 tbsp whole milk
- 1 tsp vanilla extract
- Preheat your oven to 350°F (175°C). Grease your 10-12 cup bundt pan with a generous coating of baking spray make sure you get into every single nook and cranny of the design.
- In your stand mixer, combine the red velvet cake mix, pudding mix, cocoa powder, sour cream, oil, 4 eggs, buttermilk, and 2 tsp of vanilla. Beat on medium speed for 2 minutes until the batter is thick, glossy, and vibrant red.
- In a separate clean bowl, beat the 8 oz of softened cream cheese and granulated sugar together until they look light and fluffy.
- Add the 1 egg, 1 tsp vanilla, and 2 tbsp of flour to the cream cheese mixture, mixing until it is completely smooth and no white streaks remain.
- Pour exactly two thirds of that gorgeous red velvet batter into the prepared bundt pan.
- Use the back of a large spoon to gently push the batter up the sides and around the center tube, creating a "trench" or a valley right in the middle of the batter.
- Carefully pour the cream cheese mixture into that trench. Note: Be very careful that the white filling doesn't touch the actual metal edges of the pan, or it might scorch.
- Top the filling with the remaining red velvet batter, using an offset spatula to smooth it out until the white filling is completely tucked away.
- Bake for 45 to 55 minutes. You'll know it's ready when a wooden skewer comes out clean from the cake portion and the kitchen smells like a chocolate shop.
- Let the cake sit in the pan on a wire rack for exactly 10 minutes. Then, place the rack on top of the pan, take a deep breath, and flip it over. The cake should slide out with a soft "whoosh" sound.
- While the cake cools completely, whisk the glaze ingredients together and drizzle over the top once the cake is no longer warm to the touch.
Fixing Sinking Fillings and Stuck Bundt Cakes
We’ve all had those "oh no" moments. The first time I tried a filled cake, the cream cheese decided it wanted to be the crust instead of the core. It happens to the best of us! The key is understanding why it happened so you can fix it mid stride next time.
Why Your Filling Sunk to the Bottom
If your cream cheese ring is sitting right at the top (which was the bottom of the pan), it usually means your red velvet batter wasn't thick enough to support it. This often happens if you use "large" eggs that are actually "jumbo" or if you skip the pudding mix.
That pudding mix provides the structural integrity needed to act as a flotation device for the heavy cream cheese.
Why Your Cake Struck the Pan
This is the heartbreak of bundt baking. Usually, it's caused by the sugar in the batter caramelizing against the metal. If you didn't use enough grease, or if you left the cake in the pan for 30 minutes instead of 10, it's going to stick. If it does stick, don't panic!
You can often "glue" pieces back on with the cream cheese glaze, and no one will ever know once it's fully decorated.
| Problem | Root Cause | Solution |
|---|---|---|
| Dry Crumb | Overbaking or low-fat ingredients | Pull at 210°F internal; always use full fat sour cream |
| Filling Leaking | Filling touched the pan walls | Ensure the "trench" is deep and the filling is centered |
| Glaze is Translucent | Too much milk or warm cake | Add more powdered sugar; wait for cake to cool completely |
Common Mistakes Checklist:
- ✓ Use room temperature eggs to ensure the batter emulsifies properly.
- ✓ Don't skip the flour in the cream cheese filling it's what keeps it from becoming a liquid mess.
- ✓ Measure your oil carefully; too much will make the cake greasy and heavy.
- ✓ Always sift your powdered sugar for the glaze to avoid "polka dot" lumps on your beautiful red cake.
- ✓ If you aren't sure about the pan, use "cake goop" (equal parts flour, oil, and shortening whisked together) for the most reliable release.
The technique of creating a trench for the filling is very similar to how I handle the swirl in my moist pumpkin bread. It’s all about weight distribution. If you master the "valley" technique, you can put almost anything inside a cake!
Making This Red Velvet Dessert Your Own
The beauty of this red velvet cream cheese bundt cake is how adaptable it is. While the classic crimson and white is iconic, you can play with the flavors to suit the season.
2 Flavor Elevators
- The Espresso Kick: Add 1 teaspoon of instant espresso powder to the red velvet batter. It doesn't make it taste like coffee; it just makes the chocolate notes of the cocoa powder sing a little louder.
- Orange Zest Glaze: Add the zest of half an orange to the glaze. Red velvet and orange is a vintage Southern combination that feels incredibly sophisticated for a holiday dinner.
2 Dietary Adjustments
- Lower Sugar: You can swap the granulated sugar in the filling for a monk fruit sweetener. However, don't try to swap the powdered sugar in the glaze, or the texture will be grainy.
- gluten-free: Use a gluten-free red velvet cake mix and swap the 2 tablespoons of flour in the filling for a 1 to-1 gluten-free flour blend. The pudding mix is naturally gluten-free, but always double check your labels!
If you want a different result: If you want a denser, pound cake texture, use 5 eggs instead of 4 and reduce the buttermilk to 1/4 cup. If you want a brighter red color, add 1 teaspoon of red gel food coloring to the batter (be sure it's gel, not liquid, to keep the consistency).
If you want a crunchy element, sprinkle 1/2 cup of finely chopped toasted pecans into the bottom of the pan before adding the batter.
Storage Secrets for a Moist Cake All Week
Because this cake has a cream cheese filling, you have to be a little more careful than you would with a standard sponge cake. However, the high fat content from the sour cream and oil actually helps it stay fresh longer than most.
Storage: This cake must be kept in the refrigerator because of the cream cheese core. Store it in an airtight cake carrier or wrap it tightly with plastic wrap. It will stay velvety and delicious for up to 5 days.
Honestly, I think it tastes even better on day two once the flavors have had a chance to marry.
Freezing: You can freeze this cake! Wrap individual slices in plastic wrap and then a layer of foil. They’ll stay good for up to 3 months. When you’re ready for a treat, just let a slice thaw in the fridge overnight.
Don't freeze it with the glaze if you can help it, as the glaze can become a bit tacky when thawing.
Zero Waste Tip: If you have leftover cake that’s starting to get a little dry (though with this recipe, that’s rare!), crumble it up and mix it with a little leftover glaze to make red velvet cake truffles.
Roll them in white chocolate for a "bonus" dessert that looks like it came from a bakery.
Drizzling and Decorating Like a Southern Pro
Presentation is half the battle with a bundt cake. Since the pan gives you all those beautiful ridges, you want a glaze that highlights them rather than hiding them. The trick to a perfect drizzle is the "ribbon" test.
When you lift your whisk, the glaze should fall back into the bowl and hold its shape for about 3 seconds before disappearing.
If your glaze is too thick, it won't run down the sides. If it's too thin, it will just soak into the cake and disappear. I like to put my glaze into a piping bag (or a sandwich bag with the corner snipped off) and zig zag it back and forth over the ridges.
This gives you those clean, professional looking lines you see in high end bakeries.
For a final touch, you can sprinkle a few crumbs from the "bottom" of the cake (which you might have trimmed to make it sit flat) over the top of the wet glaze. It adds a pop of red and tells everyone exactly what kind of cake is waiting for them inside. This cake isn't just a dessert; it's a centerpiece.
Whether it's sitting on a crystal cake stand for a Sunday dinner or in a plastic carrier for an office party, it always manages to be the first thing to disappear. Trust me, once you master that cream cheese "trench," you'll be the designated baker for every family event from here on out.

Recipe FAQs
Do I really need to grease the bundt pan so thoroughly?
Yes, it is essential for a clean release. Even with a non-stick pan, using baking spray or cake goop prevents the delicate cake from sticking and tearing during the inversion process.
How to ensure the cream cheese filling stays centered?
Spoon a deep, circular trench into the first two-thirds of the batter. Pour the cream cheese mixture directly into this channel, taking care that it stays away from the pan edges to prevent it from leaking to the outside of the cake.
How to tell when the bundt cake is perfectly finished baking?
Insert a skewer into the cake portion and look for it to come out clean. Since the center contains a cream cheese filling, testing the actual cake part ensures you aren't accidentally pulling it out while the batter is still raw.
Is it true I can store this cake at room temperature?
No, this is a common misconception. Because the cake contains a cream cheese filling and glaze, it must be stored in an airtight container in the refrigerator to maintain food safety and optimal texture.
How to prevent the cake from breaking when turning it out of the pan?
Cool the cake in the pan for exactly 10 minutes before inverting. If you flip it too soon, the cake is too fragile; if you wait too long, the sugars in the cake will begin to stick to the pan surface.
Can I speed up the cooling process for the glaze?
Wait until the cake is fully cooled to room temperature before drizzling. Adding the glaze while the cake is still warm will cause it to melt and turn translucent, losing that beautiful opaque finish. If you enjoyed the precision required for this glaze consistency, you can apply similar logic to our Valentine Cake Pops.
How long will the cake remain fresh?
It stays moist and delicious for up to 5 days. The high fat content from the sour cream and vegetable oil helps keep the crumb velvety, and the flavor often improves after the first day of refrigeration.
Red Velvet Bundt Cake

Ingredients:
Instructions:
Nutrition Facts:
| Calories | 468 kcal |
|---|---|
| Protein | 5.6 g |
| Fat | 27.2 g |
| Carbs | 51.4 g |
| Fiber | 0.9 g |
| Sugar | 38.6 g |
| Sodium | 425 mg |
