Pie Iron Recipe with Ham and Cheese
- Time: Active 10 minutes, Passive 8 minutes, Total 18 minutes
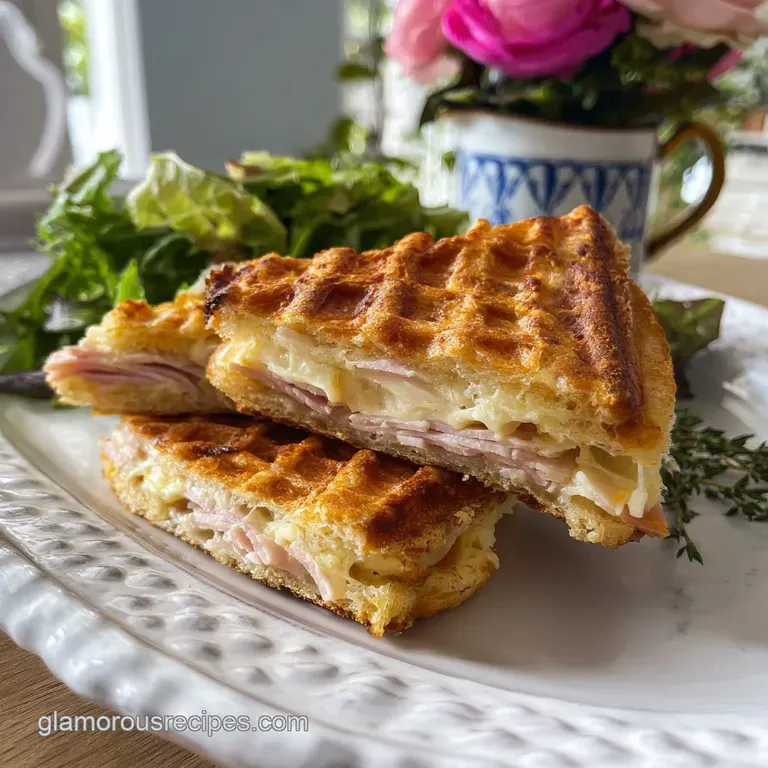
- Flavor/Texture Hook: Shatteringly crisp buttery crust with a molten, velvety cheese center
- Perfect for: Family camping trips or cozy backyard fire pit gatherings
- Master the Golden Crust: Pie Iron Recipe with Ham
- The Science Behind the Press and Sizzle
- Component Analysis for the Perfect Sandwich
- Hand Selected Elements for Maximum Flavor
- From Cold Prep to Smoky Plate
- Fixing Common Pitfalls with Campfire Cooking
- Adjusting for Crowds or Solo Cooking
- Debunking Common Campfire Myths
- Storage and Sustainable Kitchen Habits
- Perfect Pairings for Your Pressed Sandwich
- Critical High in Sodium
- Pie Iron Recipe with Ham FAQs
- 📝 Recipe Card
Master the Golden Crust: Pie Iron Recipe with Ham
The sound of a heavy cast iron latch snapping shut always reminds me of camping trips with my dad. There is something sacred about sitting by a crackling fire, waiting for that first puff of steam to escape the iron, signaling that the cheese inside has finally reached its molten peak.
This isn't just a sandwich; it is a pressurized, butter bathed pocket of pure comfort that puts any standard grilled cheese to shame.
This article shares a fantastic Pie Iron Recipe with Ham and Cheese that's perfect for campfire cooking. If you have ever struggled with a soggy center or a burnt crust, you are in the right place.
I have spent years refining this method, moving from cheap white bread to thick brioche and learning exactly when to pull the iron from the coals. We are going for that specific, deep mahogany color that only comes from the marriage of high heat and plenty of garlic infused butter.
We are keeping things simple but high-quality here, focusing on the layers of flavor that build as the ham sears and the sharp cheddar relaxes into every nook and cranny of the bread.
It is the kind of meal that brings people together, whether you are deep in the woods or just using your gas stove at home on a Tuesday night. Let’s get that fire started and talk about why this method is so much better than a frying pan.
The Science Behind the Press and Sizzle
The Science of Why it Works
Starch Gelatinization: The high pressure of the pie iron forces steam into the bread fibers, hydrating the starches so the interior stays soft while the exterior undergoes the Maillard reaction.
Protein Denaturation: As the ham heats, its proteins tighten and release juices that are immediately absorbed by the bread, creating a concentrated "ham essence" in every bite.
- Conductive Heat Transfer: Cast iron retains and distributes heat more evenly than aluminum, ensuring the bread browns from edge to edge without cold spots.
- Thermal Mass: Once the iron is hot, it stays hot, which allows for a rapid sear that traps moisture inside before the bread can dry out.
- Emulsification Stability: Using Dijon mustard acts as a bridge between the fats in the cheese and the moisture in the ham, preventing the sandwich from becoming greasy.
- Lactic Acid Sharpness: Sharp white cheddar has a lower moisture content than mild cheddar, which means it melts into a thick, velvety blanket rather than a watery mess.
| Cooking Environment | Total Time | Texture Outcome | Best For |
|---|---|---|---|
| Open Campfire Coals | 6 minutes | Smoky and charred | Authentic outdoor flavor |
| Gas Stove Burner | 8 minutes | Uniformly golden | Precision and convenience |
| Charcoal Grill | 10 minutes | Very crispy crust | Cooking for a large group |
When you are choosing your heat source, keep in mind that coals provide the most intense, direct heat. If you are looking for a side dish to prep alongside these, this How to Make recipe for succotash is a great way to add some brightness to your campfire meal.
Component Analysis for the Perfect Sandwich
The secret to a sandwich that does not fall apart lies in the quality of your bread and the way you treat the fats. I always tell my friends to skip the pre shredded cheese because the anti caking agents prevent that beautiful, stretchy "pull" we all crave.
| Ingredient | Science Role | Pro Secret |
|---|---|---|
| Brioche or Sourdough | Structural Foundation | Sourdough offers a sturdy "crust to crumb" ratio that stands up to heavy fillings |
| Sharp White Cheddar | Binding Emulsifier | Grate it yourself for a smoother melt and punchier flavor |
| Salted Butter | Heat Conductor | Use softened butter to ensure even coverage; it's the key to the "shatter" |
Before you start assembly, make sure your ham is shaved thin. Thick slabs of ham tend to slide out of the sandwich when you take a bite, but thinly shaved Black Forest ham creates air pockets that hold onto the melted cheese. This technique of layering is very similar to how we build the base in our Breakfast Casserole recipe, where texture is everything.
Hand Selected Elements for Maximum Flavor
To get these results, you need specific items. Do not substitute the butter for oil; you need the milk solids in the butter to get that deep, toasted aroma.
- 4 slices thick cut Brioche or Sourdough breadWhy this? Brioche adds sweetness; sourdough provides a tangy, structural crunch.
- 30g salted butter, softenedWhy this? Salted butter seasons the crust while providing the fat needed for browning.
- 5g garlic powderWhy this? Adds a savory depth that mimics slow roasted garlic without the burn risk.
- 150g Black Forest ham, thinly shavedWhy this? Shaved ham creates a tender, meaty texture that is easy to bite through.
- 100g sharp white cheddar cheese, freshly gratedWhy this? High fat content ensures a gooey, velvety melt every single time.
- 15ml Dijon mustardWhy this? The acidity cuts through the richness of the ham and butter.
- 20g thinly sliced pickles or jalapeñosWhy this? Adds a necessary "crunch" and a vinegary pop to balance the fats.
Chef's Tip: Freeze your butter for about 10 minutes before mixing it with the garlic powder. It allows you to spread it on the bread in a thicker, more even layer which leads to a more "shatter like" crust once it hits the hot iron.
From Cold Prep to Smoky Plate
1. Prepare the Garlic Butter
Mix the 30g of softened salted butter with 5g of garlic powder in a small bowl until it is completely smooth and pale yellow. Note: Using softened butter prevents the bread from tearing during the spreading process.
2. Season the Bread
Spread the garlic butter generously on one side of all 4 slices of bread. Spread all the way to the very edges.Note: The edges are where the "seal" happens, so they need the most fat for browning.
3. Apply the Mustard
Flip two slices over so the buttered side is down, and spread 15ml of Dijon mustard on the unbuttered side. Note: Putting the mustard on the inside keeps the exterior dry and crispy.
4. Build the Ham Layers
Divide the 150g of shaved Black Forest ham between the two mustard topped slices, folding the meat rather than laying it flat. Note: Folding creates "flavor pillows" that trap heat.
5. Add the Cheese and Crunch
Pile 100g of freshly grated sharp white cheddar on top of the ham, then distribute the 20g of pickles or jalapeños evenly. Note: The cheese acts as the "glue" that holds the pickles in place.
6. Close the Sandwich
Place the remaining two bread slices on top, buttered side facing OUT. Note: The butter must make direct contact with the iron.
7. Prime the Iron
Preheat your pie iron over the fire for 2 minutes until a drop of water sizzles and dances on the surface.
8. The Pressing Stage
Place the sandwich into the hot iron and latch it shut. If the bread is thick, you may need to press down firmly. Note: This pressure is what creates the airtight seal.
9. The Cooking Process
Cook over medium hot coals for about 3 to 4 minutes per side. Flip the iron every 2 minutes for even heating.
10. The Golden Reveal
Carefully open the iron after 8 minutes total. Cook until the bread is deep mahogany and the cheese is oozing from the sides.
Fixing Common Pitfalls with Campfire Cooking

Why Your Bread is Black but the Center is Cold
This usually happens when you place the iron directly into the "flame" rather than on the "coals." Flame heat is too aggressive and inconsistent. Coals provide a steady, radiating heat that penetrates through the bread into the center of the ham.
| Problem | Root Cause | Solution |
|---|---|---|
| Bread sticking to iron | Iron wasn't preheated or lacked fat | Preheat iron for 2 mins and butter bread to the very edges |
| Soggy, limp crust | Heat was too low or steam trapped | Use higher heat and vent the iron for 5 seconds halfway through |
| Cheese not melted | Filling was too cold or too thick | Let ingredients sit at room temp for 15 mins before assembly |
Another thing to watch for is the "leak." If you overstuff the sandwich, the cheese will escape the bread and bake onto the iron. While this creates a tasty "cheese skirt," it can make the iron a nightmare to clean later.
Common Mistakes Checklist ✓ Never use margarine; the water content will make the bread steam rather than fry. ✓ Always preheat the iron for at least 3 minutes before the first sandwich.
✓ Don't use "cold" ham straight from a cooler; it slows down the internal melting. ✓ Avoid the center of the fire where the flames are tallest. ✓ Scrap any burnt bits off the iron between sandwiches to prevent a bitter taste.
Adjusting for Crowds or Solo Cooking
When you are cooking for a larger group, you can prep the sandwiches ahead of time and keep them wrapped in foil. However, if you are scaling up, remember that the iron gets hotter with each subsequent sandwich.
You will likely need to reduce the cook time by about 1 minute for the third and fourth rounds because the cast iron has already reached a high thermal equilibrium.
If you are cooking for just one person, you can easily halve the recipe. For the leftover ham, I highly recommend making a Beef Breakfast Sausage recipe and mixing in the ham scraps for a killer protein packed breakfast the next morning.
Scaling down is easy, but scaling up requires a bit of patience. If you are making 8 sandwiches, don't try to rush the process by putting the iron in hotter flames. You'll end up with a "carbonized exterior" that tastes like a campfire rather than a gourmet meal.
Debunking Common Campfire Myths
One of the biggest misconceptions I hear is that you need to grease the inside of the pie iron with oil or spray. This is actually a mistake if you have already buttered your bread. The oil can actually cause the butter to slide off the bread, leading to an uneven crust.
Trust the butter on the bread it provides plenty of lubrication for the cast iron.
Another myth is that you can't use "fancy" bread like Brioche because it burns too fast. While it is true that Brioche has a higher sugar content, you just have to be more vigilant with your flipping. The result is a much more luxurious, decadent sandwich that feels like a real treat rather than basic survival food.
Storage and Sustainable Kitchen Habits
Storage Guidelines: You can keep these sandwiches in the fridge for up to 3 days if they are wrapped tightly in foil. To reheat them, don't use a microwave; it will turn that beautiful crust into a rubbery mess.
Instead, put them back in a pie iron or a dry skillet over medium heat for about 3 minutes per side until the cheese is moving again.
Freezing Instructions: These actually freeze surprisingly well! You can assemble the sandwiches (buttered and all), wrap them in plastic wrap and then foil, and freeze for up to 2 months.
You can even cook them straight from frozen; just add an extra 4 minutes to the total cook time and keep the heat a bit lower so the center thaws before the outside burns.
Zero Waste Tips: If you have leftover crusts or bits of ham, don't throw them away. You can chop them up and toss them into a bag to use as a base for a savory bread pudding or a strata later in the week. Even the leftover garlic butter can be melted over popcorn for a movie night snack.
Perfect Pairings for Your Pressed Sandwich
While this sandwich is a powerhouse on its own, it loves a bit of company. I usually serve mine with a side of crisp apple slices or a vinegary coleslaw to help reset the palate after all that rich butter and cheese.
If you are at home, a simple tomato soup is the classic choice, but out in the woods, a handful of salty potato chips works wonders.
- For a sweet and salty kick
- Swap the Dijon for a thin layer of apricot preserves.
- For a spicy "Western" style
- Add some sautéed onions and use pepper jack instead of cheddar.
- For a crunchy texture
- Add a layer of crushed potato chips inside the sandwich right before closing the iron.
No matter how you choose to eat it, remember that the best part of a Pie Iron Recipe with Ham is the patience it teaches you. You can't rush the fire, and you certainly can't rush the melt. Take your time, enjoy the aroma of the garlic butter hitting the iron, and get ready for the best campfire meal you've ever had.

Critical High in Sodium
1725 mg mg of sodium per serving (75% of daily value)
The American Heart Association recommends limiting sodium intake to about 2,300mg per day for overall cardiovascular health.
Sodium Reduction Tips for Your Grilled Cheese
-
Low-Sodium Ham-25%
Opt for low-sodium or unsalted Black Forest ham. This simple swap can significantly cut down on the overall sodium content from a major source in the recipe.
-
Lower Sodium Cheese-15%
Choose a naturally lower sodium cheese, such as Swiss or Monterey Jack, or look for reduced sodium cheddar. Sharp cheddar tends to be higher in sodium.
-
Unsalted Butter-10%
Use unsalted butter instead of salted butter. You can always add a pinch of salt later if needed, but this gives you control over the sodium level.
-
Fresh Jalapeños-10%
If using jalapeños, opt for fresh jalapeños. Pickled jalapeños can have a higher sodium content due to the brining process.
-
Less Mustard-5%
Use less Dijon mustard or try a lower sodium mustard variety. A little goes a long way in flavor, and reducing the amount can reduce sodium intake.
-
Flavor Boost
Enhance the flavor with fresh herbs and spices like black pepper, smoked paprika, or onion powder instead of relying solely on salt.
Pie Iron Recipe with Ham FAQs
What kind of bread works best for a pie iron recipe with ham?
Brioche or sourdough are ideal. Brioche offers a sweet, tender interior while sourdough provides a sturdy, tangy crust that holds up well to fillings.
How do I prevent the bread from sticking to the pie iron?
Generously butter the outside of the bread slices all the way to the edges. Ensure the pie iron is properly preheated before adding the sandwich; the butter acts as your lubricant.
Can I use pre-shredded cheese, or is grating it myself really necessary?
Always grate your cheese yourself for the best melt. Pre-shredded cheeses contain anti caking agents that prevent them from melting into a smooth, gooey consistency.
What is the best way to cook a pie iron sandwich over coals?
Cook over medium hot coals, not directly in flames, and flip regularly. Rotate the iron every 2 minutes for about 3-4 minutes per side, ensuring even heating and a deep mahogany crust.
My bread is black but the inside is cold. What went wrong?
This usually means the heat was too high and inconsistent, likely from direct flame. Try placing the iron on steadier, radiating coals and ensure your fillings aren't ice cold before assembly.
How can I reheat a pie iron sandwich without making it soggy?
Use a dry skillet or another pie iron over medium heat. Avoid the microwave, as it steams the bread and ruins the crispy crust we worked hard for.
Can I add anything else besides ham and cheese to my pie iron sandwich?
Yes, thinly sliced pickles or jalapeños add a nice crunch and tang. For a sweet and salty twist, try a thin layer of apricot preserves instead of Dijon mustard, similar to how fruit complements savory elements in our Sardines in Tomato Sauce.
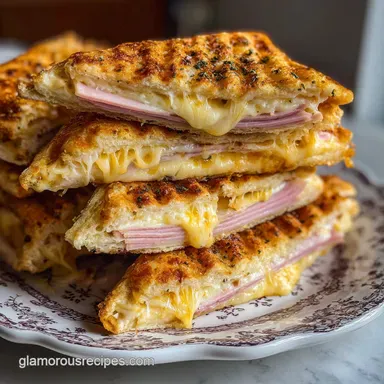
Pie Iron Ham Sandwich
Ingredients:
Instructions:
Nutrition Facts:
| Calories | 704 kcal |
|---|---|
| Protein | 36.6 g |
| Fat | 42.4 g |
| Carbs | 45.5 g |
| Fiber | 2.1 g |
| Sugar | 5.8 g |
| Sodium | 1725 mg |
