Melting Potatoes with Broth Braise
- Time: Active 15 minutes, Passive 45 minutes, Total 1 hours
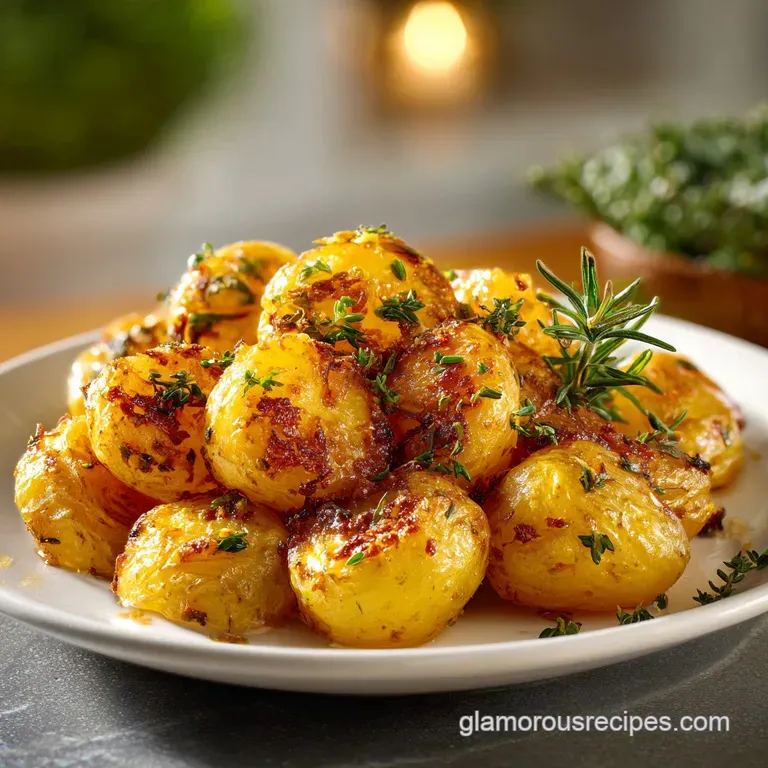
- Flavor/Texture Hook: A shatter crisp golden crust with a velvety, melt in-your mouth interior
- Perfect for: Impressive holiday sides or a cozy weekend comfort food feast
- The Science Behind Creamy Spuds
- Essential Specs for Your Kitchen
- High Quality Ingredients for Flavor
- The Best Tools for Searing
- A Guide to Crispy Spuds
- Fixing Common Potato Cooking Mistakes
- Tasty Swaps and Creative Ideas
- Debunking Traditional Potato Preparation Myths
- Storage and Reheating Best Practices
- Best Dishes to Serve Alongside
- Melting Potatoes FAQs
- 📝 Recipe Card
I’ll never forget the first time I heard the sizzle of these hitting the heavy cast iron. It was a cold Tuesday, and I was trying to replicate a dish I’d seen in a grainy old cookbook.
The kitchen filled with the aroma of rosemary and browning butter, that nutty, toasted scent that makes your mouth water before you even see the food. I remember thinking there was no way a potato sliced that thick would actually cook through without becoming a rock.
But when I pulled that pan out of the oven, the transformation was incredible. The broth had vanished, absorbed entirely by the starch, leaving behind a rich, concentrated glaze. When I bit into the first one, the crust didn’t just crunch, it seemed to shatter, giving way to a center so soft I didn't even need to chew.
It was a total revelation for me. Since then, I’ve made every mistake possible, from using the wrong potato to crowding the pan, and I’ve distilled all those lessons into this guide for you.
You’re going to love how the lemon juice at the very end cuts through the richness of the butter. It’s a tiny detail, but it’s what takes the flavor from heavy to bright. We aren't just roasting here, we are essentially performing a two stage magic trick that involves searing and braising.
It’s simpler than it sounds, and once you see those golden rounds glistening in the pan, you’ll be just as hooked as I am.
The Science Behind Creamy Spuds
The Secret to these Melting Potatoes
The high initial heat triggers the Maillard reaction, creating a complex, savory crust that holds the potato together during the braise. Meanwhile, the starch granules inside the potato swell and gelatinize as they absorb the hot chicken broth, turning the interior into a velvety puree.
- Starch Gelatinization: As the potatoes simmer in the broth, the starch molecules break down and soak up the liquid like a sponge. This is why the center feels like mashed potatoes while the outside stays intact.
- Thermal Buffering: The liquid in the pan prevents the bottom of the potatoes from burning while the top continues to brown in the dry heat of the oven.
- Emulsification: The combination of melted butter and chicken broth creates a thin, silky sauce that coats each slice as the water evaporates.
- Pectin Breakdown: The long, slow cook in the oven softens the cell walls (pectin) of the Yukon Golds, which is what creates that signature "melting" sensation on the tongue.
| Method | Total Time | Texture Outcome | Best For |
|---|---|---|---|
| Oven Braise | 45 minutes | Maximum velvet interior | Classic Sunday dinners |
| Stovetop Only | 30 minutes | More snap, less "melt" | Quick weeknight sides |
| Air Fryer | 20 minutes | Extra crispy, drier center | Small batches/snacks |
If you love the way flavors build in this dish, you might find a similar satisfaction in the layers of my Garlic Parmesan Chicken Potatoes recipe. Both recipes lean heavily on the way fat and starch interact under high heat to create that addictive crust.
Essential Specs for Your Kitchen
The success of this recipe depends on a few specific variables, mostly involving the thickness of your slices and the temperature of your oven. I’ve found that 400°F (200°C) is the "sweet spot." Anything lower and the potatoes steam rather than sear, anything higher and the butter might smoke too much before the inside is ready.
Component Analysis
| Ingredient | Science Role | Pro Secret |
|---|---|---|
| Yukon Gold Potatoes | Medium starch content | Don't use Russets; they fall apart and lose their shape too easily during the flip. |
| Unsalted Butter | Fat for browning | Use unsalted so you can control the seasoning perfectly with your kosher salt. |
| Chicken Broth | Hydration for the core | Low sodium is a must, as the broth reduces and concentrates the saltiness significantly. |
| Fresh Rosemary | Volatile aromatics | Toss the sprigs in whole; the heat releases the oils without leaving bitter burnt bits. |
Before we get into the nitty gritty of the prep, let’s talk about the potatoes themselves. You want them to be roughly the same diameter so they cook at the same rate. If you have some giant ones and some tiny ones, the small ones will turn to mush before the big guys are even tender.
high-quality Ingredients for Flavor
- 3 lbs Yukon Gold potatoes: Peeled and sliced into 1 inch thick rounds. Why this? They have the perfect waxy starchy balance to hold their shape while softening.
- 4 tbsp unsalted butter: Melted. Why this? Provides the fat needed for that deep, nutty golden crust.
- 2 tbsp extra virgin olive oil: Why this? Raises the smoke point of the butter so it doesn't burn during the sear.
- 1.5 tsp kosher salt: Why this? The coarse grains distribute more evenly than fine table salt.
- 0.5 tsp freshly cracked black pepper: Why this? Freshly ground pepper has much more floral heat than the pre ground stuff.
- 1 cup low sodium chicken broth: Why this? This is the "melting" agent that hydrates the starch from the inside out.
- 4 cloves garlic: Smashed. Why this? Smashing releases the juices without the risk of burnt minced garlic bits.
- 3 sprigs fresh rosemary or thyme: Why this? Infuses the braising liquid with an earthy, woodsy aroma.
- 1 tsp lemon juice: Why this? A splash of acidity brightens the heavy fats and balances the dish.
| Original Ingredient | Substitute | Why It Works |
|---|---|---|
| Chicken Broth | Vegetable Broth | Same hydration levels. Note: Flavors will be more herbal and less savory. |
| Yukon Golds | Red Potatoes | Waxy texture holds up well. Note: Result is slightly less creamy than Yukons. |
| Rosemary | Dried Oregano | Provides earthy notes. Note: Use only 1 tsp as dried is more concentrated. |
Finding the right balance of flavor is much like the technique used in a Breakfast Casserole recipe, where the liquid must be fully absorbed by the starch to reach that ideal consistency. Don't be afraid to be generous with the salt here, potatoes can handle it.
The Best Tools for Searing
To get that legendary shatter crisp crust, your choice of pan is everything. I swear by a large cast iron skillet (like a 12 inch Lodge). The heavy metal retains heat beautifully, which means when you put the potatoes in, the pan temperature doesn't drop.
This prevents the potatoes from sticking and ensures an even sear.
If you don't have cast iron, a heavy stainless steel roasting pan or a thick bottomed baking dish will work, but avoid thin glass pans. Glass doesn't conduct heat as efficiently for searing, and you might end up with "pale" potatoes.
A sturdy metal spatula is also your best friend here, it allows you to get under that crust and flip the rounds without leaving the best part of the potato stuck to the bottom of the pan.
Chef's Tip: Freeze your butter for 10 minutes before melting it. It sounds weird since we're melting it anyway, but I've found that starting with very cold butter leads to a cleaner melt with less immediate separation of the milk solids.
A Guide to Crispy Spuds

- Preheat the oven. Set your oven to 400°F (200°C) and ensure the rack is in the middle position. Note: This ensures even heat distribution above and below the pan.
- Prep the potatoes. Peel the 3 lbs of Yukon Golds and slice them into 1 inch thick rounds. Expect them to look like thick scallops.
- Season thoroughly. In a large bowl, toss the potato rounds with the 4 tbsp melted butter, 2 tbsp olive oil, 1.5 tsp salt, and 0.5 tsp pepper. Ensure every surface is glistening.
- Arrange the pan. Place the potatoes in a single layer in your skillet or roasting pan. Don't let them overlap or they will steam.
- Initial roast. Slide the pan into the oven for 15 minutes. Wait for the edges to start sizzling.
- The first flip. Carefully flip each potato round using a metal spatula. Look for a deep golden brown color.
- Add the aromatics. Scatter the 4 smashed garlic cloves and 3 sprigs of rosemary over the potatoes. The heat will immediately release their scent.
- The braise. Pour the 1 cup of chicken broth into the pan. It should come about halfway up the sides of the potatoes.
- Final roast. Return to the oven for 30 minutes until the broth has mostly evaporated and the centers are tender.
- The finish. Remove from the oven and drizzle with the 1 tsp lemon juice. Serve while the crust is still piping hot.
Fixing Common Potato Cooking Mistakes
Why Your Potatoes Are Still Hard
If you pull the pan out and the center feels firm or "snappy" rather than velvety, they simply haven't braised long enough. This usually happens if the slices were cut too thick (over an inch) or if your oven runs cool.
If the broth is gone but they're still hard, add another splash of broth and give them 10 more minutes.
Why the Crust Is Soggy
A soggy crust is usually the result of overcrowding. If the potatoes are touching or overlapping, the moisture can't escape as steam, so they end up boiling in their own juices instead of searing. Make sure there is at least a little bit of "breathing room" between each round in the pan.
| Problem | Root Cause | Solution |
|---|---|---|
| Bitter Flavor | Burnt garlic | Add garlic only after the first 15 minutes of roasting. |
| Potatoes Sticking | Pan wasn't hot enough | Preheat the pan in the oven for 5 minutes before adding potatoes. |
| Grey Color | Potatoes sat out too long | Keep peeled potatoes in cold water until you are ready to toss with fat. |
Common Mistakes Checklist ✓ Pat the potato rounds completely dry with a paper towel before tossing in butter. ✓ Use a metal pan or cast iron rather than ceramic for a better sear. ✓ Ensure the broth is at room temperature so it doesn't shock the hot pan.
✓ Don't skip the lemon juice; the acidity is crucial for balancing the starch. ✓ Resist the urge to flip them more than once.
Tasty Swaps and Creative Ideas
If you want to change things up, you can easily swap the chicken broth for a rich beef consommé to serve alongside a steak. For a more Mediterranean vibe, use oregano and lemon zest instead of rosemary.
I’ve even seen people add a pinch of smoked paprika to the butter for a hint of campfire flavor that’s absolutely brilliant.
For a vegetarian version, use a high-quality vegetable stock. Just be aware that vegetable stock is often sweeter, so you might want to add an extra pinch of salt to compensate. If you're looking for more ways to master basic vegetables, check out this How to Cook recipe for a different take on simple side dishes.
Adjusting Portions for Any Crowd
- Scaling Down (1.5 lbs): Use a smaller 8 inch skillet. Reduce the broth to 1/2 cup but keep the roasting times roughly the same to ensure the crust develops properly.
- Scaling Up (6 lbs): You must use two separate pans. If you crowd 6 lbs into one roasting tray, you'll end up with mashed potatoes. Increase the broth to 1.75 cups (not a full double) to avoid over saturating the pan.
- For the holidays: You can peel and slice the potatoes 4 hours in advance. Just keep them submerged in cold water in the fridge so they don't turn brown.
Debunking Traditional Potato Preparation Myths
One major misconception is that you need to boil the potatoes before roasting them to get a soft center. With this melting technique, the braising step in the oven does that work for you, and it does it with flavorful broth instead of plain water.
Pre boiling often leads to the potatoes falling apart before they even hit the pan.
Another myth is that you should use low-fat spreads or margarine. Honestly, don't even bother. The milk solids in real butter are what provide the flavor and the browning. Margarine has too much water and won't give you that "shatter" crust we're looking for.
Storage and Reheating Best Practices
These are definitely best served straight from the oven, but they do keep in the fridge for about 3 to 4 days. Store them in an airtight container once they have cooled to room temperature.
I don't recommend freezing them, as the cellular structure of the potato changes when frozen, often resulting in a grainy or mealy texture once thawed.
To reheat and reclaim that crunch, avoid the microwave at all costs. Instead, pop them back into a 400°F (200°C) oven or a toaster oven for about 8 to 10 minutes. This will crisp the outside back up while keeping the center velvety.
If you have leftovers, they are incredible when chopped up and tossed into a breakfast hash the next morning.
Best Dishes to Serve Alongside
Because these potatoes are so rich and savory, they pair beautifully with a lean protein like roasted chicken or a pan seared pork tenderloin. They are essentially the "luxury version" of a roasted potato, so they fit right in at a Thanksgiving table or a fancy Christmas dinner.
If you’re planning a full menu, they go wonderfully with a bright, acidic side like a vinegar based slaw or sautéed greens. If you have extra Yukon Golds, you might even consider using them in a Sweet Potato Pecan recipe for a themed dinner, though that’s usually reserved for the dessert course! Whatever you pair them with, just be prepared for everyone to ask for the recipe before the meal is over. Trust me on this, they're always the first thing to disappear from the table.

Melting Potatoes FAQs
Can I use Russet potatoes instead of Yukon Golds for melting potatoes?
No, stick to Yukon Golds or Red Potatoes. Russets have a high starch content which causes them to break down completely during the braise, turning the entire dish into mush rather than maintaining a crusty exterior.
How to ensure the potato crust gets crispy and doesn't steam?
Do not crowd the pan when searing. Arrange the potato slices in a single layer with a small space between each piece; overcrowding releases steam, effectively boiling the potatoes instead of promoting the necessary Maillard reaction for crispness.
Is it true that you must boil the potatoes before roasting to make them tender?
No, this is a common misconception. The braising step in the oven, where the potatoes simmer in the flavorful chicken broth, tenderizes the interior perfectly without the risk of them falling apart before the crust sets.
How to reheat melting potatoes to restore the crisp crust?
Reheat in a 400°F oven for 8 to 10 minutes. Avoid the microwave entirely, as it introduces moisture which will guarantee a soggy result; the dry heat of the oven revitalizes the crust.
What is the best way to substitute the liquid if I want a vegetarian version?
Use a high-quality, low-sodium vegetable broth. While it works functionally, vegetable broth often has a sweeter profile than chicken stock, so you may need to increase the kosher salt slightly to balance the final flavor.
Why are my finished potatoes so savory and heavy tasting?
You likely omitted the final acidity step. Drizzle with lemon juice right after removing them from the oven; this small amount of acid cuts through the richness of the butter and concentrates the flavor profile, similar to how acid brightens heavy sauces like in a Buffalo Chicken Dip recipe.
How can I easily make this recipe for a large crowd without losing the crust?
Use multiple separate pans, never one overcrowded pan. If you try to fit too many slices into one skillet, the potatoes will steam instead of sear; divide the ingredients across two pans to ensure all surfaces achieve that desired crispness.
Melting Potatoes Recipe
Ingredients:
Instructions:
Nutrition Facts:
| Calories | 284 kcal |
|---|---|
| Protein | 4.9 g |
| Fat | 12.1 g |
| Carbs | 40.2 g |
| Fiber | 5.1 g |
| Sugar | 1.9 g |
| Sodium | 641 mg |
