The Best Homemade Pizza Dough Recipe: Airy and Crisp
- Time: Active 30 minutes, Passive 70 minutes, Total 100 minutes
- Flavor/Texture Hook: Airy, crisp, and slightly nutty crust
- Perfect for: Sophisticated weekend gatherings or a refined family pizza night
- The best homemade pizza dough recipe
- Why the structure holds firm
- Analyzing the base components
- Ingredients for artisan results
- Executing the perfect stretch
- Refining your technique
- Adjusting the proportions
- Dough myths debunked
- Preservation and sustainability
- Artistic presentation levels
- Recipe FAQs
- 📝 Recipe Card
The best homemade pizza dough recipe
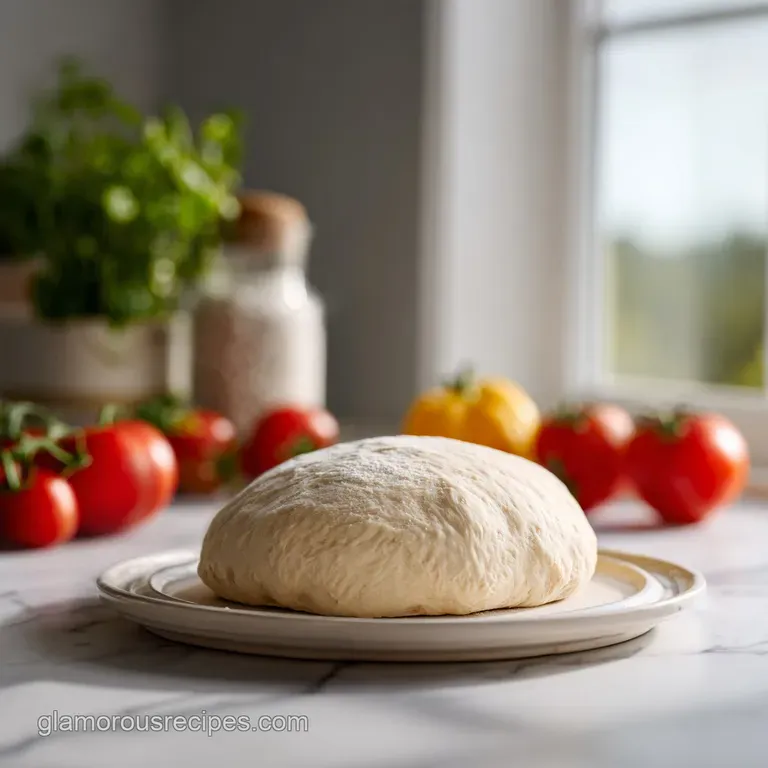
The ritual begins long before the oven preheats, usually on a quiet Friday afternoon when the light starts to lean long across the kitchen counter. There is a specific, quiet magic in the way 1.5 cups of warm water meets a single tablespoon of sugar, creating the perfect nursery for the yeast to wake.
I remember the first time I truly understood the soul of this process, watching the surface of the water turn from a murky tan to a thick, frothy cloud. It wasn't just a chemical reaction; it was the start of something tactile and alive that would eventually become the centerpiece of our family table.
When you commit to the best homemade pizza dough recipe, you are stepping away from the convenience of store-bought rounds and toward a technique that values the tactile feedback of the flour. As I sift the 3.75 cups of all purpose flour, the fine powder coats the air, smelling faintly of grain and potential.
This isn't just about feeding people, it is about the precision of the fold, the resistance of the gluten as it develops, and the rhythmic motion of the dough hook as it pulls the mass into a supple, satin finished ball. It is a sophisticated dance between hydration and heat.
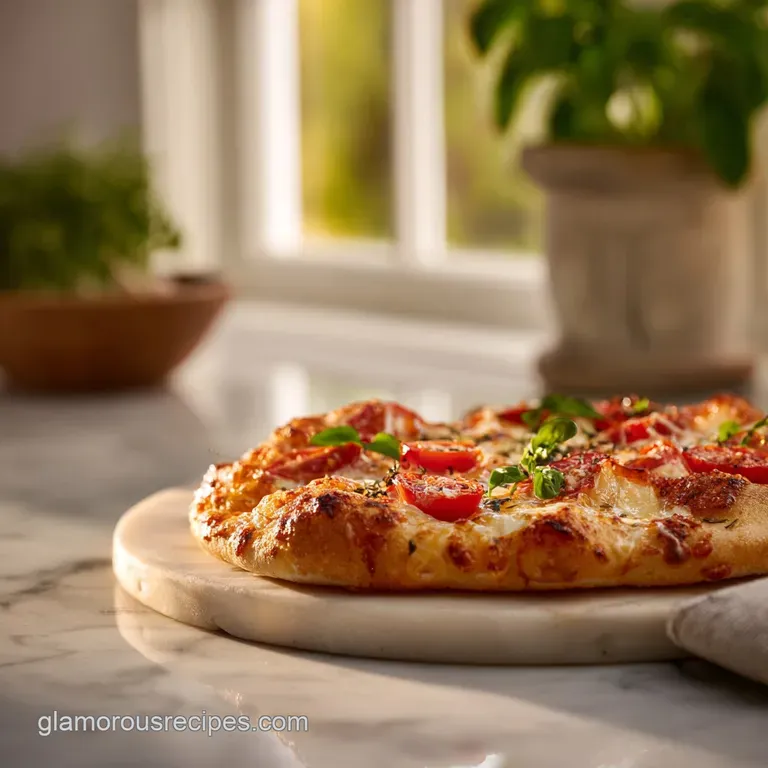
This recipe delivers a crust that shatters slightly on the first bite before yielding to a velvety, airy center. We aren't looking for a heavy, bread like base here. We are chasing that artisan ideal: a rim that puffs into golden bubbles and a center thin enough to be elegant but sturdy enough to hold a drizzle of high-quality oil and fresh buffalo mozzarella.
Whether you are hosting an intimate dinner or simply refining your personal craft, this dough provides the structural integrity and flavor depth that distinguishes a masterpiece from a meal.
Why the structure holds firm
The success of this dough rests on a few key mechanical interactions that happen within the bowl before the heat ever touches the pan.
- Yeast Vitality: The sugar acts as immediate fuel for the 2.25 teaspoons of active dry yeast, ensuring a vigorous production of carbon dioxide that creates the necessary air pockets.
- Gluten Alignment: Proper kneading organizes the proteins in the 470g of all purpose flour into long, elastic chains that trap gas, allowing the dough to expand without tearing.
- Lipid Barrier: The 2 tablespoons of extra virgin olive oil coat the flour particles, which slightly limits gluten development just enough to ensure the final crust is tender rather than tough.
- Surface Tension: Allowing the dough to rest for 90 minutes total provides the time for the internal stress to relax, making the final shaping effortless and preventing the dough from snapping back.
| Method | Total Time | Texture | Best For |
|---|---|---|---|
| Standard Rise | 100 minutes | Airy and light | Same day dinner |
| Cold Ferment | 24-48 hours | Complex and tangy | Gourmet entertaining |
| Quick Method | 60 minutes | Denser and soft | Time sensitive meals |
Choosing your method depends entirely on the depth of flavor you wish to achieve. While the 100 minute standard rise is exceptional, a slow, cold ferment in the refrigerator allows enzymes to break down starches into simpler sugars, resulting in a crust that browns with a much more sophisticated, "leopard spotted" appearance typical of high end pizzerias.
Analyzing the base components
Understanding the role of each ingredient allows you to manipulate the outcome with the precision of a pastry chef. Every gram serves a structural or flavor based purpose in the final architecture of the pizza.
| Ingredient | Science Role | Pro Secret |
|---|---|---|
| All purpose flour | Protein framework | Sift it twice to ensure even hydration and a lighter crumb. |
| Warm water (105°F) | Yeast catalyst | Use filtered water to avoid chlorine interfering with yeast growth. |
| Fine sea salt | Fermentation control | Salt strengthens gluten but can kill yeast; add it after the flour. |
| Extra virgin olive oil | Tenderness agent | high-quality oil adds a subtle fruity note to the baked crust. |
The interaction between the 1.5 cups of water and the flour is perhaps the most critical moment. If the water is too hot, you risk damaging the yeast; too cold, and the fermentation will stall, leaving you with a flat, leaden disk.
Aim for a temperature that feels like a warm bath, around 105°F, to provide the optimal environment for the 2.25 teaspoons of yeast to thrive and multiply.
Ingredients for artisan results
To achieve the best homemade pizza dough recipe, quality is non negotiable. Each component should be the best version you can source to ensure the final result feels like a deliberate, artisan creation.
- 1.5 cups warm water (355ml)Why this? Essential for hydrating the flour and activating the yeast.
- Substitute: Whey from cheesemaking for a tangier, protein rich crust.
- 1 tbsp granulated sugar (12g)Why this? Provides instant energy for the yeast and aids in browning.
- Substitute: Honey for a softer crust and floral aromatic profile.
- 2.25 tsp active dry yeast (7g)Why this? The leavening agent responsible for the airy, puffed rim.
- Substitute: Instant yeast (skip the 10 minute bloom and mix directly with flour).
- 3.75 cups all purpose flour (470g)Why this? Provides the perfect protein balance for a tender yet chewy crust.
- Substitute: Bread flour for a much chewier, New York style texture.
- 2 tbsp extra virgin olive oil (30ml)Why this? Adds richness and helps the dough stretch without sticking.
- Substitute: Grapeseed oil for a more neutral flavor profile.
- 1.5 tsp fine sea salt (9g)Why this? Enhances flavor and regulates the pace of yeast fermentation.
- Substitute: Kosher salt (increase to 2 tsp for equivalent salinity).
- 1 tbsp cornmeal (9g)Why this? Prevents sticking and adds a professional, crunchier bottom texture.
- Substitute: Semolina flour for a finer, more traditional Italian finish.
| Original Ingredient | Substitute | Why It Works |
|---|---|---|
| All purpose flour (3.75 cups) | Bread flour (3.75 cups) | Higher protein creates more gluten. Note: Results in a significantly chewier crust. |
| Granulated sugar (1 tbsp) | Agave nectar (1 tbsp) | Similar sugar content for yeast. Note: Dissolves faster in cold water methods. |
| Warm water (1.5 cups) | Light beer (1.5 cups) | Bubbles and malt add depth. Note: Yeast activation may be slightly slower. |
When you are exploring these variations, remember that the hydration level of this pizza dough recipe is carefully balanced. If you find yourself enjoying the process of dough manipulation, you might also find the technique required for a flaky empanada dough to be a rewarding next step in your culinary repertoire, as it uses similar principles of fat to flour ratios.
Executing the perfect stretch
The beauty of this dough lies in the execution. Follow these steps with precision, paying close attention to the visual and tactile cues of the dough as it evolves from a shaggy mass into a professional grade base.
- Combine the 1.5 cups warm water and 1 tablespoon sugar in your stand mixer bowl, whisking until the sugar is fully dissolved.
- Sprinkle the 2.25 teaspoons of active dry yeast over the water and let it sit for 5-10 minutes until foamy and aromatic. Note: If it doesn't foam, your yeast is likely expired.
- Pour in the 2 tablespoons of extra virgin olive oil and the 1.5 teaspoons of fine sea salt, giving it a gentle stir.
- Add approximately 2 cups of the all purpose flour and use the dough hook to mix on low speed until a thick, wet slurry forms.
- Gradually incorporate the remaining 1.75 cups of flour, one half cup at a time, until the dough begins to pull away from the sides.
- Knead the dough on medium low speed for 5-7 minutes until it becomes smooth, elastic, and slightly tacky but not sticky.
- Transfer the dough to a lightly oiled bowl, cover it with a damp cloth, and let it rise for 60-90 minutes until doubled in size.
- Preheat your oven to 475°F (245°C) and dust your baking surface or pizza stone with the 1 tablespoon of cornmeal.
- Gently punch down the dough to release large air bubbles and divide it into two equal portions for two 12 inch pizzas.
- Stretch the dough by hand or roll it out until it is translucent when held up to the light.
- Add your desired toppings and bake for 8-10 minutes until the crust is golden and the cheese is bubbling.
Refining your technique
Even with a mastered recipe, the environment of your kitchen can introduce variables that require a deft touch to correct. Most challenges with dough arise from temperature fluctuations or improper handling during the shaping phase.
Why Your Dough Keeps Shrinking
This is the most common frustration for home cooks. If you find the dough snapping back toward the center as you try to stretch it, the gluten is simply too tense. This happens if the dough hasn't rested long enough after the initial rise or if it was handled too aggressively.
| Problem | Root Cause | Solution |
|---|---|---|
| Dough snaps back | Gluten is overworked or tight | Let it rest, covered, for 10-15 mins before trying again. |
| Bottom is soggy | Moisture trapped in the dough | Use a preheated pizza stone and a light dusting of cornmeal. |
| Crust is too tough | Not enough hydration or over kneaded | Ensure the water measure is precise and stop kneading once smooth. |
The key to a professional finish is the "windowpane test." After kneading, take a small piece of dough and gently stretch it between your fingers. If you can stretch it thin enough to see light through it without it tearing, the gluten structure is perfect.
If it tears quickly, it needs another minute or two of kneading to build that essential strength.
Common Mistakes Checklist
- ✓ Always use a thermometer to check water temperature (105°F is the sweet spot).
- ✓ Never add all the flour at once; humidity can change how much you actually need.
- ✓ Ensure the bowl for rising is in a draft free, warm area of the kitchen.
- ✓ Avoid over topping the pizza, as too many wet ingredients will steam the dough rather than bake it.
- ✓ Let the oven preheat for at least 30 minutes, even after it reaches temperature, to ensure the stone is hot.
Adjusting the proportions
This recipe is designed for a standard yield, but the sophisticated cook knows how to adapt these ratios for different scales of entertaining. Whether you are hosting a large garden party or a quiet dinner for two, the chemistry remains the same.
Scaling Down (Making a single small pizza) When cutting the recipe in half, use a smaller bowl for the rise to ensure the dough doesn't dry out. You will use 3/4 cup water and approximately 1 7/8 cups of flour.
Since yeast packets are usually measured for larger batches, still use at least 1.5 teaspoons of yeast to ensure a robust rise in the smaller volume of dough.
Scaling Up (For a crowd) When doubling or tripling the recipe, it is often best to work in batches rather than overloading a standard stand mixer. If you do double it in one bowl, be sure to increase the kneading time by 2-3 minutes to ensure every flour particle is fully hydrated.
For the salt and spices, I find that 1.5x the amount is usually sufficient when doubling, as the flavor carries more efficiently in larger masses.
| Servings | Water | Flour | Yeast | Pan Size |
|---|---|---|---|---|
| 4 people | 0.75 cups | 1.85 cups | 1.5 tsp | 12 inch stone |
| 8 people | 1.5 cups | 3.75 cups | 2.25 tsp | Two 12 inch stones |
| 16 people | 3.0 cups | 7.5 cups | 4.5 tsp | Four 12 inch stones |
If you are scaling up for a party, consider preparing the dough the day before. The cold fermentation method mentioned earlier is particularly useful for large groups, as you can pull the pre portioned dough balls out of the fridge an hour before you need to stretch them, allowing the dough to come to room temperature while you prep your toppings.
Dough myths debunked
There are several persistent misconceptions in the culinary world that can prevent a cook from achieving the artisan results they desire. Let's clarify the reality of these techniques.
Adding oil to the water "waterproofs" the flour. This is a common myth. While we add oil for flavor and texture, it doesn't actually prevent the flour from hydrating.
However, adding oil too early can slightly slow down the yeast's access to the sugar, which is why we bloom the yeast in water and sugar first before introducing the fats.
The dough must rise in a "hot" place. High heat (above 90°F) actually encourages the production of off flavors and can make the yeast work too quickly, resulting in a weak structure.
A steady, room temperature environment (around 70-75°F) is much better for developing a complex flavor profile and a sturdy crumb.
Sugar is only for flavor. In many breads, sugar is optional, but in this dough, it serves as a critical browning agent. Because home ovens don't reach the 800°F temperatures of commercial pizza ovens, the sugar helps the crust achieve a beautiful mahogany color in the much shorter 8-10 minute bake time.
Preservation and sustainability
One of the markers of a refined kitchen is the ability to manage ingredients with zero waste. This dough is incredibly resilient and lends itself well to several storage methods.
Storage GuidelinesRefrigerator: You can store the raw dough in a lightly oiled, airtight container for up to 3 days. The flavor will actually improve over the first 48 hours.
Freezer: For long term storage, portion the dough into balls, coat lightly in oil, and wrap tightly in plastic wrap before placing in a freezer bag. It will stay fresh for up to 3 months. Thaw in the fridge overnight before use.
Zero Waste Techniques If you find yourself with leftover scraps after trimming your pizza rounds, do not discard them. These fragments can be twisted into thin breadsticks, brushed with olive oil and herbs, and baked alongside the pizza for a delightful appetizer.
Alternatively, small leftover balls of dough can be fried in a shallow pan of oil and dusted with cinnamon sugar for a quick, rustic dessert. Even the cornmeal used on the baking sheet can be sifted and saved for the next bake, provided it hasn't been scorched.
Artistic presentation levels
To truly master the best homemade pizza dough recipe, one must consider the final aesthetic. The way the dough is shaped and baked determines whether it looks like a casual snack or a five star entree.
Level 1: The Simple Rustic This is a thick crust, rectangular style often baked in a sheet pan. The focus is on comfort and volume. The dough is pressed into the corners of a well oiled pan, resulting in a "fried" bottom texture that is incredibly satisfying.
It is perfect for a casual family gathering where quantity is key.
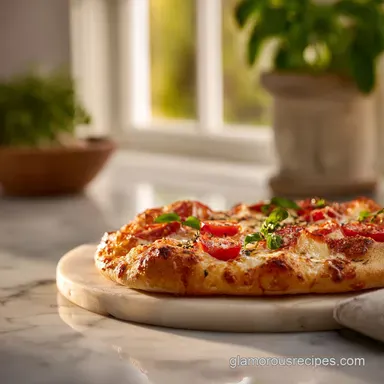
Level 2: The Polished Artisan Achieved using a pizza stone and the hand stretching technique. The crust is thin, with a defined, airy rim (the cornicione). It is topped with restraint fresh mozzarella, a drizzle of oil, and maybe a few leaves of basil added after the bake.
This level demonstrates a clear understanding of balance and heat management.
Level 3: The Restaurant Masterpiece At this level, we utilize a very over high heat environment and perhaps a specialized pizza oven. The dough is stretched to the point of translucency in the center. The rim is charred in spots (leopard spotting) while the interior remains soft and steamy. It is served on a wooden peel, perhaps accompanied by a creamy broccoli bake if you are serving a full multi course dinner.
| Level | Shaping Tool | Heat Source | Visual Cue |
|---|---|---|---|
| Simple | Rolling pin | Standard sheet pan | Uniform golden brown |
| Polished | Hand stretched | Preheated stone | Puffed, airy rim |
| Restaurant | Gravity stretch | 500°F+ stone/steel | Charred spots, thin base |
By focusing on these nuances the temperature of the water, the duration of the rise, and the precision of the bake you transform a simple collection of ingredients into a sophisticated culinary experience.
This dough is more than just a base; it is the manifestation of technique and care, ensuring that every slice served from your kitchen is a testament to the artisan spirit.

Recipe FAQs
What is the secret to making good pizza dough?
Use a thermometer to ensure your water is exactly 105°F. This precise temperature is the sweet spot for activating your yeast without damaging the cells, ensuring a perfect rise.
Which pizza is best for diabetics?
Thin crust homemade pizza with controlled toppings is generally the best choice. By making it at home, you avoid hidden sugars in store-bought sauces and can load the pizza with non-starchy vegetables while keeping the portion size moderate.
What is the 55 rule for pizza dough?
No, this is a common misconception. There is no 55 rule; instead, success relies on preheating your oven or stone for at least 30 minutes and using 105°F water for your yeast.
What kind of pizza can CKD patients eat?
Homemade pizza with a low-sodium crust and fresh vegetable toppings is often suitable. Because you control the ingredients, you can omit high potassium or high phosphorus items often found in commercial processed pizzas.
How to ensure a crispy crust without a soggy center?
Avoid over topping your pizza with wet ingredients. Excess moisture creates steam, which prevents the crust from crisping, and if you enjoyed mastering this hydration balance, see how the same principle works in our silky fufu recipe.
How to know if my yeast is alive?
Check for a foamy layer after 5 10 minutes of sitting in the warm water and sugar mixture. If the surface does not look foamy or bubbly, the yeast is inactive and will not provide the necessary lift for your dough.
How to incorporate the flour without making the dough tough?
Add only half of the flour initially, then gradually incorporate the rest. Adding all the flour at once can lead to a dry, dense dough because varying kitchen humidity levels often mean you will need slightly less flour than the recipe total.
Homemade Pizza Dough Recipe
Ingredients:
Instructions:
Nutrition Facts:
| Calories | 256 kcal |
|---|---|
| Protein | 6.3 g |
| Fat | 3.4 g |
| Carbs | 47.0 g |
| Fiber | 1.6 g |
| Sugar | 1.5 g |
| Sodium | 435 mg |
