Gluten Free Cinnamon Rolls: Fluffy and Velvety
- Time: Active 40 minutes, Passive 1 hours 30 mins, Total 2 hours 10 mins
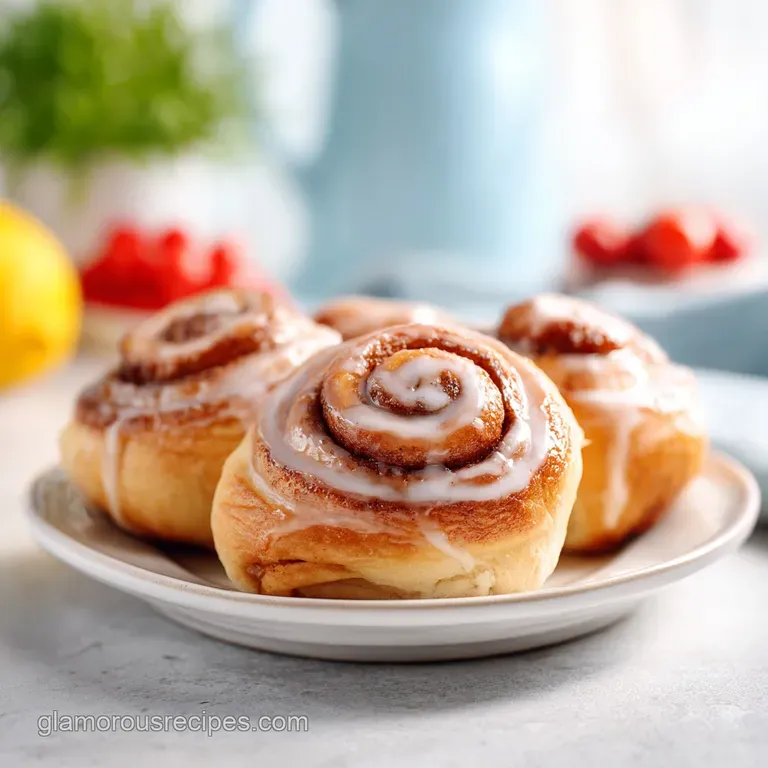
- Flavor/Texture Hook: Fluffy, velvety crumb with a buttery, cinnamon sugar shatter
- Perfect for: Slow weekend mornings, holiday brunches, or proving that gluten-free can actually be indulgent
- Why These Are Best Gluten Free Cinnamon Rolls
- Secrets to Fluffy Gluten Free Dough
- Essential Recipe Numbers and Measurements
- Selecting Your High Quality Ingredients
- Must Have Tools for Success
- Step by Step Baking Guide
- Fixing Common Texture Problems
- Easy Ingredient Swap Ideas
- Storage and Freezing Tips
- Elegant Garnish and Styling
- Gluten Free Cinnamon Rolls FAQs
- 📝 Recipe Card
Why These Are Best gluten-free Cinnamon Rolls
Imagine the smell of warm cinnamon and browning butter swirling through your kitchen on a rainy Saturday. That first bite where your teeth sink through a velvety layer of maple cream cheese frosting into a pillowy, soft center is exactly what we're going for here.
I remember the first time I tried making these years ago; it was a disaster. I ended up with something that looked like a hockey puck and tasted like cardboard. It was frustrating because all I wanted was that classic bakery experience without the stomach ache afterward.
But then I started experimenting with hydration and binders. I realized that gluten-free flour is like a thirsty sponge; if you don't give it enough liquid and the right "scaffold" to climb, it just collapses. This version is the result of dozens of "mistakes" that turned into lessons.
We aren't just making a substitute; we are making something that stands on its own. You'll get those beautiful, distinct swirls and a crumb that doesn't crumble into dust the moment it touches a fork.
This recipe is about reclaiming the joy of a messy, sticky breakfast. We're using a blend of high-quality flours and a secret weapon psyllium husk to give us that "pull apart" quality we all crave. It’s honestly better than any pre packaged frozen option you’ll find at the store.
Let's get into the mechanics of how we make this magic happen in your own oven.
Secrets to Fluffy gluten-free Dough
Psyllium Gelation: Psyllium husk creates a mucilaginous gel that mimics the elastic properties of gluten, allowing the dough to expand without tearing.
Yeast Vitality: Using honey instead of refined sugar provides immediate glucose for the yeast, resulting in a faster, more vigorous rise in a dense environment.
Hydration Ratio: A higher liquid to flour ratio than traditional dough is required because gluten-free starches absorb significantly more water during the "bloom" phase.
Thermal Kick: Starting the bake at a precise 180°C ensures the steam trapped in the psyllium matrix expands rapidly before the structure sets.
| Method | Time | Texture | Best For |
|---|---|---|---|
| Fast (No Yeast) | 45 minutes | Biscuit like, dense | Last minute cravings |
| Classic (This Recipe) | 2 hours 10 mins | Airy, pull apart, soft | Authentic bakery quality |
| Overnight Proof | 8-12 hours | Deep flavor, very tender | Holiday mornings |
If you find yourself loving the way this dough behaves, you should definitely try the technique in my gluten-free Carrot recipe, which also focuses on moisture retention. The way we balance fats and binders here is the key to avoiding that gritty mouthfeel people often associate with gluten-free treats.
Essential Recipe Numbers and Measurements
| Component | Science Role | Pro Secret |
|---|---|---|
| 500g GF Flour | Structural base | Weigh it! Volume measurements are the enemy of consistency in GF baking. |
| 15g Psyllium Husk | Elasticity agent | Use powder, not whole husks, for a smoother, less gritty dough texture. |
| 240ml Whole Milk | Fat and hydration | Keep it at 110°F; any hotter and you'll kill the yeast; any colder and it won't wake up. |
| 10g Instant Yeast | Leavening | Ensure it is fresh; if it doesn't foam in the milk, start over immediately. |
Selecting Your high-quality Ingredients
- 500g gluten-free Flour Blend: Use a high-quality blend like King Arthur or Cup4Cup. Why this? These blends contain stabilized starches that mimic wheat's structural integrity.
- Substitute: 500g DIY blend (Rice flour, potato starch, tapioca).
- 15g Psyllium Husk Powder: This is your gluten replacement. Why this? It provides the "stretch" needed to roll the dough without it snapping.
- Substitute: 15g Xanthan gum (Note: results will be less "bread like" and more "cake like").
- 10g Instant Yeast: For a reliable rise. Why this? Instant yeast works faster in the heavy, starch rich environment of GF dough.
- Substitute: 12g Active Dry Yeast (must be proofed in milk for 10 minutes first).
- 240ml Warm Whole Milk (110°F): Provides moisture and richness. Why this? The fat in whole milk creates a more tender, velvety crumb.
- Substitute: 240ml Full fat oat milk for a dairy-free version.
- 85g Unsalted Butter: Melted and cooled. Why this? Adds essential lipids for flavor and a soft mouthfeel.
- Substitute: 85g Vegan butter sticks.
- 50g Honey: To feed the yeast and add moisture. Why this? Honey is a humectant, meaning it keeps the rolls fresh for longer.
- Substitute: 50g Maple syrup.
- 2 Large Eggs: Room temperature. Why this? Eggs provide protein structure and help the rolls "climb" the pan.
- Substitute: 1/2 cup Carbonated water (less structural, but works).
- 1 tsp Apple Cider Vinegar: To react with the yeast. Why this? The acidity strengthens the dough's "walls" during the rise.
- Substitute: 1 tsp Lemon juice.
- 1 tsp Salt: To balance the sweetness. Why this? Salt tightens the protein structure in the eggs and flour.
- Substitute: Sea salt.
- 100g Coconut Sugar: For the filling. Why this? It has a deep, caramel like flavor that pairs beautifully with cinnamon.
- Substitute: 100g Brown sugar.
- 2 tbsp Ground Cinnamon: The star of the show. Why this? High oil content cinnamon provides the best aroma.
- Substitute: Apple pie spice.
- 55g Softened Butter: For spreading on the dough. Why this? Creates the fat barrier for those distinct, flaky swirls.
- Substitute: 55g Coconut oil (solidified).
- 115g Cream Cheese: For the frosting. Why this? Provides a tangy contrast to the sweet roll.
- Substitute: 115g Cashew cream cheese.
- 60ml Maple Syrup: For the glaze. Why this? Adds a complex sweetness that refined sugar lacks.
- Substitute: 60ml Honey.
- 60g Powdered Sugar: Sifted. Why this? Ensures the glaze is perfectly smooth without lumps.
- Substitute: 60g Coconut sugar (blitzed in a blender).
- 1 tsp Vanilla Bean Paste: For flavor. Why this? The little black specks add an artisan, high end look.
- Substitute: 1 tsp Vanilla extract.
Must Have Tools for Success

You don't need a professional bakery setup, but a few specific tools make this process so much easier. First, a digital kitchen scale is non negotiable. Flour density varies wildly; if you use a cup, you might end up with 20% more flour than I did, which leads to dry rolls.
A stand mixer, such as a KitchenAid with the paddle attachment, is also a life saver. gluten-free dough is incredibly sticky think of it more like a thick paste than a traditional wheat dough. Mixing it by hand is a workout you probably don't want.
Finally,, grab some parchment paper and a rolling pin. We’ll be rolling the dough between sheets of parchment to prevent it from sticking to your counter. Trust me, trying to flour a counter for GF dough usually just results in a dry, messy disaster.
step-by-step Baking Guide
Phase 1: Blooming Yeast
Combine 240ml warm milk (110°F), 10g instant yeast, and 50g honey in your mixer bowl. Note: Wait 5-8 minutes until it is frothy and smelling like a brewery.
Phase 2: Structuring Dough
Add 500g GF flour, 15g psyllium powder, 85g melted butter, 2 eggs, 1 tsp apple cider vinegar, and 1 tsp salt to the bowl. Note: Use the paddle attachment on medium speed for 5 minutes until a smooth, tacky dough forms.
Phase 3: Tension and Shaping
Place the dough between two large sheets of parchment paper. Roll into a rectangle (about 12x16 inches) until even and about 1cm thick.
Phase 4: Filling the Swirls
Spread 55g softened butter over the dough, then sprinkle the mix of 100g coconut sugar and 2 tbsp cinnamon evenly. Note: Leave a 1 inch border at the top to help the roll seal.
Phase 5: The Precise Cut
Slowly roll the dough into a log using the bottom parchment to help lift it. Cut into 12 even pieces until the swirls are visible and clean.
Chef's Tip: Use unflavored dental floss to "cross cut" the rolls. It prevents the delicate dough from being squashed flat by a knife.
Phase 6: The Final Rise
Place rolls in a buttered 9x13 inch pan. Cover with a warm, damp cloth and let rise for 45-60 minutes until they have puffed and are touching each other.
Phase 7: Ascension and Heat
Preheat your oven to 180°C. Bake for 25-30 minutes until the tops are golden brown and the sugar is bubbling.
Phase 8: Silky Maple Cream Glaze
Whisk 115g cream cheese, 60ml maple syrup, 60g powdered sugar, and 1 tsp vanilla bean paste. Spread over the rolls until the frosting begins to melt into the warm crevices.
Fixing Common Texture Problems
Handling Sticky Dough Problems
If your dough feels more like muffin batter than bread dough, don't panic. gluten-free dough needs to be much wetter than wheat dough to stay soft after baking. If it's truly unmanageable, chill it in the fridge for 20 minutes.
The starches will hydrate further, and the butter will firm up, making it much easier to roll.
Fixing Densely Packed Rolls
If your rolls didn't rise and feel like stones, the culprit is usually the temperature of your liquids. If the milk was too hot (above 120°F), you likely killed the yeast. If it was too cold, they just need more time.
Try placing the pan in a turned off oven with a bowl of boiling water on the rack below to create a makeshift proofing box.
| Problem | Root Cause | Solution |
|---|---|---|
| Gummy Center | Underbaked or too much psyllium | Bake 5 mins longer; check internal temp is 190°F (88°C). |
| Dry / Crumbly | Too much flour or no psyllium | Use a scale for flour; never skip the psyllium husk. |
| No Rise | Dead yeast or cold room | Check yeast expiration; use the warm oven "proof box" method. |
Common Mistakes Checklist ✓ Always weigh your flour in grams rather than using measuring cups. ✓ Ensure eggs are at room temperature to avoid shocking the yeast. ✓ Don't skip the apple cider vinegar; the acid is crucial for the rise.
✓ Let the rolls cool for at least 10 minutes before frosting or it will just run off. ✓ Use a sharp serrated knife or floss to avoid compressing the dough.
Easy Ingredient Swap Ideas
Scaling this recipe is straightforward, but remember that gluten-free chemistry is delicate. If you are cutting the recipe in half, use one whole egg and one egg yolk to maintain the protein to fat ratio.
If you are doubling the batch, increase the yeast to 15g rather than 20g; too much yeast in a large batch can lead to a "yeasty" aftertaste and a collapse in the oven.
For those of you looking for a different breakfast vibe, you might enjoy the flavor profile of my Cinnamon Rolls recipe, which uses a slightly different hydration technique for wheat based dough.
| Original Ingredient | Substitute | Why It Works |
|---|---|---|
| Whole Milk | Coconut Milk (Full fat) | High fat content maintains the velvety crumb texture. |
| Butter | Refined Coconut Oil | Solidifies at room temp, allowing for the same layering effect. |
| Eggs | Flax "Eggs" | Adds fiber and binding, though the rise will be significantly less airy. |
Storage and Freezing Tips
These rolls are at their absolute peak about 15 minutes after they leave the oven. However, because of the honey and psyllium, they stay moist much longer than most GF bread. You can store them in an airtight container at room temperature for up to 2 days.
To reheat, microwave for 15-20 seconds to soften the starches, or pop them in a 150°C oven for 5 minutes.
To freeze, I recommend freezing them individually after they are baked but before they are frosted. Wrap each roll tightly in plastic wrap and then foil. They will stay fresh for up to 2 months.
When the craving hits, thaw a roll at room temperature for an hour, warm it up, and then hit it with a fresh batch of maple cream cheese frosting. It’s like having a bakery in your freezer.
For a completely different texture profile that also freezes beautifully, check out my Applesauce Oatmeal Cookies recipe. The moisture from the fruit serves a similar purpose to the honey in these rolls.
Elegant Garnish and Styling
Presentation is where you turn a simple breakfast into an artisan experience. For these rolls, focus on color balance. The deep, burnished bronze of the baked dough, the stark white of the glaze, and a few strategic accents make all the difference.
- Warm White Accents: Apply the frosting while the rolls are still slightly warm. This allows the edges to melt and become translucent, creating a beautiful contrast against the thicker, opaque white peaks in the center.
- Cinnamon Dusting: Just before serving, lightly sift a tiny amount of extra cinnamon over the top. The reddish brown powder against the white frosting creates a "bakery window" look.
- Citrus Zest: Add a tiny pinch of orange zest on top of each roll. The bright orange pop provides a visual "zing" that hints at the complexity of the maple and vanilla flavors.
Myths often suggest that gluten-free dough cannot be handled or rolled. That’s simply not true; with the right hydration, it’s quite pliable. Another myth is that you must use xanthan gum for everything.
In this recipe, the psyllium husk is actually superior for bread like structures because it provides a more authentic, less "rubbery" chew. Right then, let's get baking trust me, your kitchen is about to smell incredible.

gluten-free Cinnamon Rolls FAQs
Are Pillsbury cinnamon buns gluten-free?
No, Pillsbury cinnamon buns are not gluten-free. Their standard refrigerated dough products contain wheat flour and are manufactured on shared equipment, posing a cross contamination risk.
What is the best flour to use for gluten-free cinnamon rolls?
Use a high-quality commercial 1:1 gluten-free blend containing xanthan gum or rely on psyllium husk. A blend provides a balanced starches and proteins, but the psyllium husk in this recipe is critical for mimicking gluten's elasticity.
Does Cinnabon have a gluten-free option?
No, Cinnabon currently does not offer any officially certified gluten-free cinnamon rolls. Their entire menu is based on traditional wheat flour products, so homemade is the only safe alternative for celiac or gluten sensitive individuals.
Are any Pillsbury products gluten-free?
Yes, Pillsbury offers a limited selection of certified gluten-free products, mainly boxed cake and brownie mixes. Always check the packaging label carefully, as the majority of their refrigerated dough and frozen items contain wheat.
How do I prevent my gluten-free rolls from becoming dry hockey pucks?
Increase the hydration level significantly and use a strong binder like psyllium husk powder. gluten-free starches are thirsty; more liquid combined with the structure provided by psyllium gel keeps the crumb soft and prevents crumbling.
How to achieve a stretchy dough without gluten?
Activate the psyllium husk by thoroughly mixing it with the warm liquid first to form a tight gel. Mastering this stable emulsion technique, where you hydrate the fibers, is the secret to achieving stretch, similar to how stable emulsions are formed in our Edible Cookie Dough recipe for One.
Should I use whole wheat pastry flour if I am only mildly sensitive to gluten?
No, avoid standard wheat flours entirely if you have celiac disease or a high sensitivity. Even small amounts of wheat, including pastry flour, will trigger a reaction; stick to certified gluten-free blends or single starches for safety.
gluten-free Cinnamon Rolls

Ingredients:
Instructions:
Nutrition Facts:
| Calories | 418 kcal |
|---|---|
| Protein | 5.4g |
| Fat | 14.8g |
| Carbs | 66.2g |
| Fiber | 3.8g |
| Sugar | 24.5g |
| Sodium | 315mg |
