Sugar Cookies: Flawless Vanilla Cut-Outs That Hold Shape
- The Baker’s Dozen: Flawless Vanilla Cut-Out Sugar Cookies (That Hold Their Shape!)
- The Quest for the Perfect Cut-Out Cookie: Why This Recipe is Essential
- Essential Pantry Checklist: Ingredients for Flawless Dough
- The Science of the Snap: Mastering Cookie Texture and Structure
- From Dough to Deck: Step-by-Step Shaping and Baking Method
- Troubleshooting Your Bake: Expert Tips and Fixes for Common Issues
- Extending the Shelf Life: Storage and Freezing Guide
- Finishing Touches: Decorating, Pairings, and Simple Variations
- Recipe FAQs
- 📝 Recipe Card
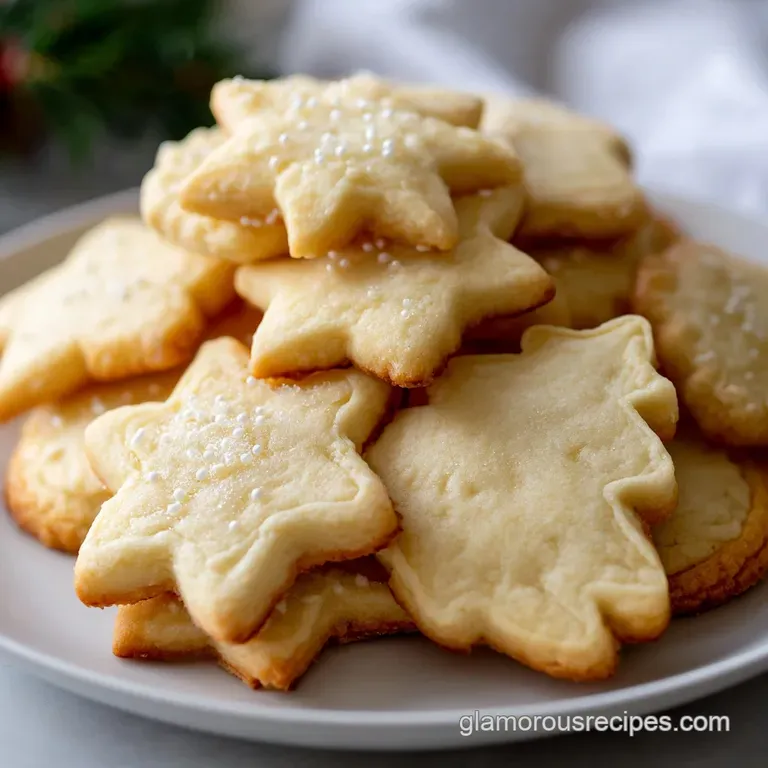
The Baker’s Dozen: Flawless Vanilla Cut-Out Sugar Cookies (That Hold Their Shape!)
That smell. Oh my gosh, the smell of warm vanilla and rich butter hitting you as the oven door cracks open it's the true scent of a happy kitchen, isn't it? When I smell that, I know I’m about to pull out a perfect tray of crisp, buttery Sugar Cookies .
This specific recipe is my secret weapon for baking projects, especially when I need those clean, architectural edges.
Honestly, I used to dread making them because my attempts always spread into messy, shapeless blobs that required zero decorating skill. But these Sugar Cookies are different; they are engineered for stability.
This technique is fast, uses ingredients you always have, and the dough never fails, making it a lifesaver when you need a perfectly uniform canvas ready for decoration in a flash.
Forget the sticky kitchen counter and the disappointment of dough failure. We are bypassing all the common issues and going straight to crisp, stable, and utterly delicious Sugar Cookies that truly hold their shape.
Let’s crack on with the method that guarantees gorgeous results every time you bake.
The Quest for the Perfect Cut-Out Cookie: Why This Recipe is Essential
Beyond the Basic Biscuit: The Appeal of Vanilla Sugar Cookies
A lot of recipes for cut-out Sugar Cookies focus purely on structure, often sacrificing flavour for shape. That's a mistake! Who wants to decorate a beautifully cut biscuit only to find it tastes like bland cardboard?
My version has a warm, rich vanilla core, balanced by just enough salt to keep it from tasting sugary sweet. We want flavour and structure. It’s a very simple formula, but the exact process makes all the difference.
Achieving Zero Spread: Guaranteeing Sharp Edges
The key to preventing spread is two-fold: temperature and flour ratio. If your butter is too warm when you mix it, or if your cut-out shapes hit the heat of the oven while still soft, the fat melts too quickly, causing the cookie to relax and lose its edge. We control this meticulously with a double chill method.
This is non-negotiable for stable Sugar Cookies that look exactly like the cutter you used. That second chill firms up the butter after rolling, locking the shape forever.
Quick Start Guide: Timing and Difficulty Level
This is a medium difficulty bake, primarily because it relies on patience and temperature control, not complex technique. You will need to plan ahead for chilling, but the active mixing time is minimal.
| Stage | Time Estimate | Notes |
|---|---|---|
| Prep Time | 20 minutes | Active mixing and shaping. |
| Chilling Time (Minimum) | 2 hours 15 minutes | The first chill must be 2 hours minimum. |
| Cook Time | 10– 12 minutes | Per batch. |
| Total Time | Approx. 3 hours | Worth every second for perfect Sugar Cookies . |
Essential Pantry Checklist: Ingredients for Flawless Dough
If you’re anything like me, you probably have all of these items on hand right now. This is a brilliant, basic recipe for Sugar Cookies that relies on high-quality, simple ingredients.
| Ingredient | Role in the Cookie | Viable Substitution |
|---|---|---|
| Unsalted Butter | Fat; provides flavour and tender texture. | Firm, high-quality baking margarine or vegetable shortening (equal amount). |
| Granulated Sugar | Sweetness; creates crispness through the creaming process. | Fine ground caster sugar. Do not use brown sugar here. |
| Large Egg | Binder and richness. | 1/4 cup applesauce or 1 tablespoon flaxseed meal mixed with 3 tablespoons water (Flax Egg). |
| Vanilla Extract | Flavour depth. | Half the amount of pure almond extract for a classic holiday flavour, or scrape half a vanilla bean. |
| All-Purpose Flour | Structure and stability. | Measure for-measure gluten-free blend (make sure it contains xanthan gum). |
| Baking Powder | Slight leavening; helps maintain tenderness. | This is required for tender Sugar Cookies . Do not substitute or omit. |
The Science of the Snap: Mastering Cookie Texture and Structure
Getting that perfect "snap" requires a subtle understanding of how fat, sugar, and flour interact. We aren't aiming for the deep chewiness of, say, Chocolate Chip Cookies: Brown Butter Recipe for Thick Chewy Results , but rather a firm yet tender bite.
The Crucial Temperature of Your Butter (It's Not Just Softened)
This is the most crucial tip for non-spreading Sugar Cookies . You want your butter slightly softened, not truly room temperature, and absolutely not greasy. When you press it with a finger, it should make a slight indent, but the butter should still feel firm and hold its shape.
If it’s too warm, you’ve introduced too much air during creaming, and your cookies will spread disastrously.
Granulated Sugar vs. Powdered Sugar: Which to Use and Why
Many recipes for delicate Sugar Cookies call for powdered sugar because it yields a softer, almost melt-in-your mouth texture. However, for cut-out cookies that must hold their shape for decorating, granulated sugar is superior.
The sharp edges of the granulated sugar crystals help "cut" through the butter during the creaming process, creating microscopic air pockets. This structure is essential for a crisp bake and provides the necessary foundation for stable Sugar Cookies .
Deepening the Flavor Profile: Vanilla Beans vs. Extract
I always recommend using pure vanilla extract here. It offers a cleaner, deeper flavour than imitation extracts. If you want to be extra fancy, scraping the seeds of half a vanilla bean into the butter and sugar mixture takes these Sugar Cookies straight over the top.
The difference in flavour depth is huge, making them taste truly artisanal.
Simple Flour and Fat Substitutions (dairy-free Options)
If you are going dairy-free, replacing the butter with vegetable shortening is your best bet for texture stability. Shortening has a higher melting point than butter, meaning your Sugar Cookies will resist spreading even better.
Just know that you lose some of that classic butter richness, so you might need to add a pinch more salt to balance the flavour. If using gluten-free flour, remember that the dough absorbs liquid differently.
If it feels too crumbly after the initial mix, add a tablespoon of milk or water until it just barely holds together.
From Dough to Deck: step-by-step Shaping and Baking Method
This process is designed to minimize gluten development and maximize structural integrity. Pay attention to the clock during the chilling phases.
Mixing the Dough: Avoiding Overworking the Gluten
Once your slightly firm butter and sugar are creamed until fluffy, you must add the dry ingredients gradually and mix only until the dough just comes together. Stop the mixer immediately when the last streak of flour disappears.
Overworking the dough is the number one cause of tough, chewy Sugar Cookies . We aren't making bread; we want delicate structure, not elastic chew.
The Non-Negotiable Step: Why Chilling Time Matters
You need to wrap the dough disks tightly and chill them for a minimum of two hours. Why? Chilling allows the flour to fully hydrate without the need for additional mixing, tenderizing the dough. Crucially, it hardens the butter.
When the cold butter hits the hot oven, it takes longer to melt, setting the cookie structure before the fat can spread. This double chilling step ensures the edges of these cut-out Sugar Cookies remain laser sharp.
Chef’s Note: Never try to rush the chilling process. If you put warm dough in the oven, you're guaranteed to get flat, misshapen Sugar Cookies .
Rolling and Cutting Techniques for Uniform Thickness
Rolling the dough between two sheets of parchment paper is a game changer. This eliminates the need for dusting flour, preventing your dough from drying out and becoming dense. Roll consistently to 1/4 inch thickness.
Use rolling pins with adjustable guides if you have them it’s the best way to ensure uniform baking for every single one of your Vanilla Sugar Cookies . Once cut, transfer the shapes to a lined baking sheet.
Then, here's the kicker: put the baking sheet of cut shapes back in the fridge or freezer for 15 minutes. This second chill is the secret weapon for preventing any distortion.
Perfect Timing: Knowing When Your Cookies are Done
Bake your chilled Sugar Cookies at 350°F (175°C) for 10 to 12 minutes. You are looking for edges that are barely set and just beginning to turn the palest shade of gold. The centers should still look slightly soft and pale.
If they are turning golden brown, you have overbaked them! Pull them out, and let them cool on the sheet for 5 minutes. They will finish cooking with the residual heat, guaranteeing tender results.
Troubleshooting Your Bake: Expert Tips and Fixes for Common Issues
Even seasoned bakers have moments of panic. Don’t worry; fixing issues with Sugar Cookies is usually straightforward.
Why Did My Cookies Spread? (And How to Fix It Mid-Bake)
If your cookies are spreading during the first few minutes of baking, the dough was likely too warm. This means your butter was too soft initially, or the dough wasn't chilled long enough.
The Fix: If you catch spreading early, quickly open the oven, and use a metal spatula or the back of a large spoon to gently push the edges of the spreading cookies back towards the center.
This is a temporary cosmetic fix but can save your batch of cut-out Sugar Cookies in a pinch. Next time, chill longer!
Preventing Tough or Dry Cookies
Tough cookies are caused by overworking the dough, which develops too much gluten, or by adding too much dry flour during the rolling process. Dry cookies are caused by overbaking. The Fix: Remember to mix the flour just until combined. Use parchment paper for rolling to skip the excess dusting flour. And for the love of all that is sweet, pull those Sugar Cookies out of the oven when they are still pale! If you want a chewy texture instead, try a recipe for Snickerdoodle Cookies: The Perfect Chewy Tangy Recipe next time.
Recommended Tools for the Best Results (Rolling Pins and Mats)
You don't need much, but a few key items elevate your baking results instantly. A silicone baking mat provides great non-stick release and even heat distribution.
An adjustable rolling pin (the kind with plastic rings that control thickness) is absolutely essential for creating uniform 1/4 inch Sugar Cookies . Uniform thickness means uniform baking, which means no burnt edges and raw centers.
Extending the Shelf Life: Storage and Freezing Guide
One of the best things about making Sugar Cookies is how beautifully they store, both baked and unbaked.
Keeping Baked Cookies Fresh and Crisp
Baked, plain Sugar Cookies can be stored in an airtight container at room temperature for up to two weeks. To maintain that fresh snap, make sure they are completely cool before storing, as any residual warmth will introduce moisture and make them soft.
If they do soften over time, you can refresh them by baking them on a sheet pan for 3– 5 minutes at 300°F (150°C).
Freezing Unbaked Dough for Later Use
This is my favourite trick for future baking sessions! Wrap the unbaked dough disks tightly in plastic wrap, then place them inside a freezer bag. They will keep perfectly for up to three months. Thaw overnight in the fridge before rolling, cutting, and chilling again.
You can also roll out the dough, cut the shapes, and freeze the cutouts on a tray until solid. Transfer frozen cutouts to a bag and bake directly from frozen, adding about 2 minutes to the bake time.
Tips for Storing Decorated Sugar Cookies
If you’ve decorated your Sugar Cookies with royal icing, wait until the icing is completely rock hard (usually 6– 8 hours, or overnight). Store the cookies in a single layer in a sturdy airtight container.
If you must stack them, use wax paper or parchment paper between the layers to protect the delicate icing work. Avoid freezing iced cookies, as the condensation during thawing can ruin the detailed work.
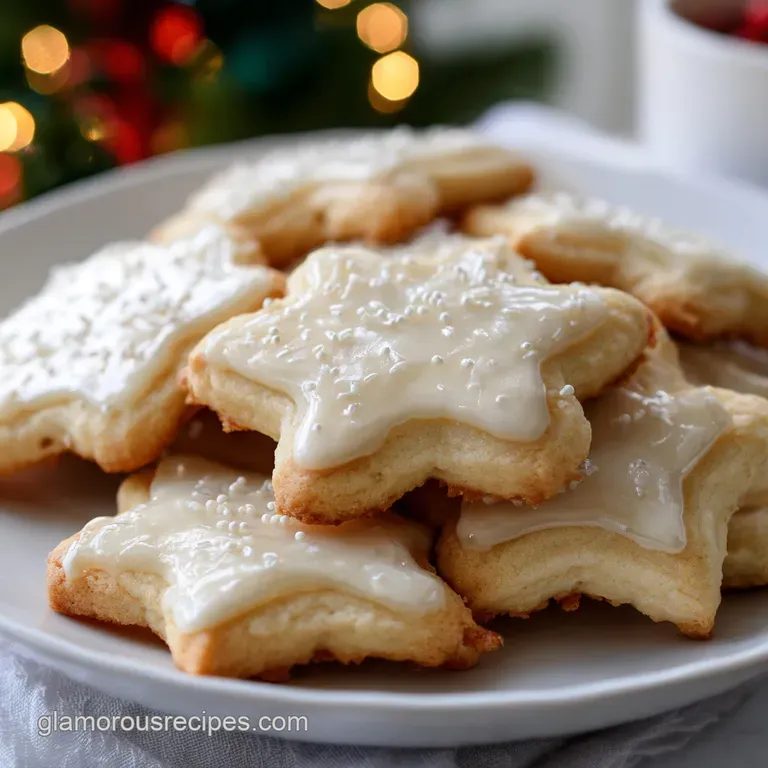
Finishing Touches: Decorating, Pairings, and Simple Variations
The ultimate joy of making perfect Sugar Cookies is decorating them! But even if you just want to eat them plain, they are truly delightful.
If you are ready for a decorating frenzy, nothing beats Royal Icing for beautiful, hard setting designs. For something quicker, a simple powdered sugar glaze works perfectly and sets fast enough to stack. For the holidays, try adding a sprinkle of cinnamon and sugar before baking for a twist that’s almost like a thin Peanut Butter Cookies: The Quintessential Chewy Recipe — wait, that's not right. Scratch that. Stick to vanilla and maybe some lemon zest!
For simple variation, try swapping the vanilla extract for 1/2 teaspoon of pure almond extract. This creates an intense, beautiful almond flavour that is classic for many holiday Sugar Cookies .
I love serving these crisp biscuits with a strong cup of Earl Grey tea; the bitterness of the tea cuts through the cookie’s sweetness perfectly, making you crave another one immediately.
No matter how you finish them, these flawless vanilla cut-out Sugar Cookies are guaranteed winners. Happy baking, my friend!

Recipe FAQs
Why did my cut-out cookies spread and lose their defined shape?
Spreading is usually caused by either over creaming the butter and sugar, incorporating too much air, or insufficient chilling time. Ensure your butter is cool room temperature, and importantly, chill the cut-out shapes on the baking sheet for at least 10-15 minutes before baking to solidify the fats.
My cookies turned out tough and dry. What went wrong?
Tough cookies are typically the result of overmixing the dough once the flour is added, which develops the gluten too much. For dry cookies, ensure you are measuring the flour correctly by spooning it into the measuring cup and leveling it off, rather than scooping directly from the bag.
Can I make this recipe gluten-free, or substitute the flour?
Yes, this recipe works very well when substituting the all-purpose flour with a high-quality 1:1 gluten-free baking blend that contains xanthan gum. You may find the dough slightly more delicate or crumbly, so handle the cut shapes gently when transferring to the baking sheet.
How long can I store the raw cookie dough before baking?
The prepared cookie dough can be wrapped tightly in plastic wrap and refrigerated for up to 3 days. If you need longer storage, the dough freezes extremely well for up to 3 months; just thaw it overnight in the refrigerator before rolling.
Do I need to soften the butter, or should I use it straight from the fridge?
For the creaming method used in this recipe, the butter should be softened to room temperature, meaning it yields slightly to pressure but holds its shape. If the butter is too warm or melted, the cookies will spread excessively when baked.
Can I freeze the baked and undecorated sugar cookies?
Absolutely, baked sugar cookies freeze beautifully. Once they are completely cool, place them in an airtight container layered with parchment paper, and they will stay fresh for up to 6 months. Thaw them completely at room temperature before decorating with icing or sprinkles.
What is the importance of using parchment paper for baking sugar cookies?
Parchment paper prevents sticking and ensures the bottoms of the cookies bake evenly without over browning. It also makes cleanup significantly easier and allows you to easily slide the entire batch onto a cooling rack once finished.
Flawless Vanilla Cut Out Sugar Cookies

Ingredients:
Instructions:
Nutrition Facts:
| Calories | 115 kcal |
|---|---|
| Fat | 5 g |
| Fiber | <1 g |
