Easy Banana Bread Recipe 3: Moist & Tender
- Time: Active 15 minutes, Passive 60 minutes, Total 1 hours 15 mins
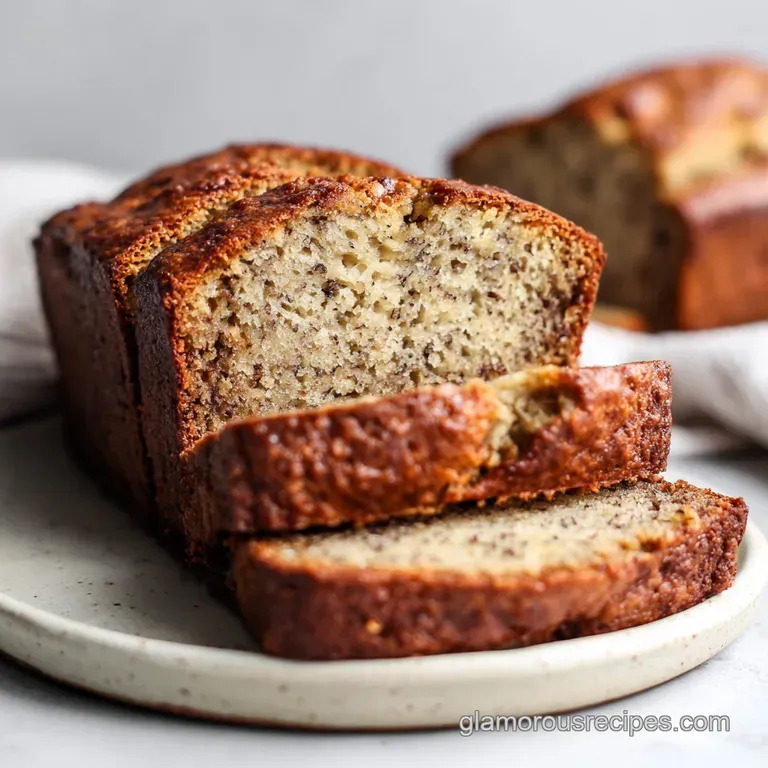
- Flavor/Texture Hook: A buttery, caramelized exterior with a moist, tender, and fragrant center
- Perfect for: Slow Sunday mornings, gifting to neighbors, or using up those forgotten counter bananas
- Mastering the Fragrant Simplicity of Easy Banana Bread Recipe 3
- The Molecular Logic Behind a Fluffy Crumb
- Efficiency Metrics for Your Morning Bake
- Gathering Your Essential Pantry Components
- Choosing Your Primary Baking Vessels
- Navigating the Steps to Golden Perfection
- Correcting Common Texture and Rise Issues
- Customizing Your Loaf With Flavor Additions
- Proportional Adjustments for Different Yields
- Dispelling Common Quick Bread Notions
- Preserving Freshness and Reviving Leftover Slices
- Creative Ways to Present Your Warm Loaf
- Recipe FAQs
- 📝 Recipe Card
Mastering the Fragrant Simplicity of Easy Banana Bread Recipe 3
There's a specific scent that fills a Southern kitchen on a rainy Tuesday, and it isn't just the rain on the porch. It's the heavy, floral, almost boozy aroma of bananas that have sat on the counter just a day too long.
You know the ones I mean - they’re covered in so many leopard spots they’re practically black, looking a bit sad to the uninitiated. But to us, those fruit are pure gold.
I remember my grandmother standing over a yellowed mixing bowl, mashing those speckled bananas with a silver fork until they turned into a glossy, sweet slurry. She always said that if the bananas weren't "ugly," the bread wouldn't be beautiful.
This easy banana bread recipe 3 is the result of years of trial, error, and a few very flat loaves. I used to think I could just toss everything in a bowl and hope for the best, but the chemistry of a quick bread is a fickle thing.
We’ve all had that loaf that looks gorgeous on the outside but reveals a gummy, wet middle the moment you slice into it. It’s heartbreaking. That’s why I’ve refined this method to focus on the balance of fats and sugars.
We aren't just making a cake, we’re creating a memory that tastes like home. It's the kind of slice you slather with salted butter while it's still steaming, watching the yellow pool of fat disappear into the crumb.
You don't need a fancy stand mixer or a culinary degree to get this right. In fact, over mixing is the enemy here. We want to keep things gentle, treating the batter with a bit of respect so it rewards us with a soft, velvety texture.
I've found that using melted butter instead of creaming softened butter gives us that dense, pound cake like weight that feels so substantial. It’s honest food. It doesn't pretend to be a light chiffon; it’s a sturdy, fragrant loaf that stands up to a cup of dark coffee and a long conversation.
Trust me, once you see those first cracks form on the top of the loaf in the oven, you'll know exactly why this is our "recipe 3" favorite.
The Molecular Logic Behind a Fluffy Crumb
The Science of the Rise: The reaction between the acetic acids in the overripe bananas and the alkaline baking soda creates carbon dioxide bubbles that expand in the heat. This gas is trapped by the flour's gluten structure, resulting in a lift that prevents a dense, leaden loaf.
- Maillard Magic: The high sugar content in the fruit reacts with the proteins in the egg and flour at 300°F, creating that deep brown, flavorful crust.
- Hygroscopic Retention: Sugar doesn't just sweeten, it attracts water, which keeps the crumb moist for days after baking.
- Lipid Interference: Melted butter coats the flour particles, physically hindering gluten strands from getting too long and tough.
- Starch Gelatinization: As the loaf bakes, the flour's starch granules absorb the banana moisture and swell, setting the final structure of the bread.
| Method Style | Prep Time | Resulting Texture | Best For |
|---|---|---|---|
| Recipe 3 (Classic) | 15 minutes | Tender, moist, traditional | Daily snacking and gifts |
| Fast Method | 8 minutes | Denser, slightly more muffin like | Last minute guests |
| Whipped Method | 25 minutes | Lighter, airy, cake like | Dessert with whipped cream |
Choosing the right approach depends on your patience. While the fast method works when you're in a pinch, the classic easy banana bread recipe 3 we're doing today provides that iconic "Sunday dinner" feel.
The extra few minutes spent properly mashing the bananas and melting the butter pays off when the crust achieves that satisfying shatter crisp edge.
Efficiency Metrics for Your Morning Bake
| Component | Science Role | Pro Secret |
|---|---|---|
| Overripe Bananas | Primary Hydration | Use bananas with black skins for maximum natural fructose and easy mashing. |
| Melted Butter | Fat & Flavor | Let the butter cool slightly after melting so it doesn't scramble the egg upon contact. |
| Baking Soda | Leavening Agent | Always sift the soda into the flour to avoid bitter, soapy clumps in the finished bread. |
| Granulated Sugar | Structure & Color | Whisking sugar with the butter creates a slight emulsion that helps the crumb stay uniform. |
When you're looking for that perfect sweetness, remember that this loaf is much like my Peanut Butter Cookies recipe, where the balance of sugar and fat defines the final "chew" of the bake. Getting these ratios right is what makes a recipe a staple in your rotation rather than a one time experiment.
Gathering Your Essential Pantry Components
- 3 large overripe bananas: Approximately 1 1/2 cups mashed. Why this? They provide the bulk of the flavor and moisture for the entire loaf.
- 1/2 cup unsalted butter: Melted and slightly cooled. Why this? Butter adds a richness that oil simply cannot replicate in a quick bread.
- 3/4 cup granulated sugar: Standard white sugar works best here. Why this? It aids in browning and keeps the crumb tender through moisture retention.
- 1 large egg: Must be at room temperature. Why this? A cold egg will seize the melted butter, creating a lumpy, uneven batter.
- 1 tsp pure vanilla extract: Don't use the imitation stuff if you can help it. Why this? Vanilla acts as a flavor bridge between the banana and the butter.
- 1 1/2 cups all purpose flour: Level your cups with a knife. Why this? AP flour provides the perfect amount of protein for a sturdy yet soft loaf.
- 1 tsp baking soda: Ensure it is fresh. Why this? This is our only lift; if it's expired, your bread will be a brick.
- 1/2 tsp kosher salt: Essential for balance. Why this? Salt cuts through the sugar and intensifies the natural banana essence.
| Original Ingredient | Substitute | Why It Works |
|---|---|---|
| Unsalted Butter | Coconut Oil | Same fat ratio. Note: Adds a subtle tropical scent and slightly crispier edges. |
| Granulated Sugar | Light Brown Sugar | Adds molasses notes. Note: Will make the bread darker and much more moist. |
| All Purpose Flour | 1:1 gluten-free Blend | Similar weight. Note: May require 5 extra minutes of baking time to set. |
If you find yourself out of white sugar, switching to brown sugar can actually be a lovely variation, much like the depth found in a Sourdough Sandwich Bread recipe. It changes the soul of the bread, making it feel more like a decadent treat than a breakfast staple.
Choosing Your Primary Baking Vessels
You don't need a kitchen full of gadgets for this easy banana bread recipe 3, but two things are non negotiable. First, a standard 9x5 inch loaf pan is the "goldilocks" size for this amount of batter.
If you go too large, the loaf will be flat; too small, and it will overflow and leave the center raw while the edges burn. Second, a sturdy balloon whisk is your best friend. It allows you to incorporate the egg and sugar without introducing too much air.
Chef's Note: I always recommend a light colored metal pan over glass or dark non stick. Dark pans absorb heat too aggressively, often scorching the bottom of your banana loaf before the middle is set. If you only have a dark pan, drop your oven temperature by 25°F.
Navigating the Steps to Golden Perfection

- Preheat your oven to 350°C (180°C) and grease your 9x5 loaf pan thoroughly with butter or non stick spray. Note: Proper greasing ensures the delicate crust doesn't tear when you unmold it.
- Mash the 3 bananas in a large mixing bowl using a fork until they are mostly liquid with only tiny lumps remaining.
- Stir the 1/2 cup melted butter into the mashed bananas until the fat is fully incorporated and the mixture looks glossy.
- Whisk in the 3/4 cup sugar, the room temperature egg, and the 1 tsp vanilla extract. Smell Check: You should notice a sudden burst of sweet, floral aroma as the vanilla hits the warm butter.
- Sprinkle the 1 tsp baking soda and 1/2 tsp salt over the wet mixture and stir well. Note: Adding the leavening to the wet ingredients first ensures it is evenly distributed before the flour arrives.
- Fold in the 1 1/2 cups all purpose flour using a spatula. Stop as soon as you see no more white streaks; over mixing here will make the bread tough.
- Pour the batter into your prepared loaf pan, smoothing the top with your spatula.
- Bake for 60 minutes. Smell Check: Around the 40 minute mark, your kitchen will start to smell like toasted sugar and warm fruit - this is the Maillard reaction in full swing.
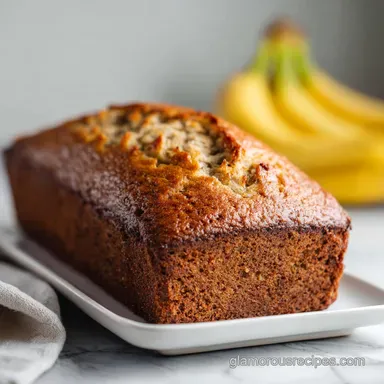
- Test for doneness by inserting a toothpick into the center; it should come out clean or with just a few moist crumbs. The top should be deeply golden and have a visible crack down the center.
- Cool the bread in the pan for 10 minutes before transferring it to a wire rack. Wait at least 20 minutes before slicing to allow the internal structure to set, or the bread may crumble.
Correcting Common Texture and Rise Issues
The Dreaded Sunken Middle
This usually happens because the oven door was opened too early, causing a sudden temperature drop before the structure was set. It can also be caused by expired baking soda that didn't have enough "oomph" to hold the weight of the bananas.
Always check your soda by dropping a pinch into vinegar; if it doesn't fizz violently, toss it.
A Gummy, Dense Bottom
A "gluey" layer at the base of your loaf often points to under mashing the bananas. If the fruit remains in large chunks, those spots won't release their moisture into the batter correctly, creating wet pockets that sink to the bottom.
It can also happen if your oven temperature is inaccurate; I highly recommend using an oven thermometer to ensure you're actually at 350°F.
| Problem | Root Cause | Solution |
|---|---|---|
| Burnt Edges / Raw Center | Oven temperature too high | Lower temp 25°F and tent with foil after 30 mins. |
| Dry, Crumbly Texture | Too much flour | Measure flour by weight (190g) or use the spoon and level method. |
| Bitter Aftertaste | Clumped baking soda | Sift your dry ingredients together before adding to the wet. |
Common Mistakes Checklist
- ✓ Using bananas that are still yellow or green (not enough sugar or moisture).
- ✓ Over milling the batter once the flour is added (activates too much gluten).
- ✓ Forgetting to let the melted butter cool (can partially cook the egg).
- ✓ Using a glass pan without adjusting the time (glass holds heat differently than metal).
- ✓ Slicing the bread while it's piping hot (the steam needs to finish setting the crumb).
Customizing Your Loaf With Flavor Additions
While the easy banana bread recipe 3 is stunning in its simplicity, we all have those days where we want a little something extra. I’ve found that adding 1/2 cup of toasted walnuts or pecans adds a necessary crunch that contrasts beautifully with the velvety interior.
If you’re feeling indulgent, 1/2 cup of dark chocolate chips transforms this from a breakfast loaf into a legitimate dessert. Just be sure to toss your "add ins" in a teaspoon of flour before stirring them into the batter; this prevents them from sinking straight to the bottom of the pan.
If you want to lean into the Southern roots of this dish, try adding a half teaspoon of ground cinnamon or a pinch of freshly grated nutmeg. These warm spices don't overwhelm the banana; they sit in the background and make the whole loaf feel more like a hug.
For those who like a bit of a "bite," a tablespoon of bourbon stirred into the wet ingredients adds a sophisticated smokiness that pairs incredibly well with the caramelized sugars of the crust.
Proportional Adjustments for Different Yields
When you find yourself with a surplus of bananas, doubling this recipe is quite simple. You can bake two loaves simultaneously, but ensure there is at least two inches of space between the pans in the oven for proper air circulation. You may need to rotate the pans halfway through to ensure even browning.
If you're doubling the recipe, keep the salt and baking soda at exactly 2x, but I usually find that 1.5x the vanilla is sufficient.
For a smaller household, you can easily halve this recipe. Since it calls for one egg, simply whisk the egg in a small bowl and use about two tablespoons of it for the half batch. Use a smaller 8x4 inch pan or even muffin tins.
If using muffin tins, the bake time will drop significantly to about 18-22 minutes. Keep a close eye on them; they are done when they spring back lightly when touched in the center.
Dispelling Common Quick Bread Notions
One of the biggest misconceptions in the baking world is that more bananas always equal a better loaf. In reality, adding a fourth or fifth banana to this specific recipe will throw off the hydration ratio, resulting in a bread that never fully sets and remains gummy no matter how long you bake it.
Stick to the three banana rule for the best results.
Another myth is that you must use a mixer to get a good rise. Actually, the more you beat a quick bread batter, the more gluten you develop. Gluten is great for chewy pizza dough, but for a tender banana loaf, we want as little gluten development as possible.
A simple fork and spatula are all the tools you need for a professional grade crumb. Hand mixing is actually the secret to that "melt in-your mouth" texture.
Preserving Freshness and Reviving Leftover Slices
This easy banana bread recipe 3 keeps remarkably well. Store it in an airtight container or wrapped tightly in plastic wrap at room temperature for up to 4 days. In fact, many people prefer it on day two, as the moisture from the bananas continues to soften the crust.
If you live in a very humid environment, you might want to move it to the fridge after 48 hours to prevent mold, though the cold can make the butter in the bread quite firm.
For long term storage, this loaf freezes like a dream. I recommend slicing it before freezing and placing a piece of parchment paper between each slice. Wrap the whole reconstructed loaf in foil and then place it in a freezer bag. It will stay fresh for up to 3 months.
When the craving hits, you can just pull out a single slice and pop it directly into the toaster.
Zero Waste Tip: Don't throw away those banana peels! If you have a garden, you can soak the peels in water for 48 hours to create a potassium rich "tea" for your houseplants.
Alternatively, if you have a compost bin, banana peels are "green" material that breaks down quickly, providing essential nutrients for your future soil. Even the scraps of this recipe can give back to your kitchen in the long run.
Creative Ways to Present Your Warm Loaf
Presentation doesn't have to be fussy to be effective. A simple dusting of powdered sugar over the top of the cooled loaf can make it look like it came straight from a boutique bakery.
For a Sunday brunch, I love to serve thick slices alongside a small bowl of honey whipped butter or even a dollop of Greek yogurt mixed with a little maple syrup. It adds a tangy contrast to the sweet bread.
If you have leftovers that have started to get a bit dry after a few days, don't despair. This bread makes the most incredible French toast you’ve ever tasted. The dense crumb soaks up the egg custard without falling apart, and the natural sugars in the banana caramelize beautifully in a hot skillet.
Serve it with a few fresh berries and a sprig of mint, and you’ve turned a simple quick bread into a five star breakfast. It’s all about finding joy in the simple, honest ingredients we have right in our pantry.

Recipe FAQs
What is the secret to making good banana bread?
Use extremely overripe bananas. The bananas should have black spots, almost entirely black, as this maximizes sugar content and moisture for flavor development and a tender crumb.
What is the number one mistake made when making banana bread?
Overmixing the batter once the flour is added. Mix only until the white streaks disappear to avoid developing too much gluten, which results in a tough, chewy, or dense loaf.
What is the one ingredient banana bread upgrade?
Toasted pecans or walnuts. Adding a half cup of toasted nuts provides a crucial textural contrast to the soft interior, though you could also swap sugar for brown sugar for deeper flavor, similar to the base in our Sweet Potato Pecan recipe.
Are 3 bananas enough for banana bread?
Yes, for this specific recipe ratio. Three large overripe bananas usually yield about 1 1/2 cups mashed, which is the ideal moisture level to balance the fat and flour in a standard loaf.
How to prevent my banana bread from sinking in the middle?
Bake at the correct temperature and do not open the oven door early. The structure needs consistent heat for at least 40 minutes to set; sudden temperature drops prevent the leavening gases from stabilizing the crumb.
Is it true I must use a stand mixer for banana bread?
No, this is a common misconception. Hand mixing with a spatula after adding the flour is preferred because it minimizes gluten development, ensuring a tender, less tough texture.
How to make banana bread taste richer if I use oil instead of butter?
Add one teaspoon of bourbon or dark rum to the wet ingredients. The alcohol enhances the perception of richness and depth; this technique of balancing liquids is similar to what we do to control spread in our Sugar Cookie Recipe.
Easy Banana Bread Recipe 3
Ingredients:
Instructions:
Nutrition Facts:
| Calories | 245 kcal |
|---|---|
| Protein | 3.1 g |
| Fat | 9.9 g |
| Carbs | 37.2 g |
| Fiber | 1.4 g |
| Sugar | 19.1 g |
| Sodium | 232 mg |
