Dry Soup Mix Recipes for Gifts
- Time: Active 15 minutes, Passive 1 hours 30 mins, Total 1 hours 45 mins
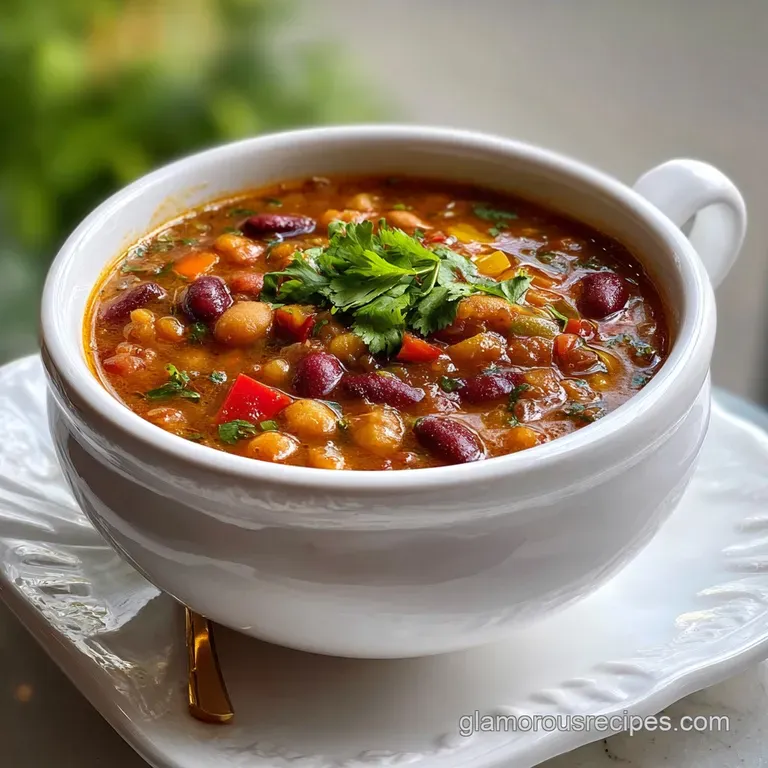
- Flavor/Texture Hook: Earthy, savory, and thick
- Perfect for: Pantry meal prep and gifting
- The Science of Legume Hydration
- Components of the Jar
- Essential Tools for Jar Prep
- Step-By-Step Jar Assembly Guide
- Solving Common Soup Mixing Issues
- Customize Your Own Soup Variations
- Adjusting the Batch Size
- Searing Meat and Bean Myths
- Storage and Keeping Fresh
- Presentation Tips for Pantry Gifts
- High in Sodium
- Recipe FAQs
- 📝 Recipe Card
You know that sound when a handful of dried beans hits a glass Mason jar? That rhythmic click clack always takes me back to my grandmother’s pantry in the humid South. She treated her pantry like a sacred library, each jar a story of comfort food waiting to happen.
On those grey Sunday dinners when the rain wouldn't quit, she’d reach for her colorful "rainbow jar," and within ninety minutes, the house smelled like a warm hug. It wasn't fancy, but it was honest.
I’ve spent years trying to replicate that exact velvety texture she achieved without ever glancing at a recipe card. My first few tries were a bit of a disaster - some beans stayed hard as pebbles while others turned to mush.
It turns out, there’s a real rhythm to how you layer these legumes and how you balance the salt. We aren't just tossing things in a bag; we are building a foundation for a meal that stays fresh on your shelf for months.
This recipe is about more than just convenience. It’s about that peace of mind you get when you know a healthy, hearty meal is sitting right there, ready for a pot of boiling water.
Whether you’re making these for yourself or as part of a gift basket, the secret lies in the quality of the dried goods and the ratio of the spices. Trust me on this, once you see how those red lentils melt into the broth to create a silky base, you’ll never go back to the store-bought packets.
The Science of Legume Hydration
- Starch Gelatinization: Red lentils and split peas lack tough outer skins, so they break down during the simmer. This releases amylose into the water, creating a naturally thick, velvety texture without needing any flour or cornstarch.
- Osmotic Balance: Keeping the salt in a separate layer or adding it later ensures the tougher beans, like kidney and great northern, can absorb water properly. If the cooking liquid is too salty from the start, the bean skins can remain stubbornly firm.
- Maillard Precursors: The dried minced onions and garlic powder in this Dry Soup Mix contain concentrated sugars and amino acids. As they simmer, they undergo a slow motion browning that adds a deep savory note to the broth.
| Servings | Ingredient Adjustments | Jar Size | Cook Time |
|---|---|---|---|
| 4 People | Use half the beans and spices | 16 oz (Pint) | 1 hours 15 mins |
| 8 People | Use full recipe quantities | 32 oz (Quart) | 1 hours 30 mins |
| 16 People | Double all beans and spices | Two 32 oz jars | 1 hours 45 mins |
Scaling this recipe is straightforward, but remember that the surface area of your pot matters. If you're doubling the recipe for a huge crowd, use a wide Dutch oven. This ensures even heat distribution so every kidney bean reaches that tender, buttery stage at the same time.
For smaller batches, a heavy bottomed saucepan works perfectly to keep the heat consistent without scorching the lentils at the bottom.
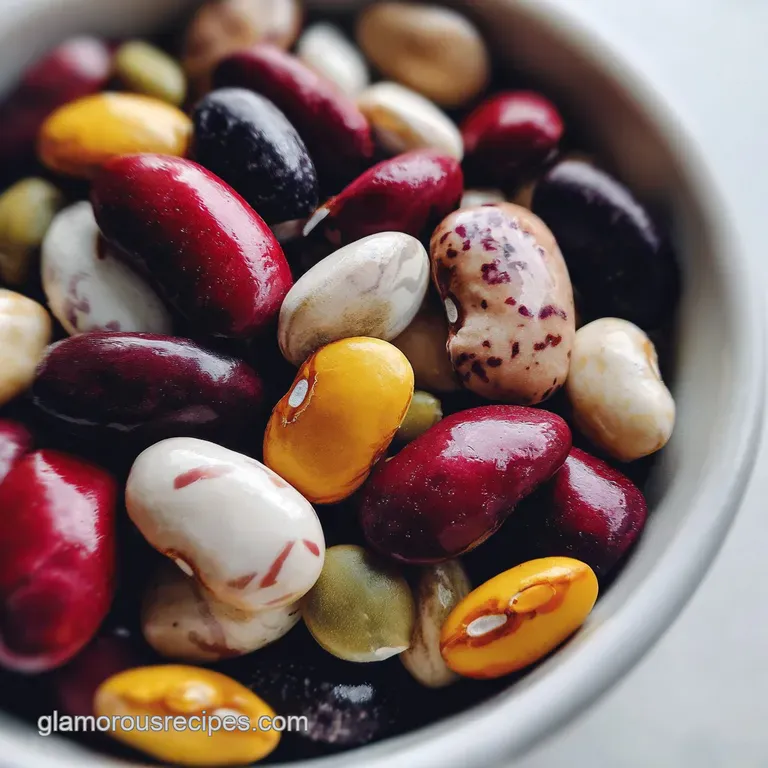
Components of the Jar
The Colorful Bean Base
- 1/2 cup (100g) Dried Kidney Beans: Why this? They provide a meaty texture and hold their shape during long simmers.
- 1/2 cup (100g) Dried Great Northern Beans: Why this? These are buttery and soak up the seasoning beautifully.
- 1/2 cup (100g) Green Split Peas: Why this? They dissolve slightly to thicken the soup broth.
- 1/2 cup (100g) Yellow Split Peas: Why this? Adds a mild sweetness and vibrant color contrast.
- 1/2 cup (100g) Red Lentils: Why this? They cook the fastest and create the soup's silky body.
- 1/2 cup (100g) Black Beans: Why this? Adds a boost of antioxidants and an earthy flavor profile.
The Flavor Core
- 2 tbsp (20g) Beef or Vegetable Bouillon granules: Why this? This is your primary salt and umami source.
- 1 tbsp (5g) Dried Minced Onion: Why this? Provides texture and sweetness that fresh onions usually offer.
- 1 tsp (2g) Garlic Powder: Why this? Ensures a consistent garlic flavor throughout every spoonful.
- 1 tsp (1g) Dried Parsley Flakes: Why this? Adds a hint of herbaceous freshness to the dry mix.
- 1/2 tsp (1g) Dried Thyme: Why this? A classic Southern herb that pairs perfectly with legumes.
- 1/2 tsp (1g) Black Pepper: Why this? Adds a subtle back of-the throat heat.
- 1/4 tsp (1g) Smoked Paprika: Why this? Just a touch for a woody, deep aroma.
- 1 Dried Bay Leaf: Why this? Releases a subtle tea like floral note as it simmers.
| Ingredient | Science Role | Pro Secret |
|---|---|---|
| Red Lentils | Texture Agent | These disintegrate to act as a natural thickener for the broth. |
| Bouillon | Flavor Catalyst | Use a high-quality brand like Better Than Bouillon (dried version) for better depth. |
| Kidney Beans | Protein Structure | These require the most heat to break down their complex starches. |
If you find yourself missing an ingredient, don't panic. You can swap the kidney beans for pinto beans without losing that hearty feel. If you're out of red lentils, brown lentils will work, though the soup will be a bit more textured and less "creamy." For those watching their salt, use a low sodium bouillon and add a pinch of celery seed to keep the flavor profile high. Just like in my Soup Recipe with vegetables, the goal is a balanced broth.
Essential Tools for Jar Prep
You don't need a high tech kitchen for this, but two tools make it much easier. First, a wide mouth funnel is your best friend. It prevents the lentils from bouncing all over your counter and keeps your layers clean.
Second, a vacuum sealer with a jar attachment can extend the shelf life of your Dry Soup Mix significantly by removing the oxygen that makes beans go stale.
If you don't have a vacuum sealer, just make sure you're using high-quality glass jars with new lids. I prefer the 32 oz wide mouth Mason jars because they are easy to fill and look beautiful on a shelf.
A simple long spoon or a wooden dowel can help you level each layer of beans if you're going for that perfect "sand art" look for gifting.
step-by-step Jar Assembly Guide
- Clean the glass. Wash and thoroughly dry your 32 oz jar. Note: Any moisture trapped inside will cause the beans to mold over time.
- Layer the kidney beans. Pour the kidney beans into the bottom of the jar and tap it gently on the counter to level them out.
- Add the northern beans. Pour these in next, creating a clear white contrast against the red beans.
- Insert the black beans. These provide the darkest layer and help separate the lighter legumes visually.
- Pour the split peas. Add both the green and yellow split peas. until you see a distinct striped pattern forming.
- Top with red lentils. Place these at the very top of the bean stack. Note: Their small size allows them to fill the gaps between the larger beans below.
- Mix the seasoning. In a small bowl, combine bouillon, onion, garlic, parsley, thyme, pepper, and paprika.
- Pack the seasoning. Pour the spice mix over the lentils. until the spices settle into a flat, even layer.
- Add the bay leaf. Tuck the bay leaf on top of the spices and seal the lid tightly.
- Label the jar. Attach a tag with cooking instructions: "Rinse beans, add 8 cups of water, simmer for 1 hours 30 mins."
Chef's Tip: If you are making this for a gift, place the spice mix in a small plastic bag or parchment paper pouch on top of the beans. This prevents the spices from sifting down through the layers during transport, keeping your "rainbow" look pristine!
Solving Common Soup Mixing Issues
Why Your Beans Stay Hard
Sometimes you can simmer for hours and the kidney beans still have a "bite." This usually happens if your beans are quite old. Dried beans don't technically expire, but they do lose moisture over years on a shelf. To fix this, you can add 1/4 teaspoon of baking soda to the pot.
This raises the pH of the water, which helps break down the pectin in the bean skins much faster.
The Problem of Muddy Broth
If your soup looks grey or unappealing, it’s likely because the black beans bled their color into the red lentils. While it tastes fine, it isn't the most beautiful bowl. To prevent this, you can rinse the mix in a colander under cold water before boiling until the water runs mostly clear.
This removes the excess dust and surface starch that carries the dark pigment.
| Problem | Root Cause | Solution |
|---|---|---|
| Bland broth | Old bouillon granules | Stir in a teaspoon of soy sauce or Worcestershire at the end. |
| Too thick | Lentils over absorbed | Add 1 cup of boiling water or stock to thin it out. |
| Hard beans | Acidic ingredients | Don't add tomatoes or lemon juice until the beans are fully tender. |
Common Mistakes Checklist ✓ Always check your dried beans for small pebbles or debris before layering. ✓ Ensure the bay leaf is removed before serving to avoid a choking hazard. ✓ Don't add salt or acidic ingredients (like vinegar) until the beans are soft.
✓ Tighten the jar lid immediately after filling to keep out pantry pests. ✓ Store the jar in a cool, dark place away from the stove's heat.
Customize Your Own Soup Variations
The "Southwest" Twist
If you want to move away from the Southern comfort profile, you can easily transform this Dry Soup Mix into a taco style feast. Swap the thyme and parsley for dried oregano and a tablespoon of chili powder. When it's time to cook, throw in a can of diced green chilies. It’s a completely different vibe that feels much more like our Chile Relleno Soup recipe but with the ease of a pantry mix.
The Meaty Upgrade
While this mix is fantastic as a vegetarian option, it’s also a great base for leftovers. I love adding a smoked ham hock or some chopped bacon at the beginning of the simmer. The fat renders out and coats the lentils, making the broth even more velvety.
If you have leftover roast chicken, shred it and toss it in during the last 15 minutes of cooking.
- Make it Creamy: Stir in 1/2 cup of heavy cream or coconut milk just before serving.
- Add Greens: Toss in a handful of fresh spinach or kale 5 minutes before the timer goes off.
- Boost the Heat: Add a teaspoon of red pepper flakes to the spice layer for a spicy kick.
Adjusting the Batch Size
When scaling down for a "soup for two," use a 16 oz pint jar. You'll want to reduce the cooking time by about 15-20 minutes because the smaller volume of water comes to a boil faster.
If you're using a single egg in a recipe you're scaling down, you'd beat it and use half, but here we just halve the volume of each bean. It's much simpler.
For massive batches intended for a church potluck, follow the 1.5x rule for spices. If you double the beans, don't necessarily double the salt immediately. Start with 1.5x the bouillon and adjust at the end. Large pots of soup tend to concentrate flavors differently than small jars.
Also, remember that a larger pot takes much longer to reach a simmer, so your "passive" time might increase by 20 minutes.
| Original Ingredient | Substitute | Why It Works |
|---|---|---|
| Beef Bouillon | Miso Powder | Provides a similar salty umami but is purely plant based. |
| Red Lentils | Yellow Split Peas | Same cook time and thickening power, just a different color. |
| Dried Onion | Onion Powder | Note: Use half the amount; you lose the texture but keep the flavor. |
Searing Meat and Bean Myths
Many people believe you must soak these beans overnight before cooking. While soaking can reduce the cooking time by about 30 minutes, it isn't strictly necessary for this Dry Soup Mix.
Because the lentils and split peas break down so quickly, they create a thick environment that helps steam the larger beans. You can go from jar to table in 90 minutes without any pre soaking required.
Another common myth is that adding salt at the beginning makes beans tough. While high concentrations of salt can slow down the softening of the skin, the amount of bouillon in this recipe isn't enough to stop the process.
However, if you're worried about it, you can always put the spice mix in a separate baggie and add it during the last 30 minutes of simmering.
Storage and Keeping Fresh
Storage: Keep your assembled Dry Soup Mix in a cool, dark place like a basement pantry or a bottom kitchen cabinet. Light and heat are the enemies of dried goods; they can cause the beans to fade in color and become even tougher. Properly sealed, these jars will stay fresh for up to 6 months.
Once the soup is cooked, it will last in the fridge for 4 days or in the freezer for up to 3 months.
Zero Waste: If you find a few stray beans at the bottom of your pantry bags that didn't make it into the jar, don't throw them out! Save them in a "scrap jar." Once that jar is full, you can grind them into a coarse flour to thicken stews or use them as a high protein addition to homemade veggie burgers.
Even the bean dust at the bottom of the bag is packed with nutrients.
Presentation Tips for Pantry Gifts
If you're giving these away, the "look" is half the fun. I like to use a bit of twine to tie a sprig of fresh rosemary or a cinnamon stick to the outside of the jar. It adds a rustic, Southern feel that makes the gift feel personal and thoughtful.
You can even cut a circle of checkered fabric to place under the metal ring of the lid for that classic farmhouse aesthetic.
Don't forget to include a "What Goes with" recipe card. I usually suggest pairing this soup with crusty sourdough or even a simple grilled cheese sandwich. You can check out my guide on What Goes with recipe pairings for more ideas. A little extra effort in the presentation tells the recipient that you didn't just buy a gift; you prepared a meal for them to enjoy during their next cozy night in.

High in Sodium
1045 mg mg of sodium per serving (45% % of daily value)
The American Heart Association recommends limiting sodium intake to no more than 2,300mg per day for most adults.
Tips to Reduce Sodium in Your Bean Soup
-
Skip the Bouillon-30%
Eliminate the beef or vegetable bouillon granules entirely. They are a significant source of sodium. Replace the flavor with low-sodium alternatives, such as herbs, spices, and a touch of vinegar at the end of cooking. This is the easiest and most impactful change.
-
Fresh Onion Instead-10%
Instead of dried minced onion, use 1/2 cup of finely chopped fresh onion. This will provide more flavor with no added sodium.
-
Fresh Garlic Instead-10%
Use 2-3 cloves of fresh, minced garlic instead of garlic powder. Fresh garlic provides a more robust flavor and avoids the added sodium sometimes found in garlic powder.
-
No Salt Added Herbs
Create an alternative blend of your own herbs and spices such as dried oregano, basil, and marjoram. Be sure to check the ingredients label to ensure that there is no added salt.
Recipe FAQs
Is dry soup mix healthy?
It can be, but check the ingredients. Many dry soup mixes are packed with legumes and vegetables, offering fiber and nutrients. However, watch out for excessive sodium, MSG, and artificial flavorings often found in commercial varieties.
What is in a dry soup mix?
A variety of dried ingredients. Typically, you'll find dried beans, lentils, split peas, pasta or rice, and dehydrated vegetables like carrots, celery, and onions. Seasonings such as salt, pepper, herbs, and spices are also included.
What to use instead of dry soup mix?
Fresh or frozen ingredients for the best flavor and nutrition. You can create your own healthy soup base by sautéing fresh aromatics like onions and garlic, adding broth, and then incorporating fresh or frozen vegetables and grains.
For a quick shortcut, consider using canned beans and pre-cooked grains.
How to use dried soup mix?
Rinse the mix, then simmer in liquid. Start by rinsing the dry ingredients under cold water to remove dust. Then, add the mix to a pot with the recommended amount of broth or water, bring to a boil, reduce heat, and simmer until all ingredients are tender, usually 30-90 minutes depending on the mix.
Can I make dry soup mix healthier?
Yes, by adding fresh ingredients and reducing sodium. While the dry mix provides a base, you can boost its health factor by adding extra fresh vegetables like spinach or kale in the last few minutes of cooking.
If using a commercial mix, opt for low-sodium versions or rinse it before cooking to reduce salt content.
How long does dry soup mix last?
Typically 1-2 years if stored properly. Keep your dry soup mix in an airtight container in a cool, dark, and dry place. This prevents moisture and pests from affecting the ingredients, ensuring their quality for extended periods.
What are the main benefits of using dry soup mix?
Convenience, affordability, and long shelf life. Dry soup mixes are incredibly easy to store and prepare, making them a pantry staple for quick meals. They are generally inexpensive, and their dried nature means they don't spoil quickly, offering a reliable option for busy individuals.
Dry Soup Mix
Ingredients:
Instructions:
Nutrition Facts:
| Calories | 262 kcal |
|---|---|
| Protein | 18g |
| Fat | 1g |
| Carbs | 47g |
| Fiber | 14g |
| Sugar | 2g |
| Sodium | 1045mg |
