Baked Chicken Parmesan: Ultra Crisp
- Time: Active 15 minutes, Passive 20 minutes, Total 35 minutes
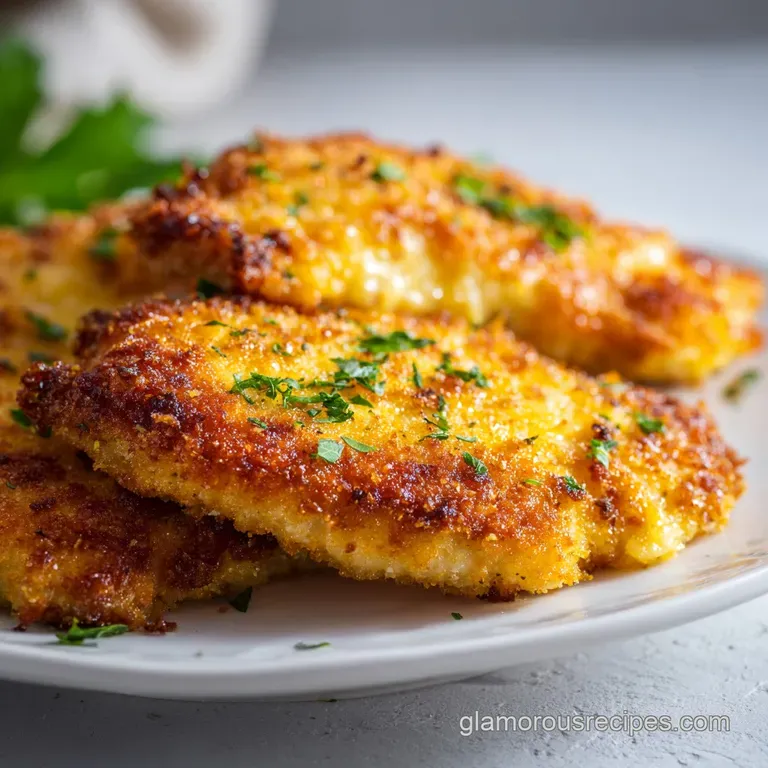
- Flavor/Texture Hook: Shatter crisp panko crust with a silky, melted mozzarella finish
- Perfect for: Stress free Sunday dinners or a high protein weeknight win
- Science of the Golden Crust
- Component Analysis for Peak Flavor
- Selecting High Quality Ingredients
- Essential Kitchen Tools Needed
- Step By Step Cooking Guide
- Solving Common Cooking Problems
- Strategies for Recipe Scaling
- Tasty Recipe Variations to Try
- Debunking Popular Kitchen Myths
- Storage and Waste Reduction Strategies
- Best Serving and Pairing Ideas
- High in Sodium
- Recipe FAQs
- 📝 Recipe Card
Science of the Golden Crust
The Maillard Reaction: High heat triggers a chemical reaction between amino acids and reducing sugars, creating that deep brown color and complex savory flavor. In this Baked Chicken Parmesan, the oven’s dry heat ensures the panko toasts rather than steams.
Protein Denaturation: Pounding the chicken breasts to an even thickness breaks down tough connective tissues. This ensures the heat penetrates the center at the same rate as the exterior, preventing that dreaded "rubber chicken" texture.
The Moisture Barrier: Using a light dusting of flour before the egg wash creates a dry surface for the egg to grab onto. This structural integrity prevents the breading from sliding off in one sad, soggy sheet when you cut into it.
| Thickness | Internal Temp | Rest Time | Visual Cue |
|---|---|---|---|
| 1/2 inch | 165°F | 3 mins | Juices run clear |
| 3/4 inch | 165°F | 5 mins | No pink in center |
| 1 inch | 165°F | 7 mins | Firm to the touch |
Choosing the right thickness is the biggest hurdle for most home cooks. I usually aim for a consistent half inch because it allows the breading to reach peak crispness at the exact moment the chicken hits the safe internal temperature. If your cutlets are uneven, one side will be dry while the other is undercooked.
Component Analysis for Peak Flavor
| Ingredient | Science Role | Pro Secret |
|---|---|---|
| Panko Breadcrumbs | Provides high surface area for maximum crunch | Mix with a tiny splash of oil to mimic frying |
| Parmesan Cheese | Adds fat and salt while aiding browning | Use freshly grated for better melting and flavor |
| Large Eggs | Acts as the "glue" for the breading layers | Whisk until no streaks of white remain |
| All Purpose Flour | Absorbs surface moisture from the protein | Season the flour itself for flavor in every layer |
Selecting the right breadcrumbs is non negotiable here. Regular breadcrumbs are too fine and tend to turn into a paste, whereas panko is flaky and jagged, which traps air and creates that wonderful texture we’re after. It's these small details that separate a "meh" dinner from a "wow" dinner.
Selecting high-quality Ingredients
- 1.5 lbs boneless, skinless chicken breasts: Why this? Standard lean protein that carries the savory breading and sauce perfectly. Use a substitute of chicken thighs if you prefer darker, juicier meat, though they take slightly longer to cook.
- 1 cup panko breadcrumbs: Why this? Larger surface area creates a much crunchier exterior than traditional crumbs. Use crushed pork rinds for a low carb alternative.
- 0.5 cup freshly grated parmesan cheese: Why this? Adds a sharp, salty punch and helps the crust brown evenly. Pecorino Romano works if you want a funkier, saltier kick.
- 1 tsp garlic powder: Why this? Distributes flavor more evenly through the breading than fresh garlic bits.
- 1 tsp dried oregano: Why this? Provides that classic earthy, herbaceous Italian aroma.
- 0.5 tsp smoked paprika: Why this? Adds a subtle depth and a beautiful golden hue to the crust.
- 2 large eggs: Why this? The essential binder that keeps your crust attached to the meat.
- 0.25 cup all purpose flour: Why this? Dries the chicken surface so the egg wash doesn't slip off.
- 1 cup marinara sauce: Why this? Provides the acidic, sweet contrast to the salty fried coating. Use a spicy Arrabbiata for more heat.
- 1 cup shredded mozzarella cheese: Why this? The ultimate melting cheese for that iconic cheese pull.
- Fresh basil for garnish: Why this? Adds a pop of color and a fresh, peppery finish.
Right then, let's talk about the cheese. Honestly, don't even bother with the pre shredded mozzarella in the bag if you can help it. It’s coated in potato starch to prevent clumping, which means it won’t melt into that silky, velvety pool of goodness we want. Buying a block and grating it yourself takes two minutes and makes a massive difference. If you're looking for another way to use that parmesan, it works beautifully in my Garlic Parmesan Chicken Potatoes recipe.
Essential Kitchen Tools Needed
You don't need a professional kitchen to make this, but a few basics will make your life so much easier. A heavy bottomed baking sheet is key because it holds heat better, ensuring the bottom of your chicken gets as crispy as the top. If you have a wire cooling rack that fits inside your baking sheet, use it!
Elevating the chicken allows hot air to circulate underneath, preventing the "soggy bottom" syndrome that plagues so many baked dishes.
A meat mallet is also your best friend here. If you don't have one, a heavy rolling pin or even the bottom of a small cast iron skillet works in a pinch. The goal is evenness, not aggression. We aren't trying to pulverize the meat, just gently coax it into a uniform thickness so it cooks through at the same time.
step-by-step Cooking Guide
1. Preparing the Cutlets
Slice the 1.5 lbs chicken breasts in half lengthwise to create thinner cutlets. Place them between two sheets of plastic wrap and pound them to a uniform 1/2 inch thickness. Note: This ensures the chicken cooks quickly before the breading burns.
2. Engineering a Shatterproof Crust
Set up three shallow bowls: one with the 0.25 cup flour, one with the 2 beaten eggs, and one with a mix of 1 cup panko, 0.5 cup parmesan, garlic powder, oregano, and smoked paprika. Dredge each piece of chicken in the flour, shaking off the excess until only a fine dust remains.
3. Coating the Chicken
Dip the floured chicken into the egg wash, then press firmly into the panko mixture. Note: Pressing hard helps the crumbs adhere so they don't fall off during baking.
4. Executing the Perfect Bake
Place the breaded chicken on a prepared baking sheet and bake at 400°F (200°C) for 15 minutes until the crust is golden and firm. You should hear a light sizzle as the fat in the cheese starts to fry the breadcrumbs.
5. Finishing with Melty Cheese
Remove the pan from the oven and spoon 1/4 cup of marinara sauce onto the center of each breast, then top with 1/4 cup of shredded mozzarella. Do not cover the entire piece with sauce; leave the edges exposed to maintain that crunch.
6. The Final Melt
Return to the oven for 5 minutes until the cheese is bubbling and slightly browned. The aroma of toasted cheese should be unmistakable at this point.
7. Resting and Garnish
Let the chicken rest for 3 minutes before topping with fresh basil and serving. Note: This allows the juices to redistribute so the meat stays tender.
Chef's Tip: For an extra crispy result, toast your panko breadcrumbs in a dry pan for 2 minutes over medium heat until they are just starting to turn pale gold before you use them for breading. This gives them a head start in the oven!
Solving Common Cooking Problems

Fixing Rubber Chicken Texture
If your chicken feels bouncy or tough, it's almost always a result of overcooking or uneven thickness. When chicken goes past 165°F, the proteins tighten up and squeeze out all the moisture. Using a meat thermometer is the only way to be 100% sure.
If you’ve already overcooked it, serving it with a little extra warm marinara can help mask the dryness, but the real fix is in the prep.
Rescuing Soggy Breaded Coating
Soggy breading usually happens because of "steam lock" when moisture from the chicken gets trapped between the meat and the crust. To avoid this, make sure you pat the chicken bone dry with paper towels before starting the flour dredge. Also, don't go overboard with the sauce!
If you drown the chicken in marinara, the crust will absorb the liquid and turn into mush.
| Problem | Root Cause | Solution |
|---|---|---|
| Breading falls off | Surface was too wet | Pat chicken dry and use the flour egg-crumb sequence |
| Crust is pale | Oven temp too low | Ensure oven is preheated to 400°F (200°C) |
| Cheese is oily | Using low quality cheese | Swap pre shredded for a freshly grated block of mozzarella |
A common mistake I once made was trying to use a glass baking dish. Glass doesn't conduct heat as efficiently as metal, which meant the bottom of my chicken stayed pale and soft while the top was burning. Stick to a dark metal rimmed baking sheet for the best results.
Common Mistakes Checklist: ✓ Pat chicken completely dry before starting the breading process. ✓ Ensure the oven is fully preheated; don't rush the chicken in early. ✓ Don't skip the flour step; it’s the primer that makes the paint (egg) stick.
✓ Leave space between the chicken pieces on the pan to allow for air circulation. ✓ Only sauce the center of the chicken to preserve the crispy edges.
Strategies for Recipe Scaling
When you're scaling this recipe down for one or two people, it’s pretty straightforward. You can easily halve the chicken and breading components. If you have half an egg left over, don't throw it away! Scramble it up for a quick snack or use it to glaze some dinner rolls.
Reducing the cooking time isn't usually necessary as long as the cutlets are the same thickness, but keep an eye on them around the 12 minute mark.
Scaling up for a crowd requires a bit more logistics. If you're doubling the recipe to 8 servings, don't try to cram everything onto one tray. Use two separate baking sheets and rotate them halfway through the 15 minute bake to ensure even heat distribution. You might find that you need slightly less sauce and cheese per person when cooking in bulk, so start with 1.5x the amount and add more only if needed. For another crowd pleaser that scales well, you might enjoy my Creamy Paprika Chicken recipe.
Tasty Recipe Variations to Try
The Spicy Arrabbiata Twist
If you like a bit of a kick, swap the standard marinara for a spicy Arrabbiata sauce. Add a pinch of red pepper flakes to the panko mixture as well. This version pairs perfectly with a crisp glass of Pinot Grigio to cut through the heat.
gluten-free Modification Tips
You can absolutely make this gluten-free without losing the soul of the dish. Use a 1:1 gluten-free flour blend for the initial dredge and swap the panko for gluten-free breadcrumbs or even crushed gluten-free crackers.
The texture is remarkably similar, though gluten-free crumbs sometimes brown a little faster, so watch the oven closely.
| Original Ingredient | Substitute | Why It Works |
|---|---|---|
| All Purpose Flour | Almond Flour | High protein content helps with browning. Note: Slightly nuttier flavor. |
| Panko Breadcrumbs | Crushed Pork Rinds | Zero carb and extremely crunchy. Note: Adds a savory, salty depth. |
| Marinara Sauce | Pesto Sauce | Bright, herbaceous alternative. Note: Higher fat content, skip the mozzarella. |
Debunking Popular Kitchen Myths
One common myth is that you need to sear the chicken in a pan before baking to "lock in the juices." In reality, searing is about flavor (Maillard reaction), not moisture retention. Because our chicken is thin and breaded, a pre sear would likely overcook the meat before it even hits the oven.
The panko crust actually acts as an insulator, keeping the chicken moist while it bakes.
Another myth is that you should use "low-fat" cheese to make it healthier. Please, don't do this! low-fat mozzarella doesn't melt; it just turns into a weird, translucent plastic layer. If you want a lighter version, just use slightly less of the high-quality, full fat stuff.
You’ll get way more flavor and a much better texture.
Storage and Waste Reduction Strategies
Storage: This Baked Chicken Parmesan is best served fresh, but leftovers will keep in an airtight container in the fridge for up to 3 days. To reheat, avoid the microwave at all costs! It will turn the crust into a rubbery sponge.
Instead, pop it back into a 350°F (180°C) oven or an air fryer for 5-8 minutes until the cheese is bubbling again and the crust crisps back up.
Freezing: You can freeze the breaded (but unbaked) chicken for up to 2 months. Place them on a parchment lined tray to flash freeze, then transfer to a freezer bag. When you're ready to eat, bake them straight from frozen, adding about 10 minutes to the initial baking time.
Zero Waste: If you have leftover panko and parmesan mixture that didn't touch the raw chicken, don't toss it! Store it in a jar in the fridge and use it as a crunchy topping for roasted broccoli or a pasta bake later in the week.
Any leftover marinara can be frozen in an ice cube tray for quick flavor boosts in soups or stews.
Best Serving and Pairing Ideas
I usually serve this over a bed of al dente spaghetti tossed in a little extra marinara and olive oil. If you want to keep things on the lighter side, a simple arugula salad with a sharp lemon vinaigrette is the perfect counterpoint to the rich cheese and savory breading.
The acidity of the lemon cuts right through the fat, making every bite feel fresh.
For the ultimate Sunday feast, garlic bread is a mandatory side. You can use the same garlic powder and oregano from the chicken to season your butter. If you're looking for more inspiration for your next family gathering, check out this Crockpot Chicken and Stuffing recipe for a completely different but equally comforting vibe. No matter how you serve it, the key is to get it to the table while that cheese is still stretchy and the crust is at its peak "shatter" stage. Enjoy!

High in Sodium
945 mg mg of sodium per serving (41% % of daily value)
The American Heart Association recommends limiting sodium intake to about 2,300mg per day for optimal health.
Tips to Reduce Sodium in Your Chicken Parmesan
-
Low-Sodium Cheese-20%
Opt for low-sodium or reduced sodium mozzarella and parmesan cheese. This simple swap can significantly cut down on the overall sodium content. Look for labels indicating lower than 140mg of sodium per serving.
-
Low-Sodium Marinara-15%
Use a low-sodium or no-salt added marinara sauce. Alternatively, make your own marinara sauce from scratch using fresh tomatoes and herbs to have complete control over the sodium content. Homemade is best!
-
Unsalted Panko-10%
Choose unsalted panko breadcrumbs instead of regular panko. Many brands contain added salt which contributes to the sodium level. You can also make your own from stale bread without adding salt. Read the labels carefully.
-
Control the Salt-10%
Omit adding any extra salt to the chicken, breadcrumb mixture, or sauce. Taste the dish before adding any salt, and consider that the parmesan cheese and marinara sauce already contain sodium. A little goes a long way.
-
Flavor with Herbs
Enhance the flavor of the chicken parmesan with fresh herbs like basil, oregano, and parsley, as well as spices like garlic powder and smoked paprika. These additions provide flavor without increasing sodium. Experiment with different combinations!
Recipe FAQs
How do you bake chicken parmesan in the oven?
Pound, bread, then bake on a metal sheet. First, pound the cutlets to 1/2 inch uniformity. Dredge in flour, dip in egg, and press firmly into the panko/parmesan mix. Bake on a preheated baking sheet at 400°F for 15 minutes before topping with sauce and cheese for the final melt.
Should you bake chicken at 350 or 400?
400°F is the optimal temperature. This higher heat is crucial because the dry convection environment mimics the effect of frying, allowing the panko crust to crisp quickly before the chicken overcooks. Baking at 350°F tends to steam the breading, resulting in a softer crust.
Should chicken parm be covered when baking?
No, it should never be covered. Covering the chicken traps steam, which is the enemy of a crispy crust. You only want to cover it after the final cheese topping is added if you are worried about the cheese browning too fast, but generally, leave it uncovered throughout the entire cooking process.
How long to cook chicken parmigiana in the oven?
Plan for approximately 20 minutes total cook time, plus cheese topping. Bake the breaded cutlets uncovered for about 15 minutes until the crust is golden brown and the internal temperature reaches 165°F.
After adding sauce and mozzarella, return it to the oven for another 5 minutes until the cheese is melted and bubbling.
Is it true you should sear the chicken before baking for the best flavor?
No, this is a common misconception for baked preparations. Searing adds flavor via the Maillard reaction, but for this recipe, it risks overcooking the thin cutlet before the panko crust has a chance to fully toast in the oven.
If you want to master searing control for other recipes, see how we apply that principle in the [Sticky Garlic Chicken Noodles recipe].
What is the secret to keeping the breading from getting soggy?
Ensure the chicken is completely dry and use a metal baking sheet. Patting the chicken dry before dredging prevents surface moisture from interfering with the flour egg bond. Using a metal sheet, ideally on a wire rack, allows hot air to circulate underneath, crisping the bottom layer.
Can I prepare this recipe ahead of time?
Yes, the breading step can be done hours in advance. You can bread the chicken up to four hours ahead of time and keep it chilled on a wire rack, which actually helps the coating adhere further. If you want to freeze fully prepped cutlets, add about 10 minutes to the initial uncovered baking time.
Crispy Baked Chicken Parmesan

Ingredients:
Instructions:
Nutrition Facts:
| Calories | 557 kcal |
|---|---|
| Protein | 67.1 g |
| Fat | 16.5 g |
| Carbs | 21.9 g |
| Fiber | 1.8 g |
| Sugar | 4.2 g |
| Sodium | 945 mg |
