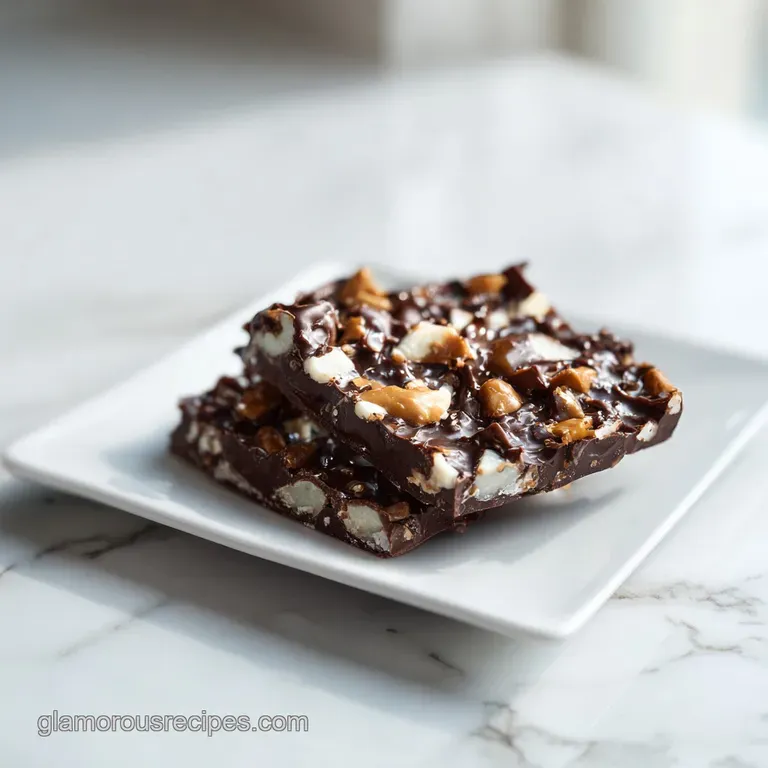
Chocolate Toffee Crack: Buttery and Crispy
- Time: Active 10 minutes, Passive 15 minutes, Total 25 minutes
- Flavor/Texture Hook: Shatter crisp buttery toffee with a velvety cocoa finish
- Perfect for: Holiday gifting, sophisticated dessert boards, or precision snacking
- Master the Artisan Texture of Chocolate Toffee Crack
- Why This Toffee Works Perfectly
- Comparing Fast vs Classic Methods
- Sourcing the Finest Pastry Elements
- Essential Precision Tools for Success
- Mastering the Toffee Technique Steps
- Professional Troubleshooting and Fixes
- Scaling the Batch for Any Occasion
- Creative Artisan Toffee Variations
- Storage and Preservation Strategies
- Sophisticated Pairings and Complements
- Debunking Common Kitchen Myths
- Recipe FAQs
- 📝 Recipe Card
Master the Artisan Texture of Chocolate Toffee Crack
The moment the sugar reaches a rolling boil, the kitchen fills with a scent that is nothing short of magic. It is that deep, toasted aroma of butter and brown sugar caramelizing into something structural and sophisticated.
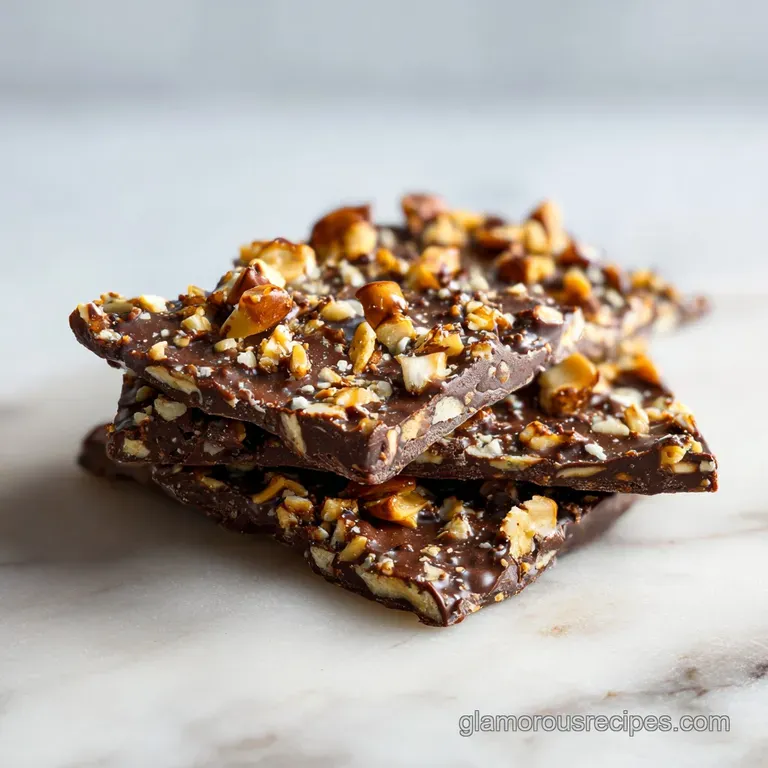
When you pour that molten gold over a humble grid of saltines, you are not just making a snack; you are performing a bit of pastry alchemy. There is a specific sound I wait for the crackling sizzle as the hot toffee meets the air and begins to set, followed later by that distinctive "shatter" when you finally break the cooled slab into artisan shards.
We are aiming for a result that looks like something from a high end confectionery shop. It should have a clean break, a glossy chocolate sheen, and a salt to sweet ratio that keeps the palate engaged.
If you have ever struggled with toffee that feels chewy or chocolate that peels away like a sticker, I have been there. We are going to focus on the precision of the boil and the temperature of the oven to ensure this Chocolate Toffee Crack is a masterpiece of texture and flavor.
Forget the idea that this is just a quick pantry treat. We are treating these ingredients with the respect they deserve. From the way we pack the sugar to the specific timing of the boil, every action contributes to the final snap.
It’s about understanding how the fat and sugar bond to create a brittle that doesn’t just melt it explodes with flavor. Let's get into the mechanics of why this works so you can achieve professional results in your own kitchen.
Why This Toffee Works Perfectly
The magic of this recipe lies in the thermal transition of the sugar and the structural support of the cracker base. It isn't just about mixing ingredients; it's about managing moisture and heat to create a specific molecular bond.
When we boil the butter and sugar, we are creating an emulsion that must be stabilized through heat.
- Hard Crack Solidification: Boiling the mixture for exactly three minutes at a high temperature removes enough water content to reach the hard crack stage, ensuring the toffee snaps rather than bends.
- Starch Toffee Bond: The secondary bake in the oven forces the boiling toffee into the pores of the saltines, creating a monolithic structure that prevents the crackers from becoming soggy.
- Residual Heat Tempering: By using the heat of the freshly baked toffee to melt the chocolate chips, we achieve a smoother, more integrated layer that resists bloom and maintains a velvety mouthfeel.
- Salt Fat Synergy: The sea salt flakes act as a flavor catalyst, cutting through the richness of the butter and the sweetness of the chocolate to highlight the toasted notes of the pecans.
| Method | Time | Texture | Best For |
|---|---|---|---|
| The Artisan Classic | 25 minutes | Ultra crisp, clean shatter | Professional gifting and dessert boards |
| The Quick Stovetop | 15 minutes | Chewy, slightly softer | Immediate cravings or casual snacking |
| The Microwave Batch | 10 minutes | Gritty, inconsistent snap | Last minute emergencies only |
The artisan method we are using today is superior because the oven step is the only way to truly fuse the toffee to the cracker. Without that second blast of heat, the toffee sits on top like a separate entity.
By baking it until it bubbles vigorously, we are essentially frying the cracker inside the toffee, which results in that addictive, airy crunch.
Comparing Fast vs Classic Methods
To understand why we take the time for the oven bake, we have to look at how the sugar behaves under different conditions. A quick stovetop only version often results in a layer that is "toffee flavored" but lacks the structural integrity of a true brittle.
| Feature | The Artisan Way | The Shortcut Version |
|---|---|---|
| Cracker Texture | Deeply toasted and integrated | Occasionally soggy or detached |
| Sugar Stability | High (resists melting at room temp) | Moderate (can become tacky) |
| Flavor Profile | Complex, browned butter notes | Simple, sweet caramel |
The decision to boil for exactly three minutes is a precision checkpoint. If you go for two minutes, you get a soft caramel that will stick to your teeth. If you go for four, you risk scorching the milk solids in the butter, leading to a bitter aftertaste.
Three minutes is the "goldilocks" zone where the sugar reaches the perfect density for a crisp break.
Sourcing the Finest Pastry Elements
Selecting your ingredients is the first step in the artisan process. Even with a recipe this focused, the quality of your butter and the percentage of cacao in your chocolate will drastically alter the final profile.
I prefer using a high fat European style butter if possible, as the lower water content leads to a more stable emulsion.
| Component | Science Role | Pro Secret |
|---|---|---|
| Salted Butter | Provides the fat for emulsification | Use cold butter to control the initial melt rate |
| Light Brown Sugar | Adds molasses for depth and texture | Pack it firmly to ensure precise volume |
| Semi Sweet Chips | Creates a stable, glossy top layer | Look for a cacao content around 50-60% |
When choosing your crackers, look for the classic salted variety. The salt on the surface of the cracker isn't just for flavor; it helps break the surface tension of the toffee as it spreads, allowing for a more even coat.
If you're feeling adventurous, a thin pretzel or even a graham cracker can work, but the saltine is the traditional choice for a reason its neutral, airy structure provides the perfect canvas.
For the Toffee Base
The light brown sugar is non negotiable for that artisan flavor. While white sugar would create a harder, more glass like brittle, the molasses in brown sugar adds a humectant quality that makes the toffee feel "rich" rather than just "sweet."
For the Chocolate Layer & Toppings
Using semi sweet chocolate chips (340g) provides the necessary stability. Darker chocolates may not melt as readily from the residual heat, and milk chocolate can sometimes be too soft to set firmly. The toasted pecans (60g) add an earthy, fatty crunch that rounds out the experience.
| Original Ingredient | Substitute | Why It Works |
|---|---|---|
| Saltine Crackers (1 sleeve) | Ritz Crackers | Higher fat content; results in a richer, more buttery base. |
| Semi Sweet Chips (2 cups) | Dark Chocolate Bars (chopped) | Higher cacao; adds sophistication and reduces overall sweetness. |
| Toasted Pecans (1/2 cup) | Smoked Almonds | Adds a savory, smoky dimension to the artisan finish. |
Chef's Tip: Freeze your chocolate chips for 10 minutes before sprinkling them on the hot toffee. This sounds counterintuitive, but the temperature shock helps the chocolate set with a better "snap" once it cools down.
Essential Precision Tools for Success
You don't need a professional pastry kitchen, but a few specific tools will make the process much smoother. A heavy bottomed saucepan is your most important ally. Thin pans have "hot spots" that can cause the sugar to burn in one corner while the rest hasn't even reached a boil.
For the baking sheet, a 12x17 inch jelly roll pan is the standard. It has the perfect surface area to accommodate one full sleeve of crackers without them overlapping. I highly recommend lining it with a silicone mat (like a Silpat) or high-quality aluminum foil.
If you use foil, make sure it is tucked tightly into the corners so the toffee doesn't seep underneath and glue the crackers to the metal.
An offset spatula is another tool that provides artisan precision. It allows you to spread the molten toffee and the melted chocolate without dragging your knuckles through the ingredients. If you don't have one, the back of a large metal spoon will work, but the control of a spatula is unmatched.
Mastering the Toffee Technique Steps
1. Prep the Artisan Canvas
Preheat your oven to 400°F (200°C). This high temperature is necessary for the rapid bubbling we need later. Line your 12x17 inch pan meticulously. Arrange the saltine crackers in a single, tight layer.
Note: Ensuring the crackers are touching prevents the toffee from pooling on the bottom of the pan.
2. The 3 Minute Hard Boil
In your heavy bottomed saucepan, combine the 225g of salted butter and 200g of light brown sugar over medium high heat. Stir constantly until the butter is completely melted and the mixture looks like a uniform, pale sludge.
3. The Oven Transformation
Once the mixture reaches a rolling boil where bubbles are breaking the surface even while you stir stop stirring immediately. Set your timer for exactly 3 minutes. The mixture will become airy, puffy, and turn a deep mahogany amber.
Pour it immediately over the crackers and spread it to the edges.
4. Applying the Chocolate Veil
Place the pan in the oven and bake for 5–6 minutes. Wait until the toffee is bubbling vigorously across the entire surface. This is the signal that the sugar has fused with the crackers. Remove the pan and sprinkle the 340g of chocolate chips evenly.
5. The Cold Snap Set
Let the chips sit for 2 minutes to soften. Use your spatula to spread them into a velvety, smooth layer. Top immediately with the 60g of toasted pecans and 1/2 tsp of sea salt flakes.
Allow the tray to cool at room temperature for 30 minutes, then refrigerate for at least 2 hours.
Professional Troubleshooting and Fixes
One of the most common issues in toffee making is separation. This happens when the fat in the butter detaches from the sugar, leaving a greasy puddle on top of your bark. This is usually caused by a sudden temperature change or uneven stirring during the initial melt.
Why is my toffee greasy or separating?
If you notice a layer of oil sitting on top of your boiling sugar, don't panic. This usually happens if the heat is too high too fast, or if the butter had a very high water content. To fix this, you can add a tablespoon of very hot water and whisk vigorously. The water helps re emulsify the fat into the sugar syrup.
Preventing Soggy Cracker Bases
A soggy base is the enemy of the "crack." This occurs if the oven isn't hot enough or if the toffee didn't boil long enough to reach the hard crack stage. If the toffee remains "taffy like" at room temperature, it will eventually soften the cracker.
| Problem | Root Cause | Solution |
|---|---|---|
| Grainy Toffee | Sugar crystals didn't melt | Stir more thoroughly during the initial melt phase. |
| Soft/Chewy Texture | Under boiled syrup | Ensure a full 3 minute rolling boil before baking. |
| Chocolate Peeling | Chocolate applied too late | Sprinkle chips immediately while toffee is bubbling hot. |
Common Mistakes Checklist:
- ✓ Use a heavy bottomed pan to prevent sugar scorching and ensure even heat distribution.
- ✓ Never stir once the rolling boil begins to maintain the aeration and prevent crystallization.
- ✓ Pat toasted pecans dry before topping to ensure they bond properly to the chocolate.
- ✓ Preheat the pan for 3 full minutes before adding oil if you're using a different base.
- ✓ Let the bark rest at room temperature before refrigerating to prevent the chocolate from "blooming" (developing white spots).
Ensuring Chocolate Adhesion
If your chocolate layer slides off the toffee when you try to break it, the toffee likely cooled too much before the chocolate was applied. The toffee needs to be molten so the chocolate can "grip" the sugar.
If this happens, you can briefly pop the pan back into a warm oven for 30 seconds to re melt the interface between the two layers.
Scaling the Batch for Any Occasion
When you're making this for a large gathering, it's tempting to just double everything. However, toffee is sensitive to volume changes.
Downsizing (1/2 batch): Use an 8x8 inch square pan. Reduce the boil time by about 30 seconds, as a smaller volume of sugar will reach the hard crack stage faster. If the recipe calls for one egg (not applicable here, but good to know), beat it and use half.
Upscaling (2x batch): I strongly recommend working in two separate batches rather than doubling the ingredients in one pot. A double batch of toffee is very difficult to stir effectively, and it takes much longer to reach the boil, which can lead to the sugar burning.
If you must double it, only increase the sea salt and pecans to 1.5x to prevent the flavors from becoming overwhelming.
Creative Artisan Toffee Variations
While the classic saltine version is legendary, the Chocolate Toffee Crack formula is incredibly versatile. You can swap the base, the chocolate, or the toppings to suit the season.
Espresso Dark Chocolate Twist
For a more "adult" version, whisk 1 tablespoon of instant espresso powder into the butter sugar mixture during the boil. Use a 70% dark chocolate for the topping and replace the pecans with crushed cocoa nibs. The bitterness of the coffee and dark chocolate provides a sophisticated counterpoint to the sweet toffee.
White Chocolate Peppermint Variation
This is a holiday favorite. Use white chocolate chips instead of semi sweet. Because white chocolate has a lower melting point, only let it sit for 1 minute before spreading. Top with crushed candy canes instead of pecans. It’s a bright, festive take on the traditional recipe.
For the Espresso Enthusiast
If you love the depth of coffee, try adding a layer of finely ground coffee beans between the crackers and the toffee. It creates a "crust" that is deeply aromatic and pairs perfectly with a morning latte or an after dinner digestif.
Storage and Preservation Strategies
Toffee is a shelf stable confection, but it is highly sensitive to humidity. In a humid environment, the sugar will draw moisture from the air, turning your crisp bark into a sticky mess.
- Storage
- Store the broken pieces in an airtight container. If you are layering them, place sheets of parchment paper between the layers to prevent the chocolate from sticking.
- Fridge
- Up to 2 weeks. The cold environment keeps the toffee at its crispest.
- Freezer
- Up to 3 months. This toffee actually tastes artisan level when eaten straight from the freezer.
Zero Waste Tip: Don't throw away the small crumbs and "dust" left at the bottom of the pan! These tiny bits of chocolate, toffee, and saltines are incredible when folded into a batch of thick and chewy brown butter cookies or sprinkled over vanilla bean ice cream.
Sophisticated Pairings and Complements
This Chocolate Toffee Crack is a powerhouse on its own, but it truly shines when part of a curated dessert experience. Because of its high fat and sugar content, it pairs beautifully with acidic or bitter elements that cleanse the palate.
Consider serving these shards alongside a plate of elegant chocolate covered strawberries. The freshness of the fruit cuts through the buttery richness of the toffee, creating a balanced dessert course. For a holiday gathering, I often arrange the toffee on a board with sharp white cheddar and green apples; the salty sweet tart combination is a classic for a reason.
If you are serving this at a dinner party, a glass of tawny port or a smoky Islay scotch is the ultimate accompaniment. The caramel notes in the toffee mirror the aged flavors of the spirits, while the salt highlights the complex undertones of the drink.
Decision Shortcut: If you want a cleaner snap, increase the fridge set time to 4 hours. If you want a softer bite, replace half the light brown sugar with dark brown sugar.
If you want a more savory profile, use smoked sea salt and toasted walnuts instead of pecans.
Debunking Common Kitchen Myths
There is a myth that you need a candy thermometer to make good toffee. While precision is great, visual and temporal cues are often more reliable for home cooks. If you wait for a specific temperature, you might miss the window where the butter and sugar are perfectly emulsified.
Trust the "3 minute rolling boil" rule it has been tested in thousands of kitchens with consistent success.
Another common misconception is that you should use unsalted butter and add salt later. In this recipe, using salted butter from the start allows the salt to dissolve into the fat, seasoning the toffee from the inside out. This results in a more integrated flavor than just having salt on the surface.
Finally,, people often think that the "crack" in the name refers to the sound. While it does shatter beautifully, the term actually comes from the "hard crack" stage of sugar cookery, which occurs between 300°F and 310°F.
By boiling our mixture and then baking it, we are ensuring we hit that temperature range every single time, giving you that professional artisan texture without the need for complex equipment.

Recipe FAQs
Should toffee be hard or soft crack?
It should reach the hard crack stage. Boiling the brown sugar and butter mixture for exactly 3 minutes ensures the candy sets into a firm, crisp texture rather than remaining chewy or sticky.
Is Christmas crack toffee?
Yes, it is a variation of saltine toffee. The term "Christmas crack" is a popular nickname for this recipe because the combination of buttery caramelized sugar and chocolate is highly addictive.
Which is the most famous toffee in the world?
English toffee is widely considered the most famous. While this recipe uses saltines as a base, traditional versions rely solely on the emulsion of butter and sugar to create a distinct, snappy crunch.
What are common saltine toffee mistakes?
The most common mistake is failing to let the toffee boil for the full 3 minutes. If you remove it from the heat too early, the mixture will not reach the proper temperature to set, resulting in a soggy bottom instead of a crisp, professional snap.
How to prevent the toffee from becoming soft?
Store your finished pieces in an airtight container within the refrigerator. Because sugar is hygroscopic, it pulls moisture from the air; keeping it chilled prevents it from absorbing humidity and turning sticky.
How to achieve a perfectly smooth chocolate layer?
Sprinkle the chocolate chips immediately after removing the pan from the oven and wait exactly 2 minutes. This resting period allows the residual heat from the toffee to melt the chips gently, making them easy to spread into a uniform layer with an offset spatula. If you enjoyed learning the patience required for this tempering style melt, you can apply similar heat control techniques to our dark chocolate covered strawberries.
How to properly arrange the crackers for even toffee distribution?
Place your saltine crackers in a single, tight, edge-to-edge layer across the 12x17 inch pan. Leaving gaps allows the hot toffee syrup to pool underneath the crackers, which prevents them from staying crisp and makes the final product difficult to break cleanly.
Chocolate Toffee Crack Recipe

Ingredients:
Instructions:
Nutrition Facts:
| Calories | 206 kcal |
|---|---|
| Protein | 1.3g |
| Fat | 13.8g |
| Carbs | 21.6g |
| Fiber | 1.1g |
| Sugar | 15.3g |
| Sodium | 163mg |
