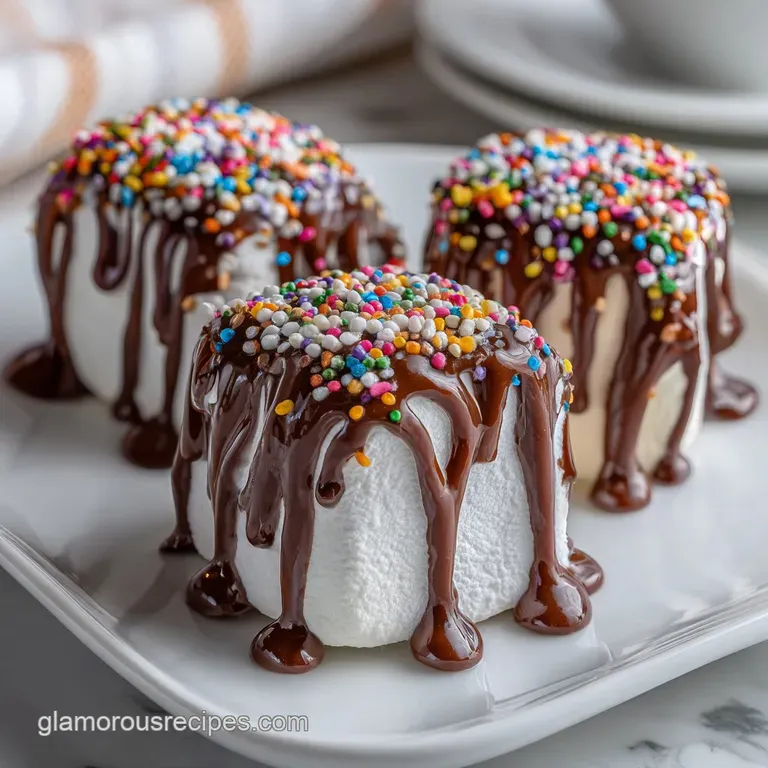
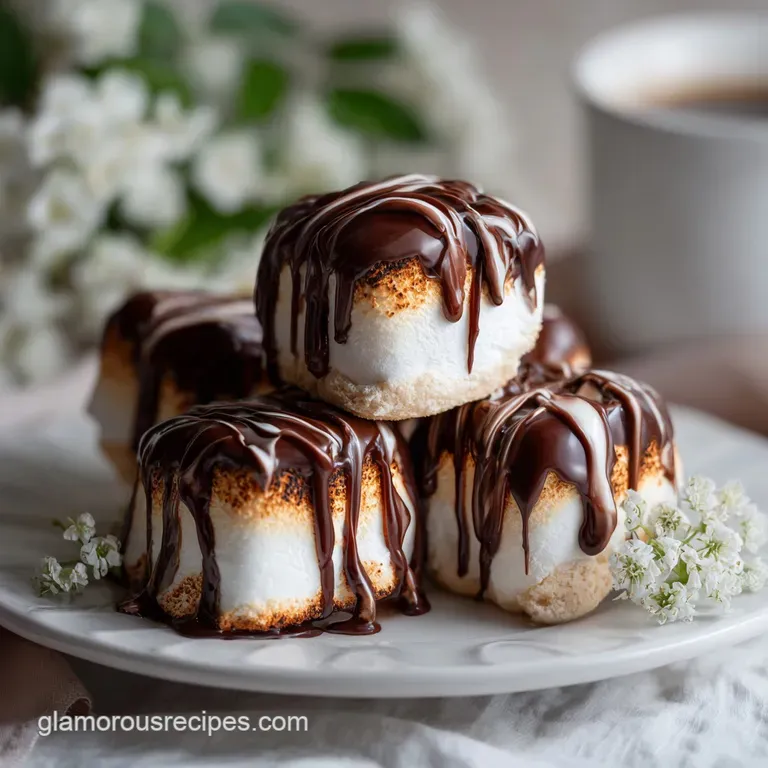
Chocolate Dipped Marshmallows
- Time: Active 10 mins, Passive 5 mins, Total 15 mins
- Flavor/Texture Hook: Velvety chocolate shell with a cloud like center
- Perfect for: Sunday dinners, last minute gifts, or a sacred family treat
- Creating the Ultimate Chocolate Dipped Marshmallows
- Reasons This Simple Treat Succeeds
- Essential Statistics and Preparation Timing
- Sourcing Your Quality Pantry Essentials
- Tools for a Professional Finish
- Step-By-Step Assembly and Dipping
- Solving Common Coating Mishaps
- Scaling Your Treats for Crowds
- Common Confectionery Myths Debunked
- Flavor Swaps and Dietary Tweaks
- Storage and Zero Waste Tips
- Creative Ideas for Any Crowd
- Recipe FAQs
- 📝 Recipe Card
Hey there! You know those Sunday dinners where everyone is lingering around the table, not quite ready for the night to end, but also too full for a heavy pie? That is exactly where these treats come in.
I used to think making anything involving melted chocolate was a recipe for a kitchen disaster I've seized more chocolate than I care to admit but I finally found the rhythm of it.
These aren't just your standard campfire snacks. We’re talking about a transformation into something truly special. When that semi sweet chocolate hits the soft marshmallow, and you add a little sprinkle of sea salt or peppermint, it becomes this elegant, bite sized piece of comfort food that reminds me of the treats my grandmother used to keep in a glass jar.
You are going to love how these look on a platter. They have that professional, glossy finish that makes people think you spent all afternoon hovering over a double boiler. In reality, we’re keeping it simple and focusing on the small details that make a huge difference in the final texture.
Creating the Ultimate Chocolate Dipped Marshmallows
There is something almost sacred about the ritual of dipping. The way the chocolate flows over the white surface, creating a thick, velvety coat that hardens into a brittle shell, is just so satisfying. I’ve learned the hard way that you can't just throw chocolate in a bowl and hope for the best.
You need a bit of logic and a lot of patience.
The secret to why this specific recipe works lies in the interaction between the sugar in the marshmallows and the fats in the chocolate. We’re not just coating them; we’re creating a barrier that keeps the marshmallow airy while providing a rich, decadent contrast. If you’ve ever tried the White Chocolate Pretzels recipe, you’ll know that the "snap" is everything when it comes to dipped confections.
Scientific Principles Behind the Velvety Texture
The Science of Why it Works: - Fat Soluble Emulsification: Adding coconut oil to semi sweet chocolate introduces medium chain triglycerides that lower the viscosity, allowing for a thinner, more even coating that sets with a professional sheen.
- Surface Tension Management: The smooth exterior of the Jet Puffed marshmallow provides a low friction surface that requires the chocolate to be at a specific temperature to "grip" without sliding off.
Chef's Note: I always freeze my marshmallows for about 10 minutes before dipping. This prevents the interior from softening too much when it hits the warm chocolate, ensuring that iconic cloud like bite stays intact.
Reasons This Simple Treat Succeeds
We often overcomplicate desserts, but the best ones are usually about the contrast of textures. These work because you get the immediate "shatter" of the chocolate shell followed by the squish of the marshmallow. It is a sensory loop that makes it hard to stop at just one.
| Prep Style | Texture Outcome | Flavor Profile |
|---|---|---|
| Fresh Dipped | Shattering shell with pillowy core | Intense cocoa with bright toppings |
| store-bought Shortcut | Waxy, soft coating | Muted, overly sugary sweetness |
Choosing the "fresh" route is always worth those extra few minutes. When you dip them yourself, the chocolate hasn't oxidized or sat in a plastic container for months. You get that fresh cracked aroma of cocoa that is absolutely essential for a high-quality dessert.
Another reason this recipe is a winner is the salt. I cannot stress this enough don't skip the sea salt. It cuts through the sugar and brings out the deeper, earthy notes in the semi sweet chocolate. It’s the same principle I use in my Deep Caramel Notes recipe, where the salt makes every other flavor pop.
Essential Statistics and Preparation Timing
When you're planning your kitchen time, remember that chocolate is a sensitive soul. It doesn't like to be rushed. While the total time is short, the active dipping requires your full attention.
- Total Yield: 24 servings
- Active Prep: 10 minutes
- Setting Time: 5 minutes (in fridge)
- Melting Temp: 110°F (Ideal for sem sweet)
If you’re making these for a big group, work in small batches of chocolate. If the chocolate sits too long, it begins to lose that fluid quality, and your marshmallows will end up with a clumpy, uneven coat instead of a sleek, professional look.
Sourcing Your Quality Pantry Essentials
You only have a handful of ingredients here, so each one has to pull its weight. I’ve tried the bargain bin chocolate chips, and honestly, they just don't melt the same way. They often contain more stabilizers and less cocoa butter, which leads to a grainy texture.
| Component | Science Role | Pro Secret |
|---|---|---|
| Semi sweet Chocolate | Provides structural "snap" and rich base | Melt in 30 second bursts to prevent scorching |
| Refined Coconut Oil | Lowers melting point and adds gloss | Use refined oil to avoid a heavy coconut taste |
| Large Marshmallows | Acts as a moisture stable, airy foundation | Use fresh bags; stale marshmallows won't hold the stick |
- 24 Large Jet Puffed Marshmallows: These provide the best height to width ratio for dipping. Why this? They have a consistent density that supports the weight of the chocolate.
- 24 Paper Straws or Lollipop Sticks: These are your handles. Why this? Paper straws add a pop of color and better grip than plastic.
- 12 oz semi sweet chocolate chips: The backbone of the flavor. Semi sweet (around 60% cacao) balances the sugar of the marshmallow perfectly.
- 2 tsp refined coconut oil: This is the secret for that high gloss finish.
- 2 tbsp crushed peppermint candies: For a sharp, cooling crunch.
- 1 tsp flaky sea salt: To balance the sweetness and add texture.
- 1/4 cup toasted sprinkles: For a festive, nostalgic look.
Tools for a Professional Finish
You don't need a lot of fancy gear, but a few specific items will make your life much easier. First, grab a microwave safe glass bowl. Glass retains heat better than plastic, which helps keep your chocolate fluid longer while you're working through all 24 marshmallows.
Second, find something to stand your marshmallows up in while they dry. I've used a block of floral foam covered in foil, or even a cardboard box with small holes poked in it. If you lay them down on parchment paper, you'll get a flat spot on the side of the chocolate, which is fine, but standing them up gives you that 360 degree perfection.
Finally,, a small silicone spatula is better than a spoon for stirring the chocolate. It lets you scrape the sides of the bowl effectively, ensuring every bit of chocolate is melted and integrated with the coconut oil. This prevents those tiny unmelted lumps that can ruin a smooth dip.
step-by-step Assembly and Dipping
Let's get into the process. Remember, the goal is a clean, velvety finish.
- Prep the station. Line a baking sheet with parchment paper and have your toppings ready in small, shallow bowls. Note: Speed is key once the chocolate starts to set.
- Skewer the marshmallows. Insert a paper straw into the center of each marshmallow, going about halfway through. Ensure the stick is firm and not wobbly.
- Melt the chocolate. Combine 12 oz chocolate chips and 2 tsp coconut oil in a glass bowl.
- Heat in intervals. Microwave for 30 seconds, then stir thoroughly. Continue in 15 second bursts until 90% is melted.
- Finish with residual heat. Stir the chocolate until the last few lumps disappear. This prevents the chocolate from exceeding 115°F and losing its temper.
- Execute the dip. Hold the straw and dip the marshmallow into the chocolate, tilting the bowl if needed. Cover at least two thirds of the marshmallow.
- Remove excess. Lift the marshmallow and gently tap your wrist to let the extra chocolate drip back into the bowl. Note: Do not shake the marshmallow or it might fly off the stick.
- Add the toppings. While the chocolate is still wet, sprinkle on the peppermint, sea salt, or toasted sprinkles. Wait about 10 seconds after dipping so the toppings don't slide off.
- Set the treats. Place the sticks upright in a stand or lay them on the parchment paper.
- Chill briefly. Place the tray in the fridge for 5 minutes until the shell is hard and matte.
Solving Common Coating Mishaps
Even with the best intentions, chocolate can be finicky. I remember the first time I tried this; I over microwaved the bowl, and the chocolate turned into a thick, gritty paste that looked like wet sand. It was heartbreaking, but it's a common mistake.
Why Your Chocolate Seized
If a single drop of water gets into your melting chocolate, it will clump up instantly. This is called seizing. The sugar and cocoa particles bind together instead of gliding past each other in the fat.
| Problem | Root Cause | Solution |
|---|---|---|
| Thick, grainy chocolate | Overheating or moisture contamination | Add 1 tsp of warm coconut oil and stir vigorously |
| Chocolate sliding off | Marshmallows are too warm or chocolate is too thin | Chill marshmallows for 10 mins before dipping |
| Dull, greyish streaks | Chocolate went out of temper (fat bloom) | Stir in more unmelted chips to stabilize the fat |
Handling the "Puddle" Effect
Sometimes, after you set the marshmallow down, a large pool of chocolate forms at the base. This usually means you didn't spend enough time tapping off the excess. When you lift the marshmallow out of the bowl, rotate it slowly as you tap. This helps distribute the coating evenly and prevents that bottom heavy look.
Scaling Your Treats for Crowds
If you’re making these for a big Sunday dinner or a school bake sale, you’ll likely need to double or triple the batch. However, don't just double all the ingredients in one bowl.
- Scaling Up (2x-3x): Work with 12 oz of chocolate at a time. If you melt 24 oz or more at once, the chocolate at the bottom will stay hot too long, while the top cools, leading to uneven dipping. Also, reduce the coconut oil slightly for larger batches to maintain a thicker shell; use about 3.5 tsp for 24 oz of chocolate.
- Scaling Down (1/2): If you only need a dozen, you can easily halve the recipe. Use a smaller, deeper bowl to ensure you have enough depth to submerge the marshmallows.
When baking or melting for a crowd, remember that spices and salt shouldn't always be doubled exactly. For the sea salt, start with 1.5x the amount and taste. You can always add more, but you can't take it away!
Common Confectionery Myths Debunked
There are so many "rules" about chocolate that just aren't true for the home cook. Let's clear a few up so you can dip with confidence.
- Myth: You must use a double boiler for perfect chocolate.
Truth: A microwave is perfectly fine and often safer for small batches of Chocolate Dipped Marshmallows. It minimizes the risk of steam (water) getting into the bowl and seizing your chocolate. Just go slow.
Myth: The "white stuff" on old chocolate means it's spoiled.
Truth: That is just "bloom," which is cocoa butter or sugar rising to the surface. It’s perfectly safe to eat and will disappear once you melt it down and integrate it with your coconut oil.
Myth: You need "melting wafers" for a good coating.
- Truth: high-quality chocolate chips or chopped bars actually taste better. Wafers often use palm oil instead of cocoa butter, which gives them a plastic like mouthfeel.
Flavor Swaps and Dietary Tweaks
One of the best things about these is how easily they adapt to the seasons. While I love the classic semi sweet and peppermint combo, the possibilities are endless.
| Original Ingredient | Substitute | Why It Works |
|---|---|---|
| Semi sweet Chocolate | Dark Chocolate (70%+) | Deeper, more bitter profile. Note: May require 1 extra tsp of oil for fluidity |
| Peppermint Candies | Crushed Pretzels | Adds a salty crunch. Great for those who don't like mint |
| Refined Coconut Oil | Cocoa Butter | More traditional flavor. Note: Harder to find but creates a firmer snap |
If you have friends who are dairy-free, you can easily use high-quality vegan chocolate chips. Most dark chocolates are naturally dairy-free anyway. Just check the label for "milk solids." For a holiday twist, try using white chocolate with a dusting of cinnamon and nutmeg it tastes just like eggnog!
Storage and Zero Waste Tips
Once these are set, you want to keep them in a cool, dry place. If your kitchen is warm, the chocolate will soften and get messy.
- Fridge: Store in an airtight container for up to 1 week. Use parchment paper between layers to prevent sticking.
- Freezer: These actually freeze beautifully! Store for up to 2 months. Eat them straight from the freezer for a firm, chewy treat.
- Zero Waste: If you have leftover melted chocolate, don't toss it! Stir in some nuts or dried fruit to make a quick "bark," or drizzle it over your morning oatmeal. You can also save the crushed peppermint dust to stir into your coffee for a homemade peppermint mocha.
Creative Ideas for Any Crowd
When it comes to serving, presentation is half the fun. For a formal look, I love placing each dipped marshmallow in a mini cupcake liner. It makes them look like individual truffles and prevents people's fingers from getting chocolatey if the room is a bit warm.
For a more casual gathering, you can arrange them on a large wooden board with some fresh berries and nuts. If you're feeling adventurous, you could even pair these with my Olympic Village Chocolate recipe for a full on cocoa themed dessert spread.
I hope you enjoy making these as much as I do. There is something so rewarding about taking a simple marshmallow and turning it into a piece of edible art. Just remember: keep your bowl dry, your heat low, and your salt flakes generous. Happy dipping!

Recipe FAQs
Can I use stale marshmallows?
No, fresh is best. Stale marshmallows have a drier interior and won't absorb moisture properly, leading to a less ideal texture when dipped.
How do I prevent my chocolate from seizing?
Keep moisture out. Ensure your bowl, utensils, and any ingredients are completely dry; even a tiny drop of water can cause melted chocolate to clump up and become unusable.
What is the best way to melt chocolate for dipping?
Use a microwave at 50% power in short intervals. Stirring between each 15-second burst is crucial to prevent scorching and achieve a smooth, fluid consistency.
Why are there dull, greyish streaks on my chocolate coating?
This is called fat bloom, and it means the chocolate is out of temper. Stir in a few unmelted chocolate chips to help stabilize the cocoa butter and bring it back into temper for a glossy finish.
Can I substitute the coconut oil in the recipe?
Yes, you can use cocoa butter for a more traditional flavor. However, cocoa butter is harder to find and will create a firmer snap, similar to the texture achieved in our Chocolate Covered Strawberries: Shatter Crisp recipe.
How should I store chocolate dipped marshmallows?
Store them in an airtight container in a cool, dry place. If your kitchen is warm, they can soften; consider refrigerating them in an airtight container for up to a week, using parchment between layers.
What’s the secret to getting a smooth, even chocolate coating?
Dip in small batches and tap off excess. Gently tap your wrist after lifting the marshmallow from the chocolate to allow excess to drip back into the bowl, ensuring a sleek, uniform layer. If you enjoyed mastering this smooth coating technique, you might also appreciate how we achieve a similar finish in our Festive Holiday Cookie: Sparkling Sugar Recipe.
Chocolate Dipped Marshmallows

Ingredients:
Instructions:
Nutrition Facts:
| Calories | 107 kcal |
|---|---|
| Protein | 0.8 g |
| Fat | 4.6 g |
| Carbs | 16.6 g |
| Fiber | 0.6 g |
| Sugar | 13.5 g |
| Sodium | 103 mg |
