Peanut Butter Cookies: Quintessential Chewy Recipe
- The Quest for the Perfect Peanut Butter Cookie: Chewy, Crisp, and Classic
- Baking Science Explained: Achieving the Ideal Cookie Texture
- Essential Pantry Items and Ingredient Specifics
- The Method: Baking the Classic Criss-Cross Cookies
- Troubleshooting and Expert Baker’s Notes
- Preparation, Storage, and Making Dough Ahead
- Sweet Pairings and Ways to Elevate Your Treat
- Recipe FAQs
- 📝 Recipe Card
The Quest for the Perfect Peanut Butter Cookie: Chewy, Crisp, and Classic
That smell. Seriously, that deep, rich, nutty aroma hits you the second the oven door opens, promising pure, uncomplicated comfort. It’s the scent of home, baked into a classic shape.
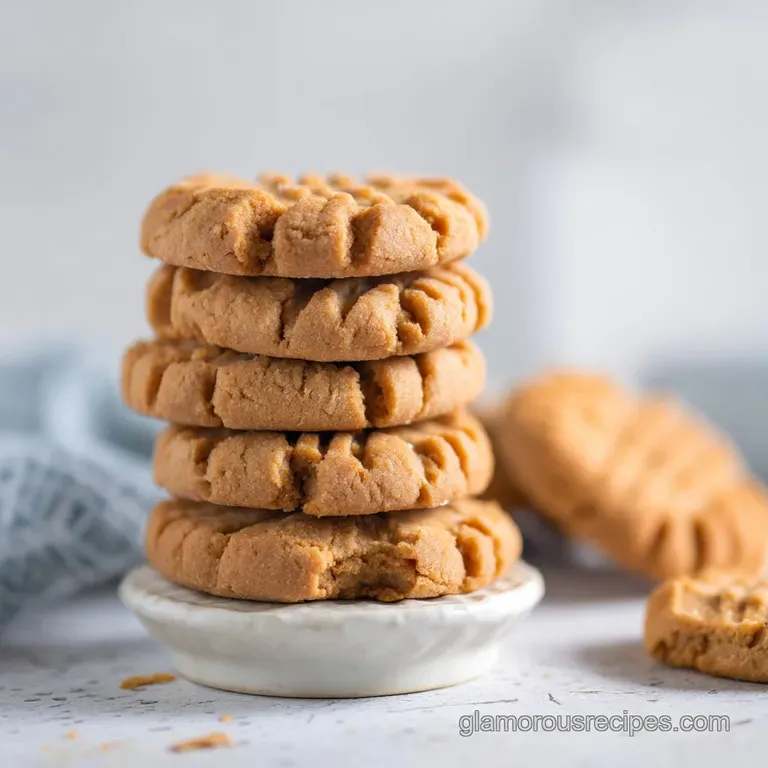
The combination of crisp edges yielding to a chewy center is intoxicating, and this recipe delivers the ultimate classic Peanut Butter Cookies .
Honestly, who needs a complicated layer cake when you can whip up this nostalgic treat in minutes? These cookies are fast, ridiculously easy, and use ingredients you probably already have lurking in the pantry right now. They truly are the perfect comfort bake when a craving hits hard.
I’ve made every mistake possible, from dry, crumbly disks to greasy, flat puddles that tasted more like a sad shortbread than a cookie. But after years of tweaking, I finally cracked the code on making truly perfect, thick, soft, and intensely flavored Peanut Butter Cookies .
Let’s crack on and nail that iconic crosshatch pattern, shall we?
Baking Science Explained: Achieving the Ideal Cookie Texture
Defining the Gold Standard: Why Texture Matters
It’s all about the mouthfeel, isn’t it? A superior batch of Peanut Butter Cookies demands that iconic textural contrast. You absolutely want the outside edges to give a satisfying, slight snap, but the middle must remain dense, soft, and incredibly moist never dry.
We achieve this specific texture by controlling two things: the type of sugar we use and the chilling time.
The Nostalgia Factor: A Deep Dive into Classic Flavor
The deep, roasted flavor of a perfect batch of Peanut Butter Cookies comes from properly balancing salt, sugar, and the fat content of the butter. A major flavor mistake people make is using too little salt; salt actually enhances the sweetness and prevents the cookie from tasting bland or one-note.
We’re using a mix of brown and white sugar because brown sugar retains moisture and adds a hint of caramel, ensuring that irresistible chewiness we crave.
The Role of Cold Butter and Room Temperature Eggs
Wait, didn't I just say "room temperature butter" in the recipe outline? Yes, but chilling the dough after mixing is critical. When we start, we use truly softened, room temperature butter and eggs. This allows the butter to emulsify perfectly with the sugar during the creaming stage, trapping tons of tiny air bubbles.
If your ingredients are too cold, this aeration won't happen, and your resulting Peanut Butter Cookies will be dense, flat, and hard.
Understanding Sugar Ratios for Perfect Spread and Chew
We’re using a higher ratio of brown sugar to white sugar here, which is the key to chewy cookies. Granulated sugar promotes spreading and crispness, while brown sugar, which contains molasses, keeps the finished cookie soft and moist.
If you want a crisper cookie, swap the ratios, but if you want that classic chewy heart, stick to this formula for the best Peanut Butter Cookies .
Why Chilling the Dough is Non-Negotiable
This is my biggest piece of advice, especially when making Peanut Butter Cookies . The chilling step is absolutely essential for two major reasons. First, it allows the flour to fully hydrate, preventing a dry or gritty texture.
Second, and most importantly, it hardens the fat (the butter and the peanut butter). When cold fat hits a hot oven, it takes longer to melt, meaning the cookie holds its shape longer before spreading out. This gives you those gorgeously thick, perfectly domed cookies rather than thin puddles.
Do not skip the 30 minute chill.
Essential Pantry Items and Ingredient Specifics
Choosing the Right Peanut Butter (Natural vs. Stabilized)
This is a hill I will die on. You must use a standard, stabilized commercial creamy peanut butter like Jif or Skippy for this recipe. I repeat: Do NOT use natural, oil-separation style peanut butter.
The oils in natural peanut butter will separate and cause your dough to spread uncontrollably, giving you flat, greasy Peanut Butter Cookies that defy gravity. Stick to the classic stuff here.
| Ingredient | My Recommendation | Substitution/Alternative |
|---|---|---|
| Flour | Standard All-Purpose | 1:1 gluten-free Blend with Xanthan Gum |
| Butter | Unsalted, Room Temp | Shortening (Crisco) or quality margarine (results in a softer cookie) |
| Egg | Large, Room Temp | Flax Egg (1 Tbs ground flaxseed + 3 Tbs water, let sit 5 min) |
| Peanut Butter | Stabilized, Creamy | Almond or Cashew Butter (Increase chill time to 2 hours) |
Scaling the Recipe: Measurements and Yields
This recipe yields a solid two dozen standard sized cookies. I highly recommend using a kitchen scale for measuring the flour and sugar, especially if you live in a humid environment.
When baking, precise measurements are your friend, which makes achieving the perfect texture for these Peanut Butter Cookies much easier. If you want to double the batch, simply double all the ingredients, but mix the dough in two separate batches to ensure proper creaming.
Simple Substitutions for Dairy or Gluten Needs
If you are dealing with a dairy intolerance, you can substitute the butter for shortening (Crisco) or a quality plant based butter alternative, but remember shortening often creates a slightly softer texture. For gluten-free Peanut Butter Cookies , use a high-quality 1:1 gluten-free flour blend.
If your blend doesn't include xanthan gum, add ½ teaspoon per cup of flour used. These adaptations generally work seamlessly.
The Method: Baking the Classic Criss Cross Cookies
Creaming the Fats and Sugars Properly
The creaming step is foundational. You need to cream the softened butter, brown sugar, and granulated sugar for a full 3 to 4 minutes on medium speed. Stop the mixer, scrape down the bowl, and then cream again.
The mixture should look visibly lighter, almost pale yellow, and fluffy, like thick frosting. This is the air you are trapping, which will prevent your Peanut Butter Cookies from being overly dense.
Forming Uniform Dough Balls for Even Baking
Always, always, always use a cookie scoop! It’s not just about speed; it's about uniformity. Cookies that are all the same size bake at the same rate. If you have big cookies and small cookies on the same sheet, the little ones will burn before the large ones are done. Aim for 1 ½ tablespoon scoops.
If you’re really serious, you can weigh them aim for about 40 45 grams per ball.
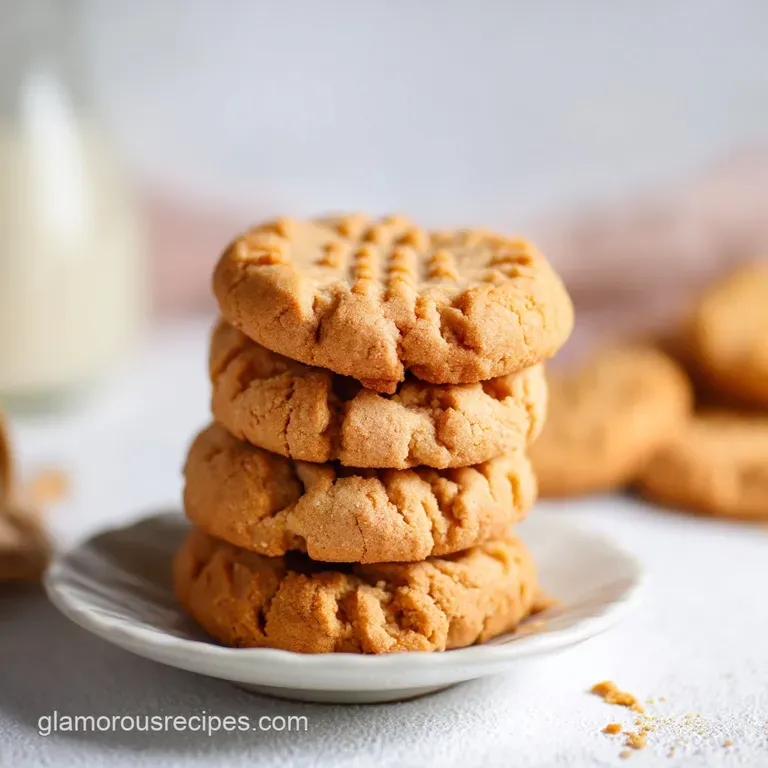
Applying the Criss Cross Signature Mark
This is the fun part and the hallmark of classic Peanut Butter Cookies . After rolling the dough ball in extra sugar (if desired), place it on the sheet. Use a dinner fork dipped lightly in granulated sugar (or flour, if you prefer less sweetness).
Gently press down, flatten the cookie about halfway, and lift. Rotate the fork 90 degrees and press again to create the famous crosshatch. Pro Tip: If you skip this step, the dough is so dense and rich it won't spread correctly on its own!
Judging Doneness: Knowing When to Pull Them from the Oven
This is where most people mess up! Overbaked Peanut Butter Cookies are sad and dry. You must remove them from the oven when the edges are set and just beginning to turn a pale golden color. The center should still look slightly puffed, soft, and underdone.
Trust me, the carryover heat from the baking sheet will finish cooking the centers while they rest.
Chef’s Note: Do not disturb the cookies for the first five minutes after removing them from the oven. Let them cool and set up completely on the baking sheet before attempting to transfer them to a wire rack. This prevents breakage and ensures they develop the perfect chew.
Troubleshooting and Expert Baker’s Notes
Preventing Cookies from Spreading Too Thinly
If your Peanut Butter Cookies are turning into flat disks, you likely have one of two problems. First, you might have used natural peanut butter (we covered this, don't do it!).
Second, your dough wasn't chilled long enough, or your oven temperature is slightly off (try cranking it up by 15°F next time, as this sets the edges faster).
Achieving Maximum Flavor Intensity
Want even more peanut flavor in these Peanut Butter Cookies ? Try browning your butter first! It adds a beautiful nuttiness and depth of flavor that complements the peanut butter wonderfully. I use that technique for my famous Chocolate Chip Cookies: Brown Butter Recipe for Thick Chewy Results , and it works magic here, too. Just brown your butter, let it cool back down to room temperature until it solidifies slightly, and proceed with the creaming steps.
Adjusting Bake Time for Crispness or Chewiness
For super chewy Peanut Butter Cookies , bake them for exactly 10 minutes, ensuring the center is still visibly soft. For a crispier edge and overall crunchier cookie, extend the baking time to 13– 14 minutes, until the edges are deep golden brown.
Preparation, Storage, and Making Dough Ahead
How to Freeze Cookie Dough Balls for Later Use
These are amazing for future cravings! Roll the dough into balls, complete the criss cross, and place them on a parchment lined tray. Freeze until completely solid (about 2 hours). Transfer the frozen dough balls to a freezer bag or airtight container. They keep beautifully for up to 3 months.
When ready to bake, place them directly onto a prepared sheet and bake you will likely need to add 2– 4 minutes to the total baking time. This is the secret to having fresh, warm Peanut Butter Cookies whenever the mood strikes.
Storing Baked Peanut Butter Cookies for Peak Freshness
Once the cookies are completely cool (this is important, trapping heat causes sogginess!), store them in an airtight container at room temperature. A small piece of bread placed in the container can actually help keep them soft by releasing moisture into the air.
Shelf Life and Reviving Stale Treats
Properly stored, your delicious Peanut Butter Cookies will stay fresh and chewy for 4 to 5 days. If they start feeling a little stale or dry, don't throw them out! You can easily revive them by placing a few cookies on a plate and microwaving them for 8 10 seconds.
The slight warmth softens the sugars and fats, making them taste warm and fresh from the oven again.
Sweet Pairings and Ways to Elevate Your Treat
These Peanut Butter Cookies are perfect on their own, obviously, but sometimes we want to dress them up a bit, right?
- Peanut Butter Blossom Style: Right after the cookies come out of the oven, press a miniature chocolate kiss (like a Hershey’s Kiss) gently into the center of each cookie. This creates the classic Peanut Butter Blossom, which is arguably the perfect holiday variation of these classic Peanut Butter Cookies .
- The Ultimate Sandwich: Use two cooled cookies to sandwich a scoop of vanilla ice cream, or perhaps a scoop of homemade lemon curd for a tart counterpoint (if you loved my Lemon Balm Melting Moments: The Perfect Tender, Buttery Biscuit recipe, you know I love lemon and butter!).
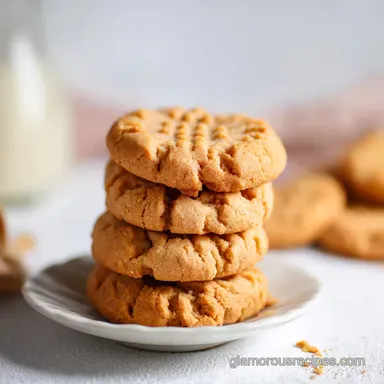
- Dunking: Serve them alongside a big, cold glass of whole milk, or a strong, hot cup of coffee. You deserve it. These are, after all, the best Peanut Butter Cookies you will ever make.

Recipe FAQs
How do 3-ingredient and 4-ingredient recipes compare to this classic chewy recipe?
Minimalist recipes typically rely on just peanut butter, sugar, and egg, which creates a very dense, fudgy, and slightly heavier cookie texture. This classic recipe incorporates butter and flour, yielding a superior structure that bakes up chewy in the center and crisp on the edges, offering a more traditional bakery style cookie experience.
Why are my peanut butter cookies crumbly or dry, and how do I ensure they are chewy?
Dryness usually results from inaccurate measuring of flour or over baking the cookies past the point of setting. To ensure a quintessential chewy texture, pull the cookies from the oven when they still look slightly pale and underbaked in the very center, as they will finish setting on the hot pan.
Utilizing a high ratio of brown sugar also locks in essential moisture.
Can I make this recipe without eggs?
Yes, you can successfully substitute the egg using a flax egg (1 tablespoon flaxseed meal whisked with 3 tablespoons water, rested for 5 minutes). Alternatively, commercial egg replacers work well for binding.
Because the dough might be slightly more delicate, ensure the scoops are thoroughly chilled before baking to prevent spreading.
How can I adapt this recipe to make Peanut Butter Chocolate Chip or Blossom Cookies?
For Chocolate Chip cookies, fold in 1 cup of semi sweet chocolate chips after the dry ingredients are combined. To make classic Blossoms, skip pressing the traditional crisscross pattern and instead press a chocolate kiss or truffle into the center of the warm cookie immediately upon removing the tray from the oven.
Why is chilling the dough necessary for peanut butter cookies?
Chilling is crucial because cold fats (butter and peanut butter) melt slower when exposed to the oven's heat. This process helps prevent excessive spreading, allowing the cookies to retain their height, set their structure quickly, and most importantly, maintain that deep, defined crisscross pattern.
I used the crisscross pattern, but my cookies spread too much and lost their definition. What went wrong?
Excessive spreading often happens if the dough was not adequately chilled, or if you used natural, oily style peanut butter instead of a processed, homogenized variety (like Jif or Skippy).
Always ensure your dough balls are firm and cold before placing them on the baking sheet to achieve optimal shape retention and height.
What is the best way to store or freeze these peanut butter cookies?
Baked cookies can be stored in an airtight container at room temperature for up to five days. To freeze the dough for future use, scoop the balls, chill them on a tray until firm, and then transfer them to a freezer safe bag or container.
You can bake the cookies directly from frozen, adding 2 4 minutes to the total bake time.
Chewy Peanut Butter Cookies Recipe
Ingredients:
Instructions:
Nutrition Facts:
| Calories | 120 kcal |
|---|---|
| Protein | 3.0 g |
| Fat | 6.0 g |
| Carbs | 14.0 g |
