
Introduction
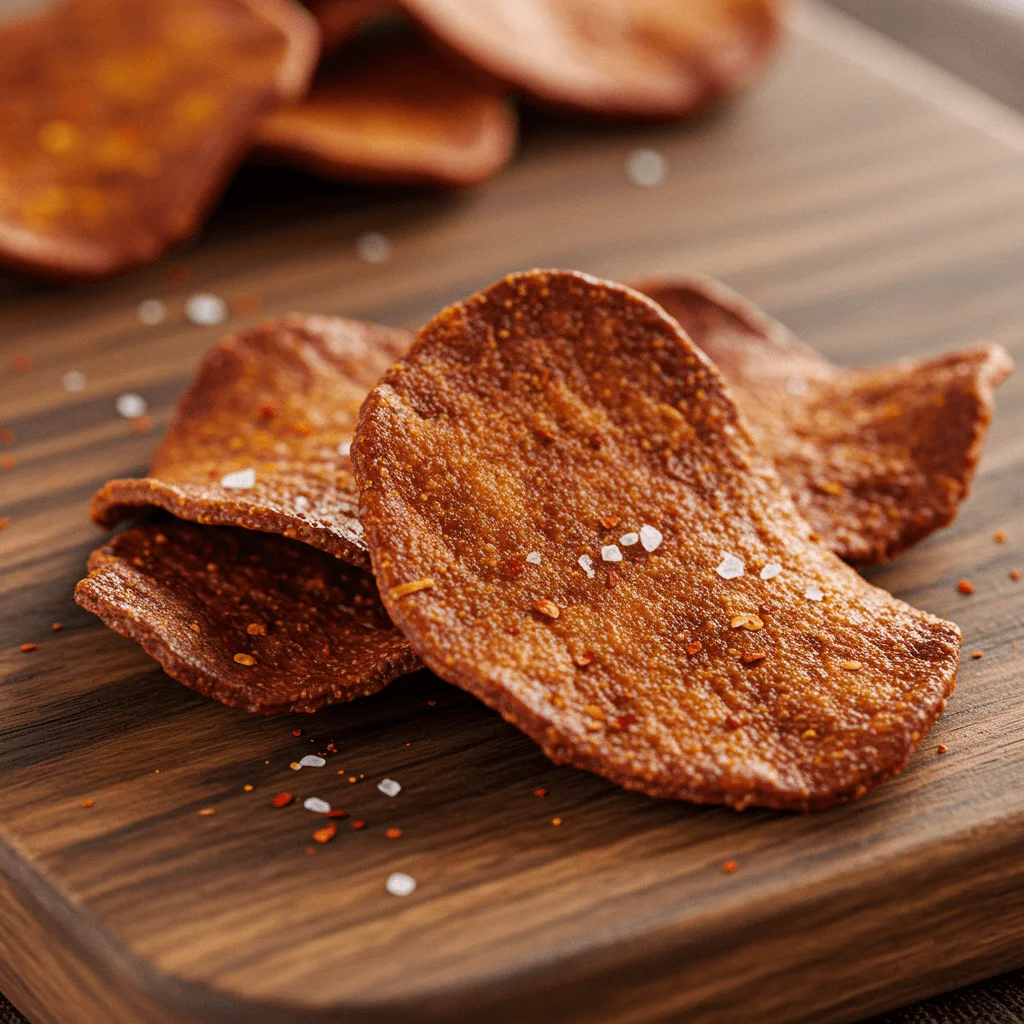
Beef chips are the ultimate crispy, high-protein snack that combines beef’s rich, savoury flavour with a satisfying crunch. Unlike traditional beef jerky, which is chewy and dense, beef chips are thin, light, and crispy, making them a perfect alternative for those who love a crunchy texture.
These low-carb, keto-friendly chips are packed with protein and flavour, making them an excellent choice for a healthy snack without added sugars or preservatives. Whether you’re on a paleo diet, need a quick post-workout bite, or crave a delicious, guilt-free snack, beef chips are a great option.
This guide will teach you everything you need to know about making crispy beef chips at home. From choosing the best cuts of meat to the different cooking methods—oven, air fryer, or dehydrator—you’ll learn how to make the perfect batch every time. Let’s get started!
What Are Beef Chips and Why You’ll Love Them?
Beef Chips vs. Beef Jerky – What’s the Difference?
Regarding dried meat snacks, beef chips and beef jerky are popular options but differ in texture, preparation, and taste. While both are made from thinly sliced beef, how they are processed leads to different eating experiences.
1. Texture: Crispy vs. Chewy
The biggest difference between beef chips and beef jerky is their texture.
- Beef chips are thin, crispy, and light, much like potato chips but with a richer, meaty flavour. They have a crunchy bite that makes them incredibly satisfying.
- Beef jerky, on the other hand, is chewy, dense, and slightly tough. It retains more moisture than beef chips, giving it a more traditional meaty feel.
2. Cooking Process: Drying vs. Crisping
The method used to make these two snacks also varies:
- Beef chips are cooked using higher temperatures to remove moisture quickly and completely, resulting in a crispy texture. Methods like baking, air frying, or dehydrating at higher temperatures help achieve the perfect crunch.
- Beef jerky is slow-dried at low temperatures (usually in a dehydrator or oven) to remove moisture gradually, preserving the meat’s chewiness.
3. Ingredients and Seasoning
- Beef chips are typically seasoned with salt, pepper, and spices before crisping to perfection. Some recipes may include a light marinade, but excessive moisture can prevent them from getting crispy.
- Beef jerky often requires longer marinating in soy sauce, Worcestershire sauce, honey, or other flavorful liquids before drying. This helps retain moisture and creates the chewy texture jerky is known for.
4. Nutrition and Dietary Benefits
Both beef chips and beef jerky are high in protein and low in carbohydrates, making them great options for keto, paleo, and low-carb diets. However, there are slight differences:
- Beef chips have less moisture and are often lower in sugar and preservatives since they don’t require a marinade. This makes them a leaner and crunchier snack.
- Beef jerky can sometimes contain added sugars or artificial preservatives from marinades, increasing the carb content depending on the brand or recipe.
5. Shelf Life and Storage
Both snacks are designed to last, but their shelf lives differ:
- Due to their lower moisture content, beef chips have a longer shelf life when stored properly in an airtight container.
- Beef jerky can last for months but may need vacuum-sealing or refrigeration for extended storage because it retains some moisture.
Which One Should You Choose?
If you prefer a light, crispy, and crunchy snack, beef chips are the way to go. They’re perfect for snacking on their own, pairing with dips, or even adding as a topping for salads.
If you enjoy a chewy, more traditional meat snack, beef jerky might be your go-to choice. It offers a heartier bite and intense flavour due to the marination process.
Both options have their perks, but beef chips are an excellent choice if you’re looking for a quick, homemade, and guilt-free snack!
Best Cuts of Beef for Crispy Chips
Choosing the right cut of beef is essential for making crispy, flavorful beef chips. Since the goal is to achieve a thin, crunchy texture, the best cuts are lean, tender, and easy to slice thinly.
1. Why Lean Cuts Work Best
Fat content plays a crucial role in achieving crispy beef chips.
- Too much fat can prevent the beef from crisping properly, creating a chewy or greasy texture.
- Lean cuts contain less connective tissue and fat, allowing the meat to dehydrate evenly and develop a light, crunchy bite.
- Well-trimmed lean cuts ensure the chips cook uniformly without leaving soggy or chewy spots behind.
2. Recommended Cuts for Beef Chips
Here are the best beef cuts for making crispy beef chips:
a) Top Round
- Also known as inside round, this cut comes from the cow’s hind leg.
- It is lean, flavorful, and budget-friendly.
- Because of its firm texture, it slices thinly and crisps up beautifully.
- Works well for both oven-baked and air-fried beef chips.
b) Eye of Round
- One of the leanest cuts of beef, making it ideal for crispy chips.
- Slightly less tender than other cuts, but when sliced thinly, it produces an excellent crunch.
- Great for dehydrator and oven methods since it lacks excessive fat.
c) Sirloin (Top Sirloin or Bottom Sirloin)
- The top sirloin is more tender, while the bottom sirloin has slightly more chew.
- Both options work well, but trimming excess fat is essential for achieving crispiness.
- A good balance of flavour and leanness makes sirloin a solid choice.
d) Flank Steak
- Flank steak is naturally thin and lean, making it one of the best choices for beef chips.
- It is intensely beefy and crisps up beautifully when sliced against the grain.
- Perfect for marinating lightly before crisping for extra flavour.
e) Brisket (Flat Cut)
- While brisket is often associated with slow cooking, the flat cut is relatively lean and can work well for beef chips.
- Requires extra-thin slicing to prevent chewiness.
- Works best with oven or air-fryer methods.
3. How to Slice the Beef for Maximum Crispiness
- Slice against the grain to ensure the chips are crisp rather than chewy.
- Thickness matters: Aim for ⅛ inch (3 mm) or thinner to allow the meat to crisp up properly.
- For easier slicing, partially freeze the beef for 30-45 minutes before cutting. This helps maintain uniform, thin slices.
4. Should You Trim the Fat?
Yes! Even lean cuts may have a small layer of fat or marbling.
- Excess fat should be trimmed off to prevent uneven cooking and greasy chips.
- While some marbling can add flavour, too much will make the chips less crispy.
Final Thoughts
For the crispiest beef chips, stick to lean, easily sliceable cuts like top round, eye of round, or flank steak. Remember to slice thinly against the grain and trim excess fat for the best texture.
Essential Ingredients and Tools for Making Crispy Beef Chips
You need the ingredients and tools to make home crispy, flavorful beef chips. Choosing quality ingredients and using the proper equipment will ensure your beef chips turn out light, crunchy, and delicious every time.
1. Essential Ingredients
While beef chips require minimal ingredients, the quality of each one makes a difference. Here’s what you need:
a) Beef (Main Ingredient)
- The key ingredient in beef chips is, of course, beef.
- Opt for lean cuts such as top round, eye of round, or flank steak to achieve the best crispiness.
- Make sure to trim excess fat for even drying and crunchiness.
- Slice the beef ⅛ inch (3 mm) or thinner for the best results.
b) Seasonings and Spices
Beef chips can be seasoned in various ways, depending on your flavour preference. Here are some popular options:
Basic Seasoning (Classic and Simple)
- Salt & black pepper – Essential for enhancing natural beef flavour.
- Garlic powder & onion powder – Adds depth and a subtle savoury taste.
Spicy Beef Chips (For Heat Lovers)
- Cayenne pepper or chilli powder – It gives a spicy kick.
- Paprika – Adds mild smokiness and enhances colour.
Savoury and Umami Flavors
- Soy sauce or Worcestershire sauce – Adds a salty, umami-rich depth to the meat.
- Smoked paprika or liquid smoke – Provides a smoky barbecue-style flavour.
- Parmesan cheese powder – Great for an extra savoury bite.
Sweet and Tangy Options
- Brown sugar or honey – Balances out the saltiness with sweetness.
- Apple cider vinegar – Adds a slight tang that enhances the overall flavour.
c) Optional Marinades (For Extra Flavor)
- While beef chips are typically dry-seasoned, a light marinade adds flavour.
- Avoid excess liquid—too much moisture will make it harder to crisp the chips properly.
- Let the beef marinate for 30 to 2 hours, then pat dry before cooking.
2. Essential Tools
Having the right tools ensures that your beef chips cook evenly and reach the perfect level of crispiness.
a) Sharp Knife or Meat Slicer
- Thin, even slices are key to getting crispy beef chips.
- A sharp chef’s knife works well, but a meat slicer is ideal for precision and consistency.
- Tip: Partially freeze the beef for 30-45 minutes before slicing for better control.
b) Cutting Board
- A large, stable cutting board makes it easier to slice beef safely.
- Use a wooden or plastic cutting board that’s easy to clean.
c) Wire Rack or Baking Sheet
- Place the beef slices on a wire rack over a baking sheet for oven-baking.
- This allows air circulation, helping the chips crisp evenly.
- If using a baking sheet without a rack, line it with parchment paper to prevent sticking.
d) Air Fryer (Optional, but Highly Effective)
- An air fryer is one of the best tools for making beef chips extra crispy.
- It uses hot air circulation to dehydrate and crisp the meat quickly.
e) Dehydrator (For a Traditional Approach)
- A food dehydrator is great if you prefer a slow-dried, crunchy texture.
- It works best at 145°F (63°C) to 160°F (71°C) for 4-6 hours.
- Dehydrators help retain more of the natural beef flavour while removing moisture gradually.
f) Tongs or Spatula
- Useful for flipping beef slices halfway through cooking.
- Helps prevent breakage and ensures even crispiness.
g) Storage Containers (For Keeping Chips Fresh)
- Airtight containers or resealable bags are essential for storing beef chips.
- Keeps them crispy and fresh for longer.
- Silica gel packs (optional) help absorb moisture to extend shelf life.
Final Thoughts
You can make crispy, delicious beef chips home with just a few key ingredients and tools. Using lean beef, the right seasonings, and proper slicing techniques will ensure the best results. Whether you bake, air-fry, or dehydrate, the right equipment makes the process easy and efficient.
Step-by-Step Guide to Making Beef Chips at Home
Preparing the Beef for Crispy Beef Chips
Proper preparation is the foundation of making crispy, flavorful beef chips. How you slice, season, and handle the meat will determine the final texture and taste. Follow these essential steps to ensure your beef chips are perfectly crunchy and flavorful.
1. Selecting the Right Cut of Beef
Choosing the right cut of beef is crucial for achieving the desired crispiness.
- Lean cuts work best because they have less fat, which prevents the chips from becoming greasy.
- Ideal cuts include Top round – Lean, firm, and easy to slice.
- Eye of round – Extremely lean, crisps up well.
- Flank steak – Naturally thin and flavorful.
- Sirloin – A good balance of tenderness and leanness.
Avoid fatty cuts like ribeye or chuck, as excess fat can make the chips chewy instead of crispy.
2. Chilling the Beef for Easy Slicing
Before slicing the beef, partially freeze it.
- Place the beef in the freezer for 30-45 minutes until it is firm but not fully frozen.
- This step makes achieving thin, uniform slices easier, which is key to getting crispy chips.
If using a meat slicer, adjust the setting to ⅛ inch (3 mm) or thinner for the best results.
3. Slicing the Beef for Maximum Crispiness
Thin, even slices ensure the beef dries and crisps up properly.
a) Slice Against the Grain
- Cutting against the grain shortens the muscle fibres, making the chips less chewy and crisper.
- Look for the natural lines on the meat and slice perpendicular to them.
b) Aim for Thin Slices
- The ideal thickness is ⅛ inch (3 mm) or less.
- If slices are too thick, they may become chewy instead of crispy.
- Using a sharp knife or a meat slicer ensures precision.
4. Trimming Excess Fat
Even lean cuts may have small amounts of fat, which should be removed.
- Fat does not dehydrate well and can make the chips greasy or unevenly crispy.
- Use a sharp knife to trim any visible fat before seasoning and cooking.
5. Seasoning the Beef
Seasoning is essential for enhancing the natural umami flavour of beef chips. There are two main methods:
a) Dry Seasoning (Quick & Easy)
- Works best for achieving an ultra-crispy texture.
- Simply rub spices directly onto the beef slices before cooking.
- Common seasonings include salt and black pepper, which are basic and essential.
- Garlic powder and onion powder – Adds depth and richness.
- Smoked paprika – Provides a smoky, slightly sweet flavour.
- Cayenne or chilli powder – Great for a spicy kick.
b) Light Marinade (For Extra Flavor)
- Adds a boost of flavour while keeping the chips crispy.
- Avoid excess liquid, as too much moisture makes it harder for the beef to dry properly.
- Suggested marinades: Soy sauce or Worcestershire sauce – Deepens the umami flavour.
- Apple cider vinegar or lemon juice – Adds a slight tanginess.
- Liquid smoke – Creates a BBQ-like smokiness.
- Honey or brown sugar (optional) – Balances saltiness with a hint of sweetness.
- Marinate for 30 minutes to 2 hours, then pat dry before cooking.
After seasoning, let the beef rest for 10-15 minutes to absorb flavours before cooking.
6. Drying the Beef Before Cooking
- If using a marinade, pat the slices dry with paper towels to remove excess moisture.
- Drying the beef helps it crisp up faster in the oven, air fryer, or dehydrator.
- For extra crispiness, let the seasoned meat air-dry on a rack for 15-30 minutes before cooking.
Final Thoughts
Proper preparation ensures crispy, flavorful beef chips every time.
- Chill the beef for easy slicing.
- Slice thinly against the grain for crispiness.
- Trim excess fat to prevent greasiness.
- Use dry seasoning or light marinades for enhanced flavour.
- Pat dry before cooking to remove extra moisture.
Following these steps, you’ll set yourself up for perfectly crunchy homemade beef chips. Let me know if you need any additional preparation tips!
Cooking Methods – Oven, Air Fryer, or Dehydrator
The next step is cooking once you’ve properly prepared and seasoned your beef. Your chosen method will affect your beef chips’ final texture, crispiness, and overall flavour. Below, we’ll explore the best cooking methods: the oven, air fryer, and dehydrator. Each has advantages, so choose the one that best suits your kitchen setup and preference.
1. Oven – A Convenient and Reliable Method
The oven is a great option because most home kitchens already have one. It allows you to make large batches of beef chips at once while maintaining even heat distribution.
How to Cook Beef Chips in the Oven:
- Preheat the Oven – Set it to 200°F (95°C) to 250°F (120°C). A lower temperature ensures slow dehydration, which helps achieve crispiness without overcooking the beef.
- Prepare the Baking Sheet – Line a baking tray with parchment paper or place a wire rack over a baking sheet to allow air circulation.
- Arrange the Beef Slices – Lay the slices in a single layer, ensuring they don’t overlap. This prevents steaming and ensures even drying.
- Slow-Bake the Beef – Place the tray in the oven and bake for 2 to 4 hours, flipping the slices halfway through.
- Check for Doneness – The chips should be completely dry and crisp. Extend the baking time by 30-minute increments if they are still slightly chewy.
- Cool and Store – Let the chips cool completely before storing them in an airtight container to maintain crispiness.
Pros of Using the Oven:
- Can cook large batches at once
- Provides even heat distribution
- No special equipment is needed.
Cons:
- Takes longer compared to an air fryer
- Requires careful monitoring to prevent overcooking
2. Air Fryer – The Fastest and Most Efficient Option
An air fryer is perfect if you want quick, crispy beef chips without waiting hours for dehydration. The rapid hot air circulation mimics deep frying but uses minimal to no oil.
How to Cook Beef Chips in the Air Fryer:
- Preheat the Air Fryer – Set it to 250°F (120°C) to 275°F (135°C) for optimal drying.
- Arrange the Beef Slices – Place them in a single layer in the air fryer basket. Do not overcrowd, as airflow is key to even crisping.
- Air Fry in Batches – If needed, cook in multiple batches to prevent overlapping.
- Cook Time – Air fry for 45 to 1.5 hours, flipping the slices every 15 minutes for even drying.
- Check for Crispiness – Once the chips are firm, dry, and crispy, remove them and let them cool before storing.
Pros of Using an Air Fryer:
- Faster than the oven or dehydrator
- Uses less energy compared to an oven
- Produces very crispy results
Cons:
- Limited capacity (only small batches at a time)
- Large quantities may require multiple batches.
3. Dehydrator – The Best for Preserving Flavor and Texture
A food dehydrator is ideal for making beef chips with the best texture while preserving the natural flavour. This method removes moisture without quickly cooking the meat, producing a perfectly crispy, lightweight snack.
How to Cook Beef Chips in a Dehydrator:
- Preheat the Dehydrator – Set it to 160°F (70°C) to 170°F (75°C) for proper drying.
- Arrange the Beef on Dehydrator Trays – Spread the slices evenly in a single layer. Avoid overlapping to allow adequate airflow.
- Dehydrate for Several Hours – Let the beef dry for 4 to 8 hours, depending on the thickness of the slices and the power of your dehydrator.
- Check for Dryness – The chips should be crisp and break apart easily when bent. If they are still slightly chewy, continue dehydrating for another hour.
- Cool Before Storing – Let the chips cool completely before sealing them in an airtight container.
Pros of Using a Dehydrator:
- Best for even, consistent drying
- Preserves beef flavour the most
- Uses the least amount of heat, preventing overcooking
Cons:
- Takes the longest time (4-8 hours)
- Requires a dehydrator, which not everyone has
Which Cooking Method is Best?
The best method depends on your priorities:
- If you want fast, crispy chips, go with the air fryer.
- The oven is a great option to make a large batch.
- The dehydrator is ideal if you want the best texture and flavour preservation.
Whatever method you choose, following the right temperature and cooking times will ensure perfectly crispy homemade beef chips.
Storing and Serving Beef Chips

Once your homemade beef chips are cooked to crispy perfection, the next step is proper storage to keep them fresh and ready for serving. Whether you plan to enjoy them as a snack, include them in a recipe, or serve them at a gathering, knowing how to store and serve beef chips will ensure they maintain their flavour and texture.
Storing Beef Chips
Proper storage is key to keeping your beef chips crisp and flavorful. Here are some helpful tips to ensure they last as long as possible:
- Cool Completely Before Storing
- It’s essential to let your beef chips cool completely before storing them. If you seal them in a container while they are still warm, the moisture trapped inside can cause them to become soggy.
- Use Airtight Containers
- Once cooled, store your beef chips in an airtight container. This will help maintain their crispiness by preventing exposure to moisture and air, which can cause them to lose texture over time. You can use glass jars, plastic containers, or resealable bags. If you want to keep them extra fresh, consider adding a silica gel packet to absorb any excess moisture inside the container.
- Vacuum Sealing for Longer Shelf Life
- For an even longer shelf life, vacuum sealing is a great option. You can keep your beef chips fresh for months by removing all the air. Vacuum-sealed bags are particularly effective if you plan to store large quantities or want to save some for later use.
- Refrigeration (Optional)
- If you prefer, you can refrigerate your beef chips, especially in hot climates where the temperature may cause them to lose their crispiness faster. While refrigeration may not be necessary, it can help preserve the chips for up to 2 weeks. Ensure they are sealed tightly in an airtight container.
- Freezing for Long-Term Storage
- For long-term storage, freezing is an option. Beef chips can last for up to 6 months in the freezer when stored in a vacuum-sealed bag or airtight container. To enjoy them, let them thaw at room temperature or place them in the oven for a few minutes to re-crisp them.
Serving Beef Chips
Beef chips are versatile and can be served in many ways. Here are some ideas for how to enjoy your crispy homemade beef chips:
- As a Snack
- Beef chips make a perfect standalone snack, whether you’re craving something savoury or need a high-protein snack on the go. Serve them as-is, or pair them with dips for extra flavour. Consider dipping them in guacamole, salsa, or a tangy yogurt-based dip.
- In Salads or Bowls
- Add crunchy to your salads or grain bowls by topping them with crumbled beef chips. They pair well with fresh greens, avocado, and roasted vegetables. You can even use them as a substitute for croutons in a salad for a more substantial, protein-packed option.
- As a Topping for Soups or Stews
- Sprinkle beef chips over hot soups or stews for added texture and flavour. Their crunch complements the rich, hearty textures of soups like beef stew, chilli, or tomato soup, enhancing the overall dish with a satisfying crunch.
- With Cheese and Charcuterie
- Beef chips are a great addition to any cheese or charcuterie platter. Pair them with cheeses like sharp cheddar, gouda, or brie and some olives, pickles, or fruit for a savoury and crunchy bite.
- In Sandwiches or Wraps
- Add a bit of extra crunch to your sandwich or wrap by layering beef chips inside. They go especially well with roast beef, turkey, or cheese sandwiches. You can also pair them with fresh veggies like lettuce and tomatoes for a flavorful contrast.
By following these storage tips and serving ideas, you can make sure your beef chips stay delicious and versatile, ready to enjoy whenever you’re in the mood for a tasty, protein-packed snack.
A Chef’s Note
Making beef chips at home is a fun culinary project and a fantastic way to enjoy a high-protein snack that you can customize to your taste. The options are endless, whether you prefer them spicy, smoky, or seasoned. You can achieve perfectly crispy chips that satisfy any craving by using quality beef, proper preparation, and the right cooking method.
Remember, storing your beef chips correctly is just as important as cooking them to perfection, so keep them fresh for longer enjoyment. And don’t be afraid to experiment with different cuts of beef, spices, and even dips to make your beef chips your own.