
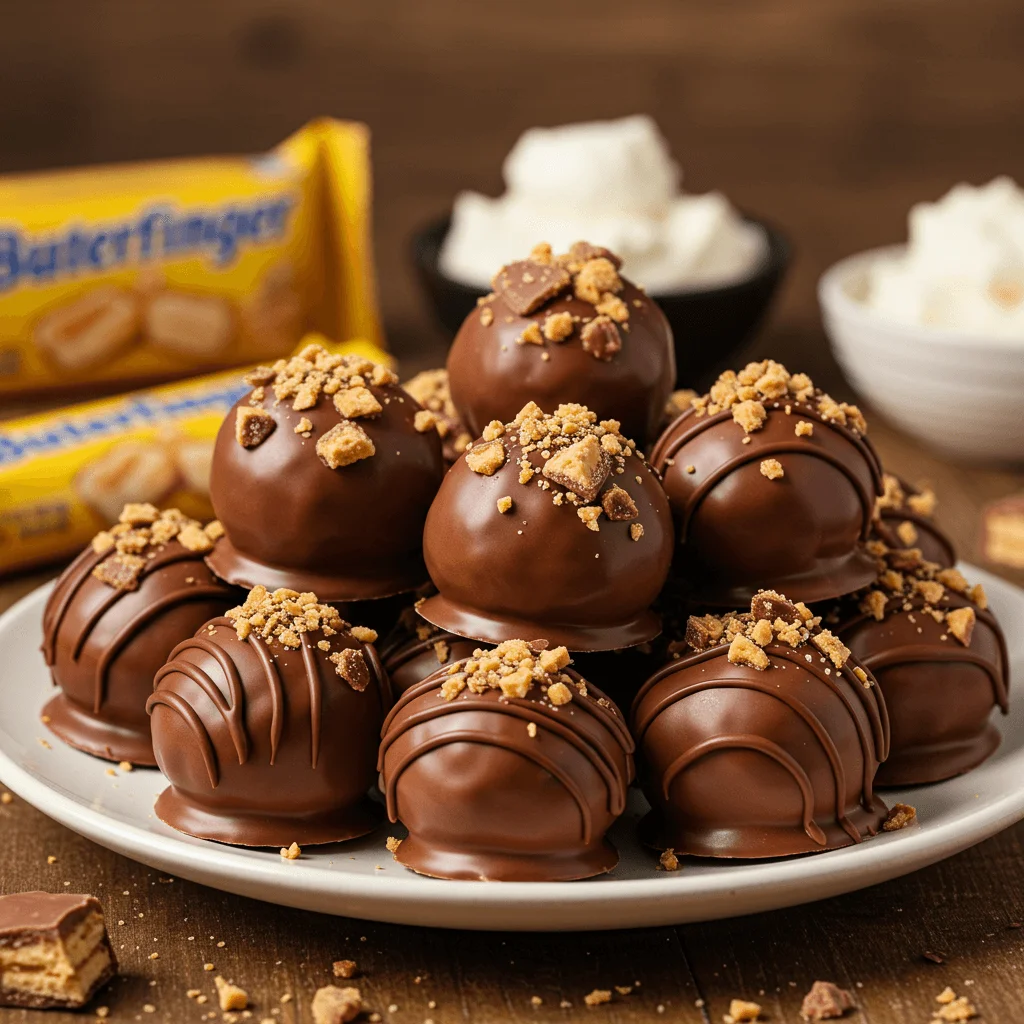
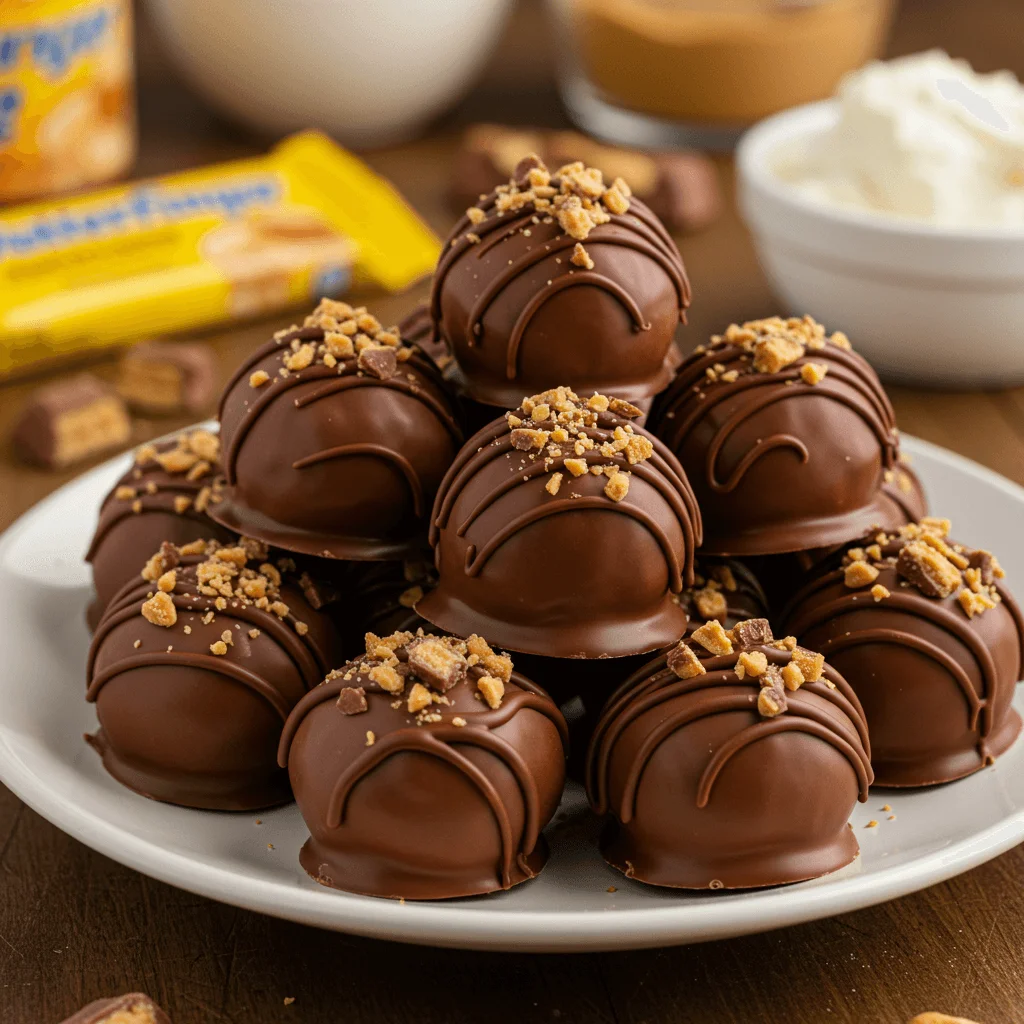
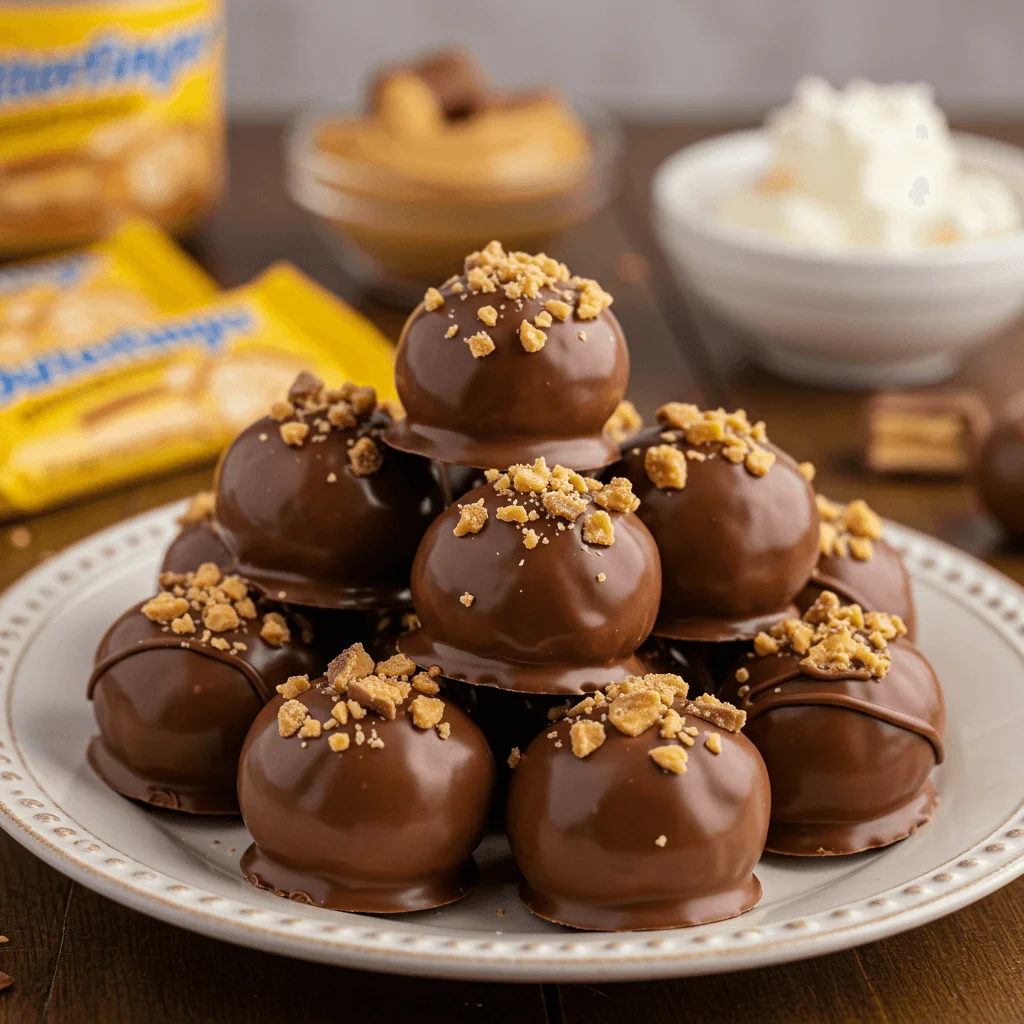
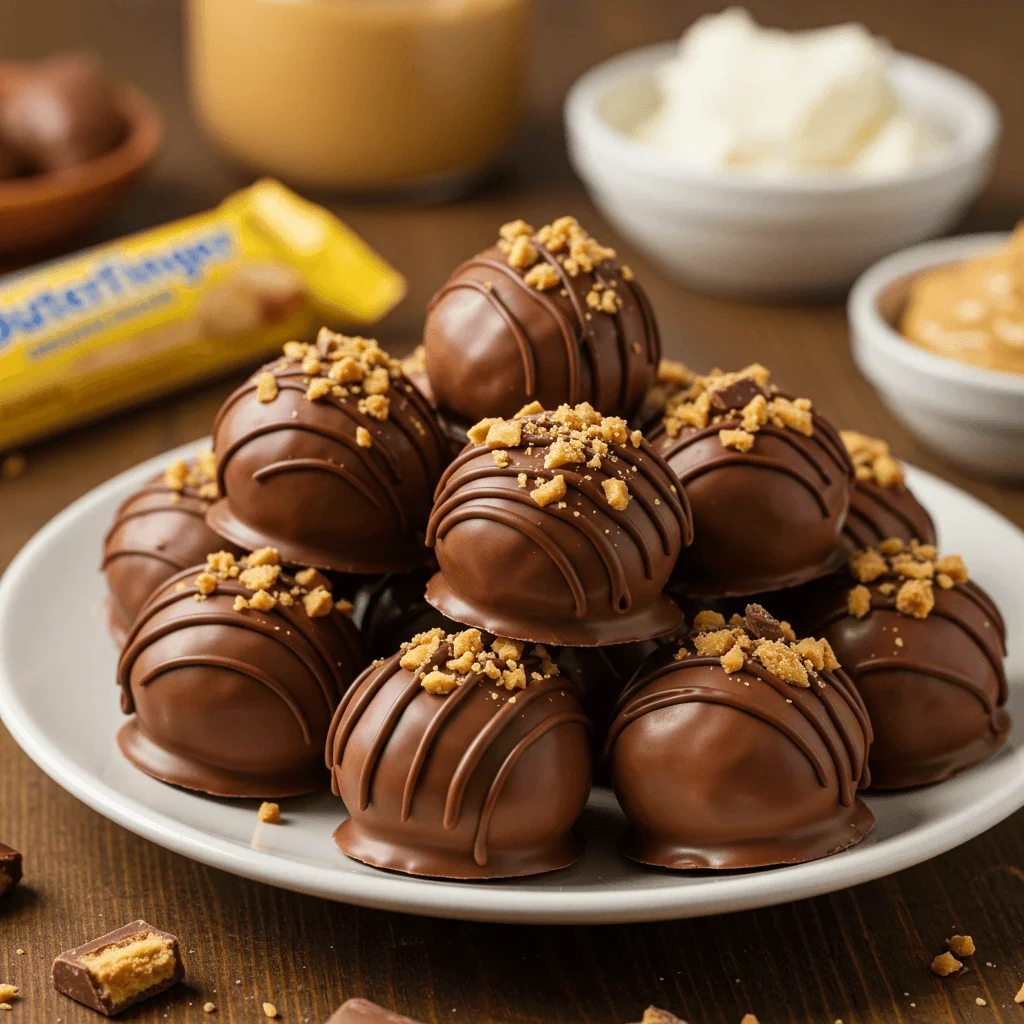
If you’re looking for a quick, no-bake dessert that’s creamy, crunchy, and irresistible, these Butterfinger Balls with Cream Cheese are the perfect treat! Made with just a handful of simple ingredients—Butterfinger candy bars, cream cheese, peanut butter, and chocolate—these bite-sized delights are packed with flavour and have the perfect balance of sweetness and crunch.
Whether you’re making them for a holiday gathering, a party, or just to satisfy your sweet tooth, these easy Butterfinger balls come together in no time. Plus, since they require no baking, they’re a hassle-free dessert that anyone can make. Keep reading to learn how to whip up this delicious treat in just a few simple steps!
Why You’ll Love These Butterfinger Balls
1. Quick & No-Bake Recipe
One of the best things about these Butterfinger Balls with Cream Cheese is that they are entirely no-bake, making them an effortless dessert for any occasion. Unlike traditional baked treats that require precise oven temperatures and long baking times, this recipe comes together in minutes with just a few simple steps.
Since there’s no baking involved, these Butterfinger balls are perfect for hot summer days when you don’t want to heat the kitchen. They also make a great last-minute dessert for parties, potlucks, or holiday gatherings. All you need to do is crush the Butterfinger bars, mix the ingredients, roll the mixture into balls, and dip them in melted chocolate—it’s that easy!
Another perk of this no-bake recipe is that it’s beginner-friendly. Even if you don’t consider yourself a pro in the kitchen, you can still make these delicious treats without worrying about baking mishaps. Just chill the balls in the fridge or freezer to set, and they’ll be ready to enjoy in no time.
This quick and convenient recipe ensures you can satisfy your sweet cravings without spending hours in the kitchen. Whether preparing a snack for yourself or making a batch for family and friends, these no-bake Butterfinger balls are a fun, stress-free dessert everyone will love!
2. Simple Ingredients
One of the best things about this Butterfinger Balls with Cream Cheese recipe is that it uses just a handful of simple and accessible ingredients. You don’t need fancy equipment or hard-to-find items—everything can be found at your local grocery store or in your pantry.
Key Ingredients and Their Role:
- Butterfinger Candy Bars – These iconic candy bars bring the perfect balance of crunchy, peanut-buttery goodness to the recipe. Their unique crispy texture blends seamlessly with the creamy base, adding an irresistible caramelized flavour.
- Cream Cheese – The secret to a smooth and creamy texture! Cream cheese acts as the binding ingredient, giving the balls a rich, velvety consistency while complementing the crunch of the Butterfinger pieces.
- Peanut Butter – Enhances the peanut flavour while adding extra creaminess. It helps hold the mixture together and balances the sweetness with a slightly salty, nutty taste.
- Powdered Sugar – Adds a touch of sweetness while also helping to firm up the mixture. It ensures the balls hold their shape without becoming too soft or sticky.
- Chocolate Chips (or Melting Chocolate) – A rich, chocolatey coating takes these Butterfinger balls to the next level. You can use milk, dark, or even white chocolate for variety. Melting the chocolate with coconut oil creates a smooth and glossy finish.
Optional Additions:
- Vanilla Extract – Adds a subtle depth of flavour and enhances the overall taste.
- Graham Cracker Crumbs – These can be mixed in for extra texture or used to roll the balls in for a decorative touch.
- Coconut Oil – If you’re melting chocolate for coating, some coconut oil helps create a silky, even layer.
Since these ingredients are simple and easy to find, this recipe is both budget-friendly and convenient. You can customize it by switching the chocolate coating or adding fun toppings like sprinkles or crushed nuts.
With just a few ingredients, you can create a delicious, no-bake treat packed with flavour and perfect for any occasion!
3. Perfect for Any Occasion
These Butterfinger Balls with Cream Cheese aren’t just delicious but incredibly versatile! Whether making a quick snack for yourself or preparing treats for a special event, these bite-sized delights are a hit for any occasion.
Great for Holiday Gatherings
Everyone loves easy, festive desserts during the holiday season, and these no-bake Butterfinger balls fit the bill perfectly. You can make them ahead of time and store them in the fridge or freezer, making them a stress-free dessert option for Thanksgiving, Christmas, or New Year’s parties. Roll them in crushed candy canes, drizzle them with white chocolate, or add holiday-themed sprinkles for an extra festive touch!
Perfect Party Treats
Hosting a party? These Butterfinger balls are ideal for sharing! Since they’re small, mess-free, and easy to eat, they make a great finger food dessert for birthday parties, potlucks, or game nights. Arrange them on a dessert tray alongside bite-sized sweets like truffles or chocolate-covered pretzels for a beautiful and tempting dessert spread.
A Quick Snack or Sweet Treat Anytime
Sometimes, you just want a sweet pick-me-up, and these Butterfinger balls are perfect for satisfying a sugar craving without much effort. They’re great for an after-dinner dessert, a mid-afternoon treat, or even a fun recipe for kids. Plus, because they’re stored in the fridge or freezer, you can grab one whenever you need a quick indulgence.
Whether making them for the holidays, a party or just because you love a good chocolate-peanut butter treat, these Butterfinger Balls with Cream Cheese are guaranteed to impress. With their perfect balance of creamy, crunchy, and chocolatey flavours, they’ll quickly become a go-to dessert for any occasion!
How to Make Butterfinger Balls with Cream Cheese
1. Ingredients You’ll Need
Making Butterfinger Balls with Cream Cheese is incredibly simple, thanks to a short list of easy-to-find ingredients. Each ingredient plays a key role in creating the perfect creaminess, crunch, and sweetness balance in every bite. Let’s look at what you’ll need and why each ingredient matters.
Main Ingredients:
- Butterfinger Candy Bars (Crushed) – The star ingredient! These candy bars bring a deliciously crunchy, peanut-buttery flavour with a hint of caramelized sweetness. Crushing them allows their crispy texture to blend into the mixture, ensuring every bite is packed with Butterfinger goodness.
- Cream Cheese (Softened) – The secret to a smooth and creamy texture! It helps bind the mixture together while adding a slightly tangy, rich flavour that balances the sweetness of the candy bars. Be sure to let your cream cheese sit at room temperature for about 30 minutes before mixing to ensure a smooth consistency.
- Peanut Butter – Enhances the peanut flavour while adding extra creaminess. Peanut butter also helps hold the mixture together, making the Butterfinger balls easy to roll. Opt for creamy peanut butter for a smooth texture or crunchy peanut butter for added texture.
- Powdered Sugar – Sweetens the mixture while also helping to firm up the dough. Powdered sugar blends seamlessly with the other ingredients, preventing grainy texture and making the mixture easy to roll into balls.
- Chocolate Chips (or Melting Chocolate) – A rich, chocolatey coating that adds a decadent finish to each Butterfinger ball. Depending on your preference, you can use milk chocolate, dark chocolate, or even white chocolate. Melting the chocolate with coconut oil helps create a smooth and glossy finish.
Optional Additions & Toppings:
- Vanilla Extract – Adds a warm depth of flavour and enhances the overall taste.
- Coconut Oil – Helps create a smoother, shinier chocolate coating when melting chocolate.
- Graham Cracker Crumbs – These can be mixed into the filling for additional texture or used as a coating for a crunchy outer layer.
- Sprinkles or Crushed Nuts – For a decorative and flavorful topping, roll the Butterfinger balls in colourful sprinkles, chopped peanuts, or even extra crushed Butterfinger pieces before the chocolate sets.
Why These Ingredients Work So Well Together
The combination of crunchy Butterfinger candy, creamy peanut butter, rich chocolate, and smooth cream cheese creates the perfect bite-sized dessert. The powdered sugar helps firm the texture, making the balls easy to shape and coat in chocolate. Each bite delivers a delicious contrast of textures, from the creamy centre to the crispy candy pieces and the smooth, chocolatey outer shell.
With just a few ingredients, you can make a quick and irresistible treat that everyone will love. Now that your ingredients are ready let’s move on to the step-by-step process of making these easy Butterfinger balls with cream cheese!
2. Step-by-Step Instructions
Making Butterfinger Balls with Cream Cheese is a simple and fun process that requires no baking! Follow these step-by-step instructions to create a batch of these delicious, bite-sized treats.
Step 1: Crush the Butterfinger Candy Bars
Start by crushing the Butterfinger bars into fine crumbs. You can do this in a few ways:
- Place the bars in a sealed ziplock bag and use a rolling pin to crush them.
- Use a food processor to pulse the candy bars into fine crumbs for a smoother consistency.
- If you prefer some larger pieces for extra crunch, chop them up with a knife instead.
Set aside about ¼ cup of crushed Butterfinger crumbs to sprinkle on top of the finished balls for decoration.
Step 2: Prepare the Filling
In a large mixing bowl, combine:
- Softened cream cheese (room temperature for easier mixing)
- Peanut butter (creamy for smoothness or crunchy for texture)
- Powdered sugar (to help firm up the mixture)
- Crushed Butterfinger bars
Use a hand mixer or a spatula to blend everything until the mixture is smooth and well combined. When rolled into balls, the dough should be thick enough to hold its shape. If the mixture feels too soft, place it in the fridge for about 15 minutes to firm up before rolling.
Step 3: Roll the mixture into Balls
Using a small cookie scoop or a spoon, scoop out portions of the mixture and roll them into bite-sized balls with your hands. Each ball should be about 1 inch in diameter (roughly the size of a truffle).
Place the rolled balls onto a parchment-lined baking sheet to prevent sticking. Once all the balls are formed, place them in the freezer for 20-30 minutes to firm up before dipping them in chocolate. This step helps them hold their shape when coated.
Step 4: Melt the Chocolate
While the balls are chilling, melt the chocolate for coating. You can do this using either:
- Microwave method: Place chocolate chips or melting chocolate in a microwave-safe bowl and heat in 30-second intervals, stirring in between, until smooth.
- Double boiler method: Heat water in a saucepan and place a heatproof bowl over it, stirring the chocolate until melted and smooth.
For a shinier, smoother coating, stir in 1 teaspoon of coconut oil to the melted chocolate.
Step 5: Coat the Butterfinger Balls in Chocolate
Dip each Butterfinger ball into the melted chocolate using a fork or a dipping tool, ensuring it’s fully coated. The excess chocolate drips off before returning the ball to the parchment paper.
Sprinkle the reserved crushed Butterfinger crumbs before the chocolate sets for an extra decorative touch. You can also drizzle melted white chocolate over the top for a fancy finish.
Step 6: Chill and Serve
Place the coated balls in the refrigerator for about 30 minutes or until the chocolate is completely set. Once firm, they’re ready to enjoy!
Storage Tips
- Refrigerator: Store the Butterfinger balls in an airtight container in the fridge for up to one week.
- Freezer: For extended storage, freeze them in a sealed container for up to three months. Just let them sit at room temperature for a few minutes before serving.
Enjoy Your No-Bake Butterfinger Balls!
Now that your Butterfinger Balls with Cream Cheese are ready enjoy them as a sweet treat for any occasion! Whether you’re making them for a party, a holiday gathering, or just as an indulgent snack, these bite-sized delights will surely be a crowd-pleaser.
3. Tips for the Best Butterfinger Balls
Want to make your Butterfinger Balls with Cream Cheese Perfect? Follow these expert tips to ensure the best texture, flavour, and presentation every time!
1. Use Softened Cream Cheese for a Smooth Texture
To avoid lumps in your mixture, always use room-temperature cream cheese. Cold cream cheese can be challenging to mix and may create a grainy texture. Let it sit at room temperature for 30 minutes before starting, or microwave it for 10-15 seconds to soften it quickly.
2. Crush the Butterfinger Bars to the Right Consistency
When crushing the Butterfinger bars, aim for a mix of fine crumbs and small chunks for the best texture. This way, you get a smooth filling with little crunchy bursts of Butterfinger goodness. Use a food processor for finer crumbs or a rolling pin and ziplock bag if you prefer extra crunch.
3. Chill the Mixture Before Rolling
The mixture can be a bit soft after mixing, making it difficult to roll into balls. Refrigerate the dough for 15-20 minutes before rolling to firm it up. If the mixture is still sticky, lightly dust your hands with powdered sugar to prevent it from sticking while rolling.
4. Freeze Before Dipping in Chocolate
For a perfectly smooth chocolate coating, freeze the rolled Butterfinger balls for at least 20-30 minutes before dipping. This helps them hold their shape and prevents them from falling apart in the melted chocolate.
5. Use High-Quality Melting Chocolate
The chocolate coating is just as important as the filling! For the best results:
- Use melting wafers, chocolate chips, or baking chocolate for a smooth finish.
- Add ½ – 1 teaspoon of coconut oil to the melted chocolate to make it more fluid and glossy.
- Avoid overheating the chocolate—microwave in 30-second bursts, stirring between each until smooth.
6. Work Quickly When Dipping
Once you start dipping, work one ball at a time to prevent the others from softening. Use a fork or dipping tool to thoroughly coat each ball, tapping off the excess chocolate before placing them on parchment paper to set.
7. Add Toppings Before the Chocolate Hardens
If you want to decorate your Butterfinger balls, do it immediately after dipping while the chocolate is still wet. Try:
- Crushed Butterfinger pieces for extra crunch
- Drizzled white or dark chocolate for a professional touch
- Chopped peanuts or sprinkles for a fun look
8. Allow Enough Time to Set
Let the coated Butterfinger balls chill in the fridge for at least 30 minutes before serving. This helps the chocolate harden entirely and prevents any smudging.
9. Store Properly for Freshness
- Refrigerator: Store in an airtight container in the fridge for up to one week.
- Freezer: Freeze for up to three months and thaw for a few minutes before serving.
10. Experiment with Different Flavors
Want to switch things up? Try these fun variations:
- Use white chocolate for a sweeter, creamier coating.
- Swap peanut butter for Nutella or almond butter for a unique twist.
- Add a pinch of sea salt on top for a sweet-and-salty flavour.
By following these tips, you’ll get perfectly creamy, crunchy, and chocolatey Butterfinger Balls every time!
A Chef’s Note
These Butterfinger Balls with Cream Cheese are the ultimate treat for anyone who loves a combination of creamy, crunchy, and chocolatey goodness. They’re easy to make, require no baking, and are perfect for sharing at parties, family gatherings, or even as a sweet indulgence for yourself!
The best part is that these treats can suit your tastes. Whether you prefer milk, dark, or even white chocolate, these little balls of joy can fit any flavour preference. Don’t be afraid to experiment with different nut butter, toppings, or even additional flavours to make them uniquely yours.
With these simple ingredients, step-by-step instructions, and helpful tips, you can whip up the perfect batch of Butterfinger Balls every time. So grab your ingredients, get rolling, and enjoy a sweet treat guaranteed to impress!